Show Posts

This section allows you to view all posts made by this member. Note that you can only see posts made in areas you currently have access to.


Messages - smarty

Pages: 1 ... 5 6 [7]
91
Arcade Lifestyle / Re: Atari Fire Truck Restoration. 3/11 1st Power up
« on: November 03, 2013, 08:08:31 PM »
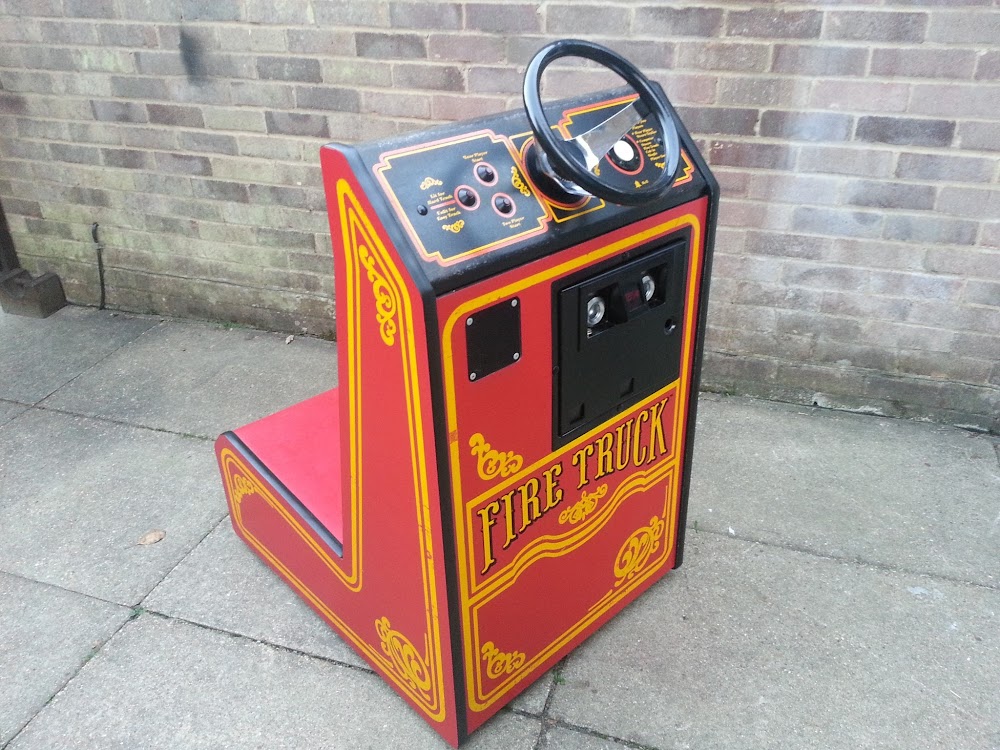
Fire Truck. 1st power up
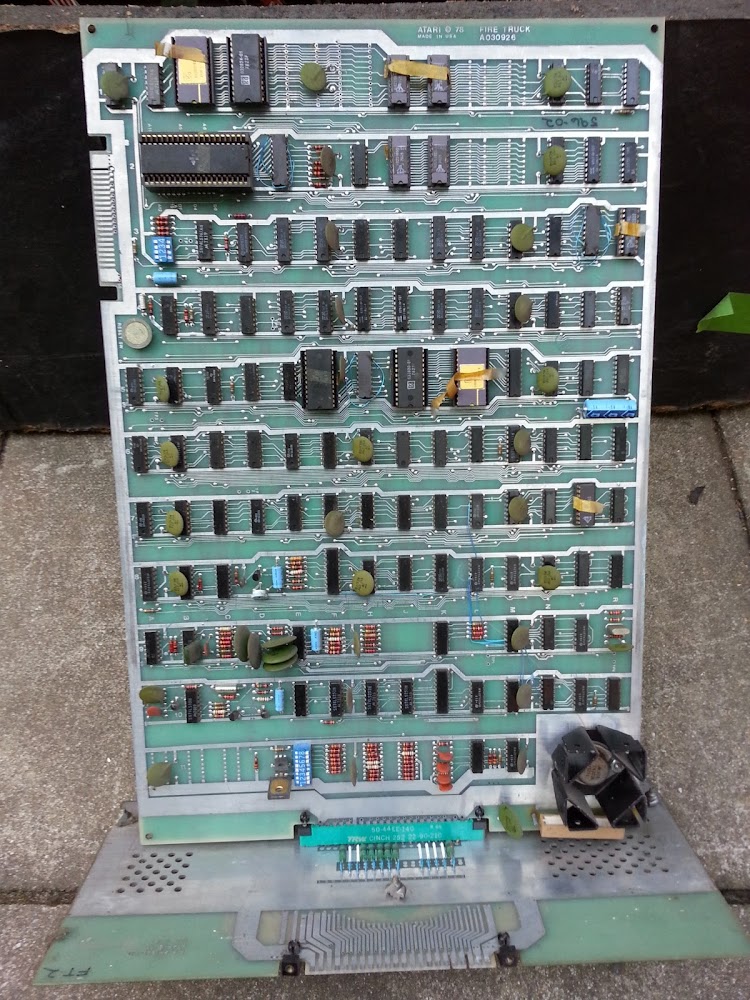
Well after the game board came back from repair, I couldn't hold off and wait for everything else to be completed so decided I needed to power it up and see what would happen...

The video is a genuine 1st power up once everything was plugged back together:

http://youtu.be/cihTlt3UVis

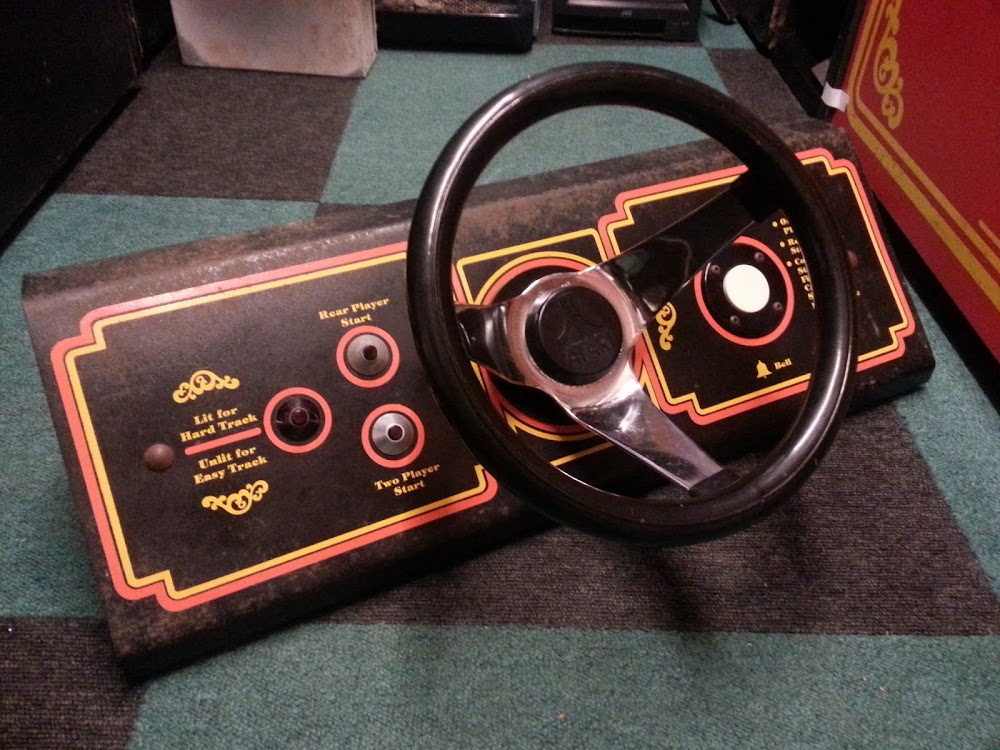
It turned out pretty successfully, with only a couple of LED's on the Control Panel buttons having failed, I have since swapped these out with some working ones, the image from the monitor is poor in the video but I can assure you that's a temporary measure and will be rectified in the future before I declare the cab to be complete.

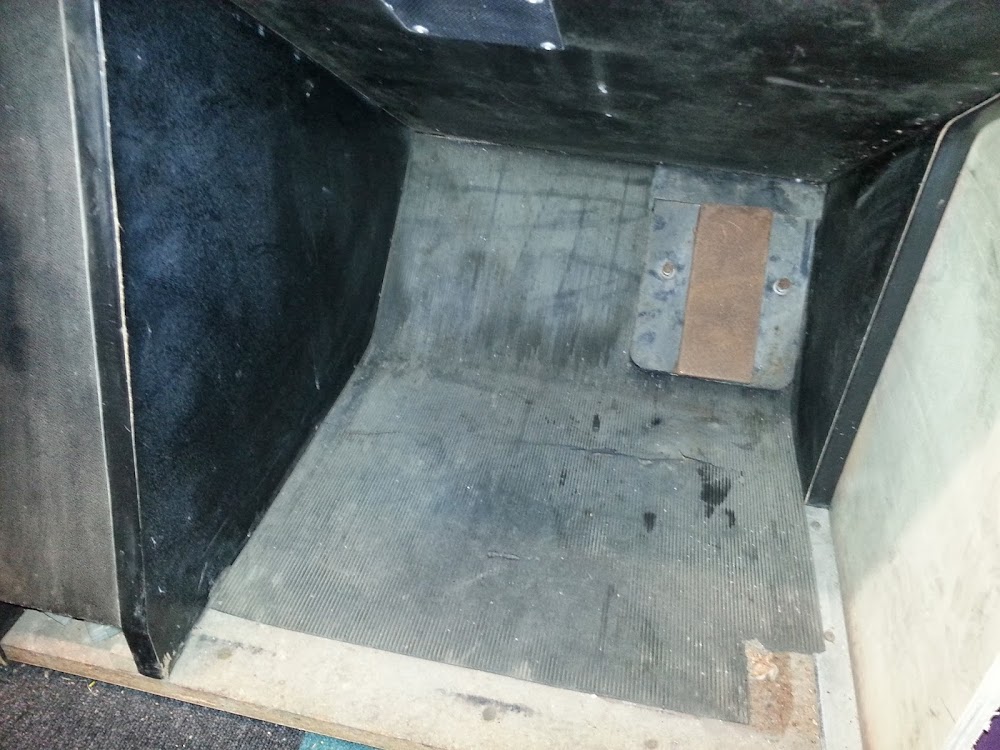
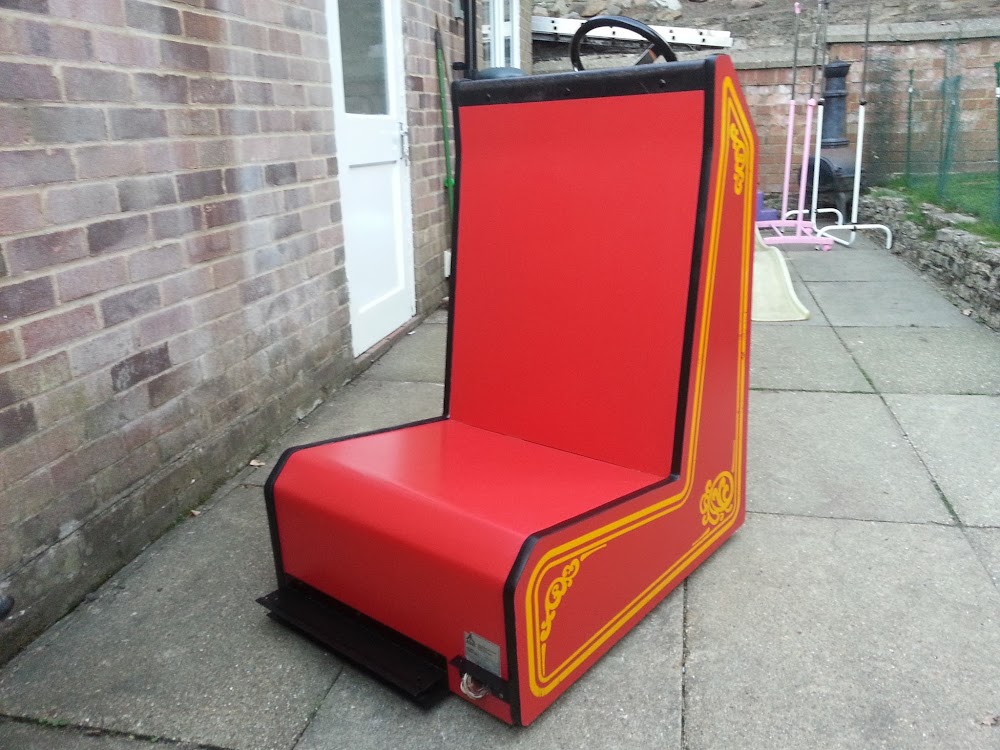
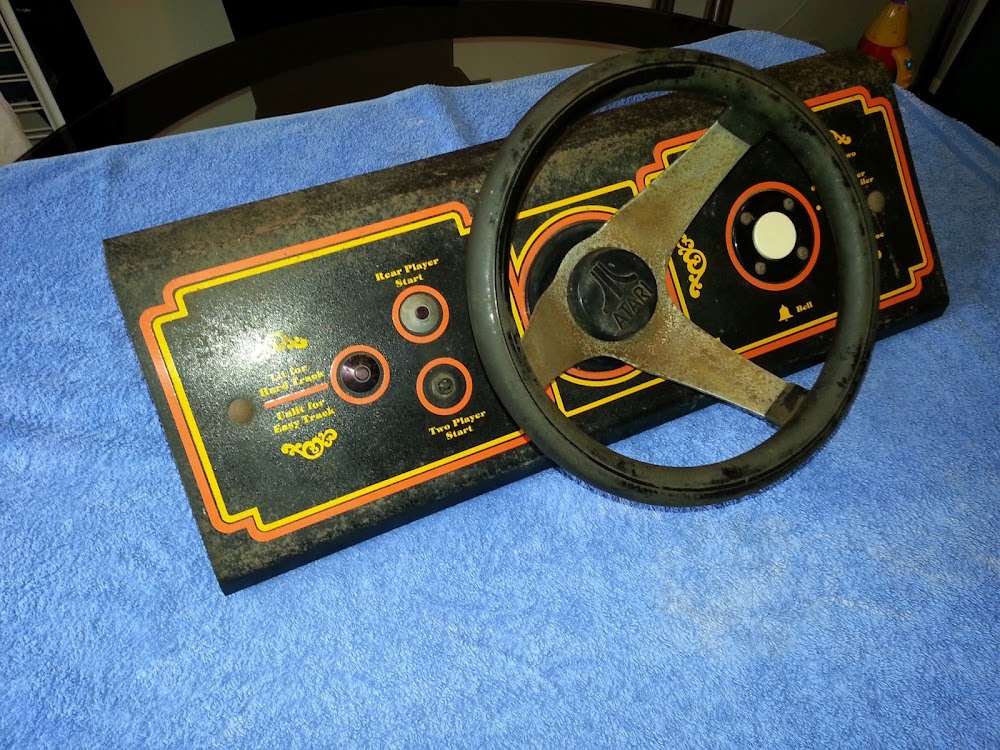
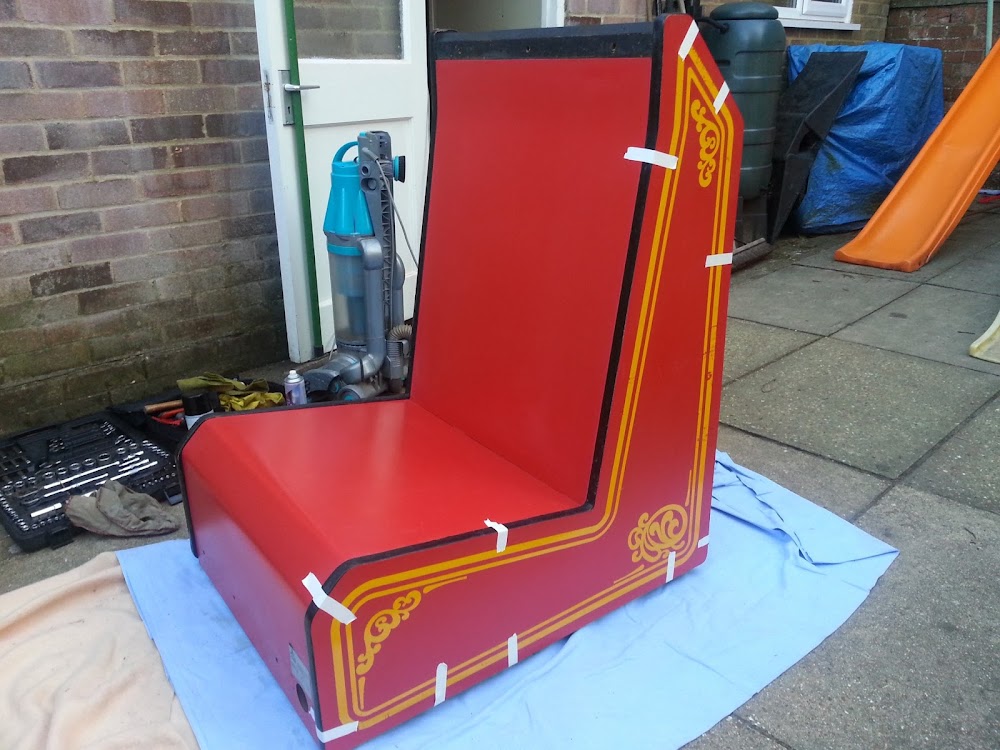
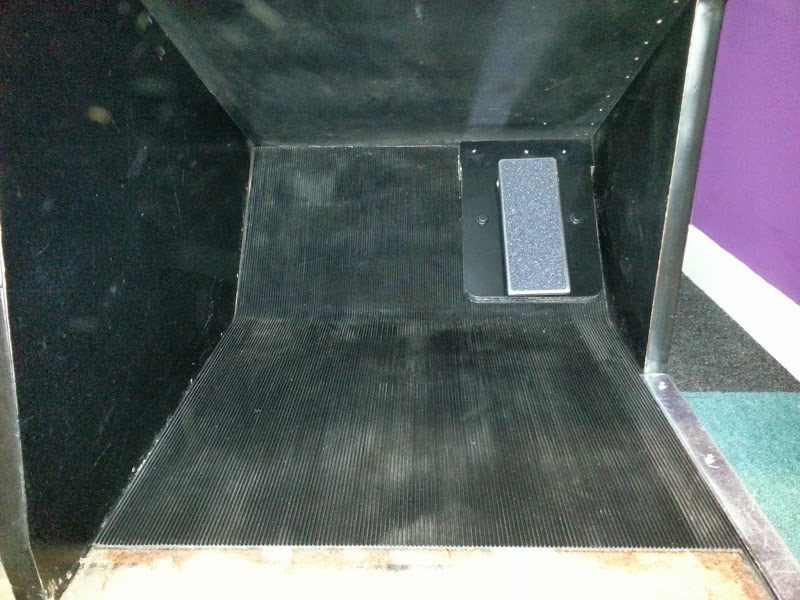
The rubber matting was completed when I made my last post, but I forgot to add a photo.


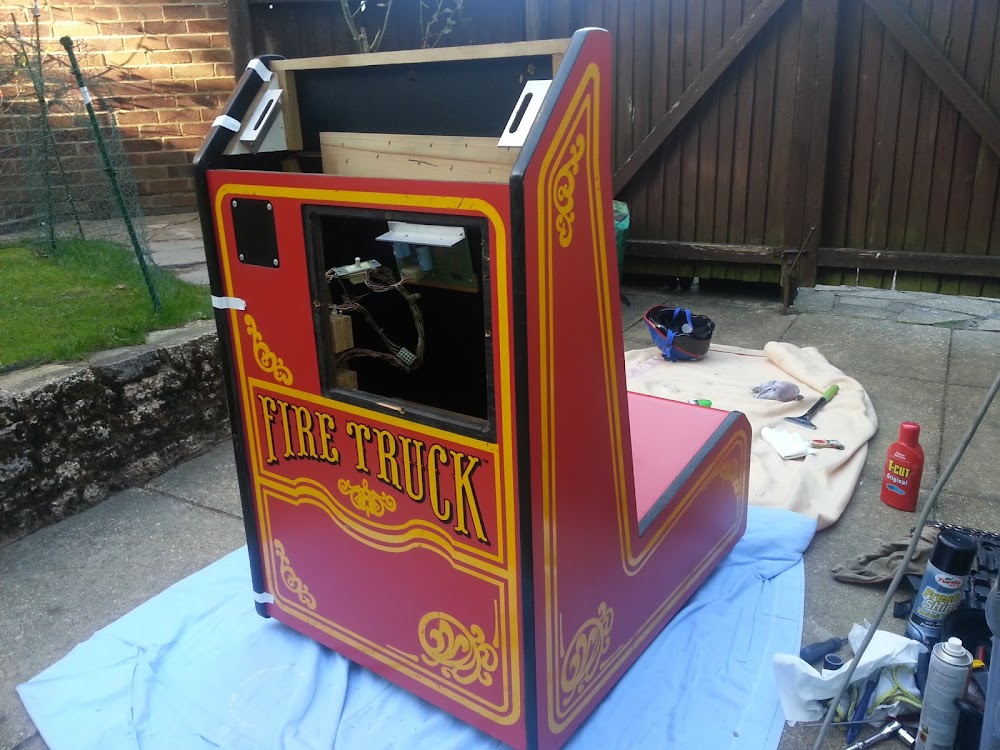
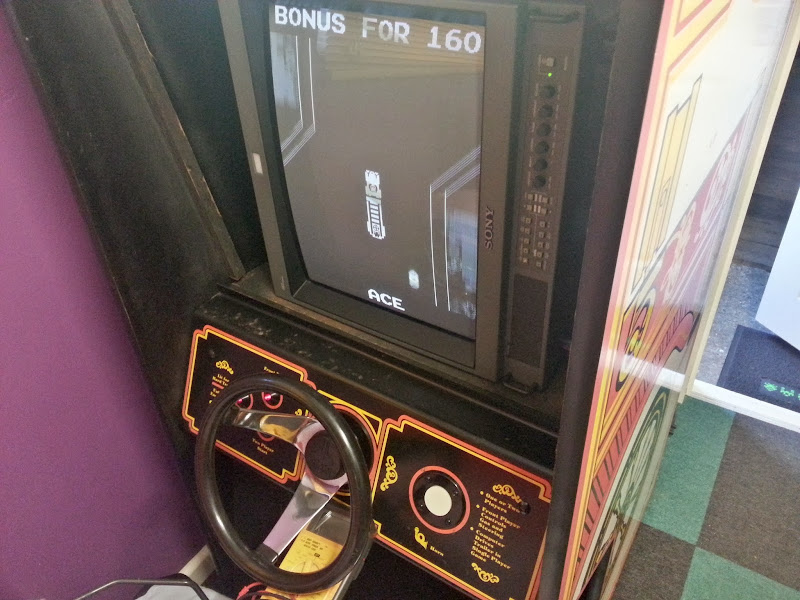
Since the above video was made I have put a 19" temporary video monitor in the cab and have been busy play testing it.  :)


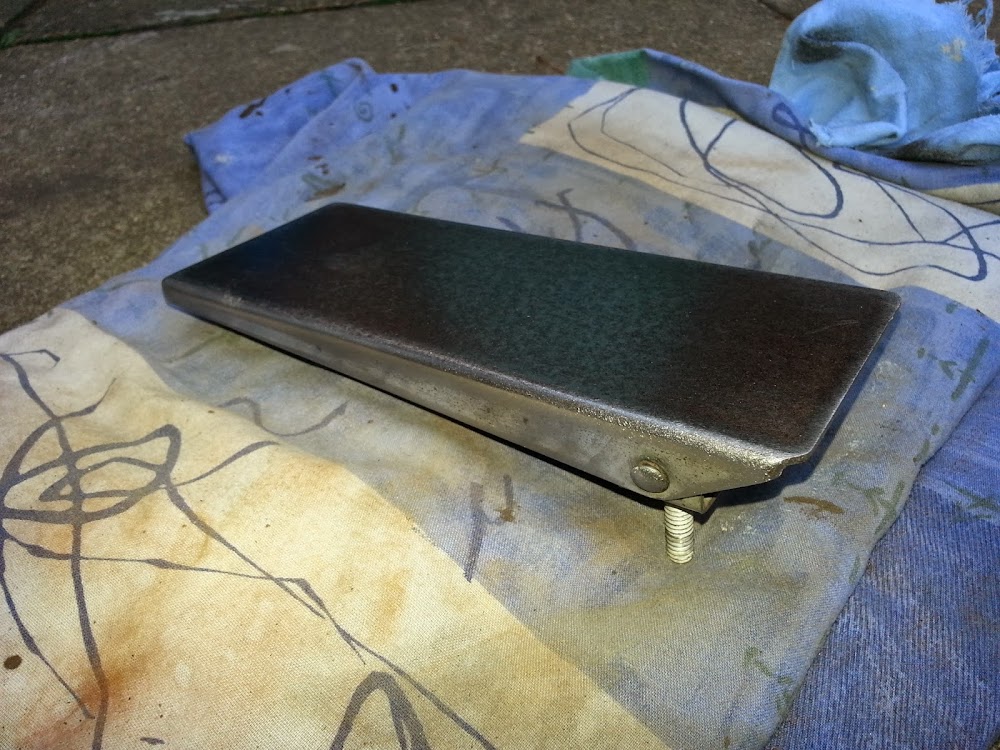
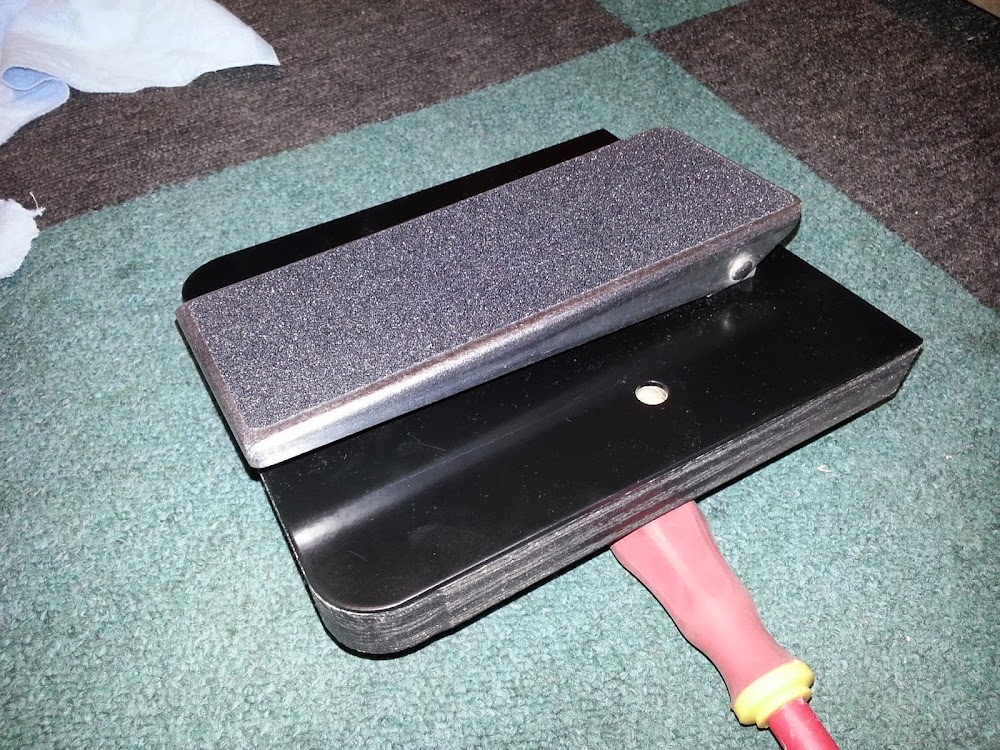
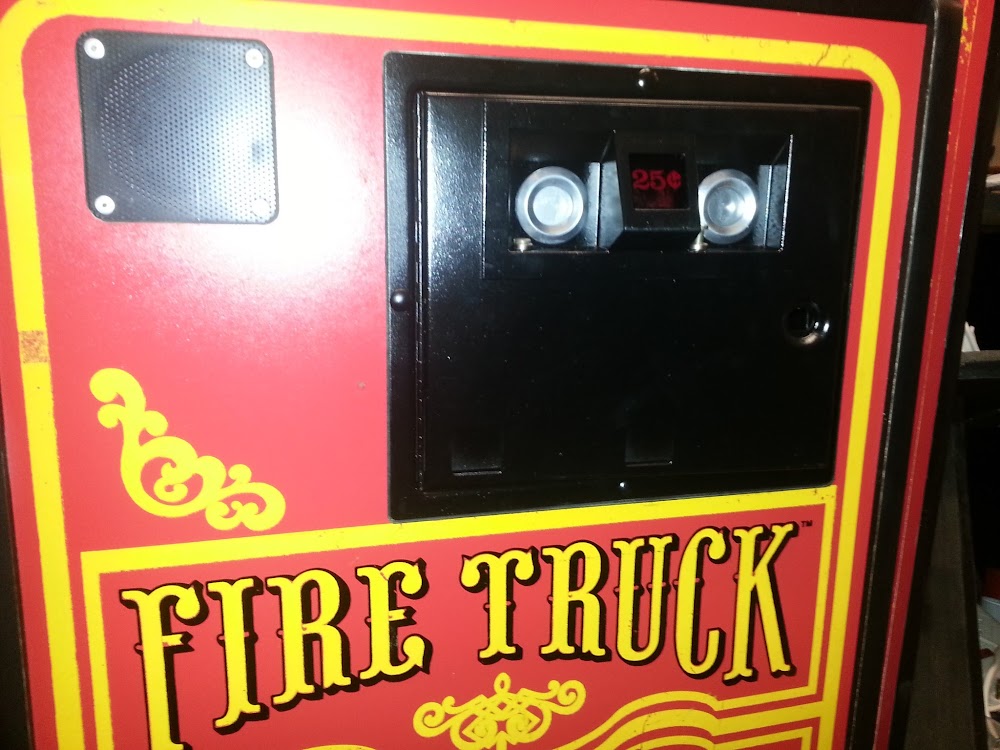
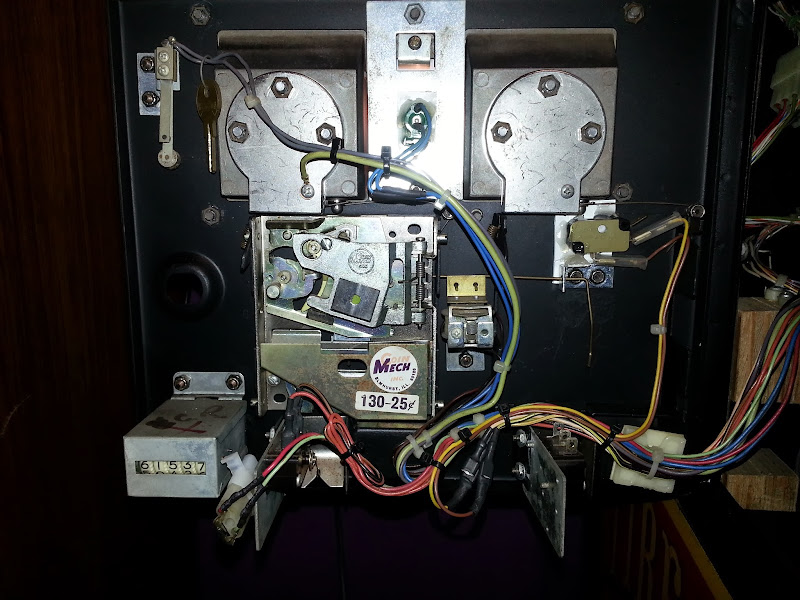
I have also fitted a 'non invasive' credit button which is activated by using the coin reject button on one side of the coin mech. The left side is for 'free' credits and the right side still take 25 Cent coins. I've also fitted a bulb holder to replace the one that had been cut off so the 25 cent sign is now illuminated.


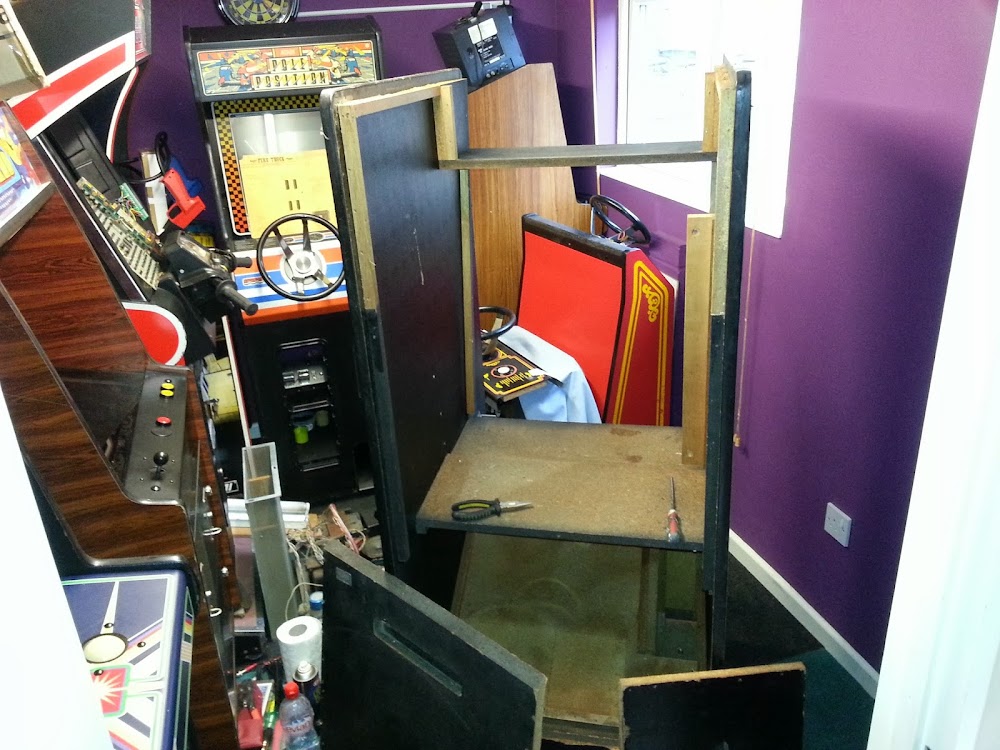
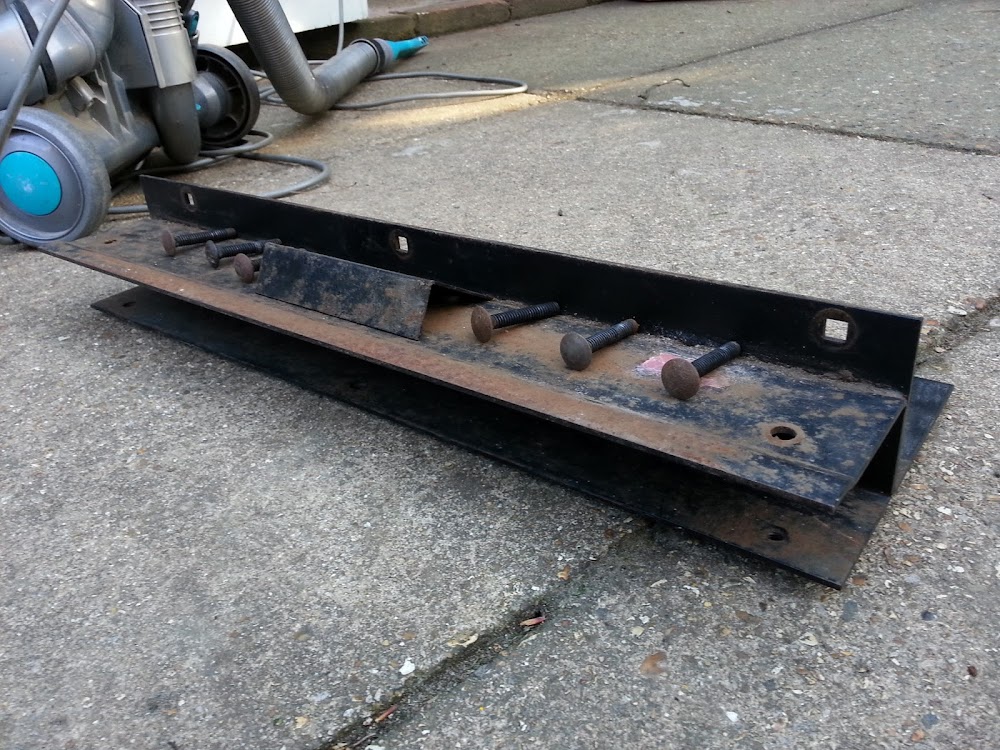
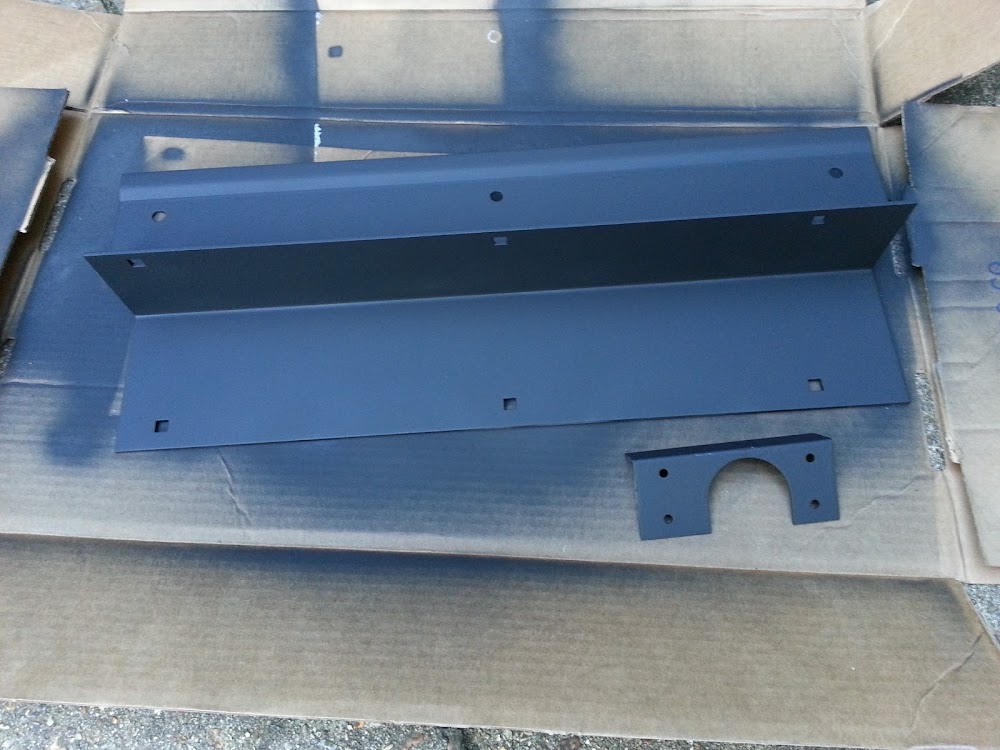
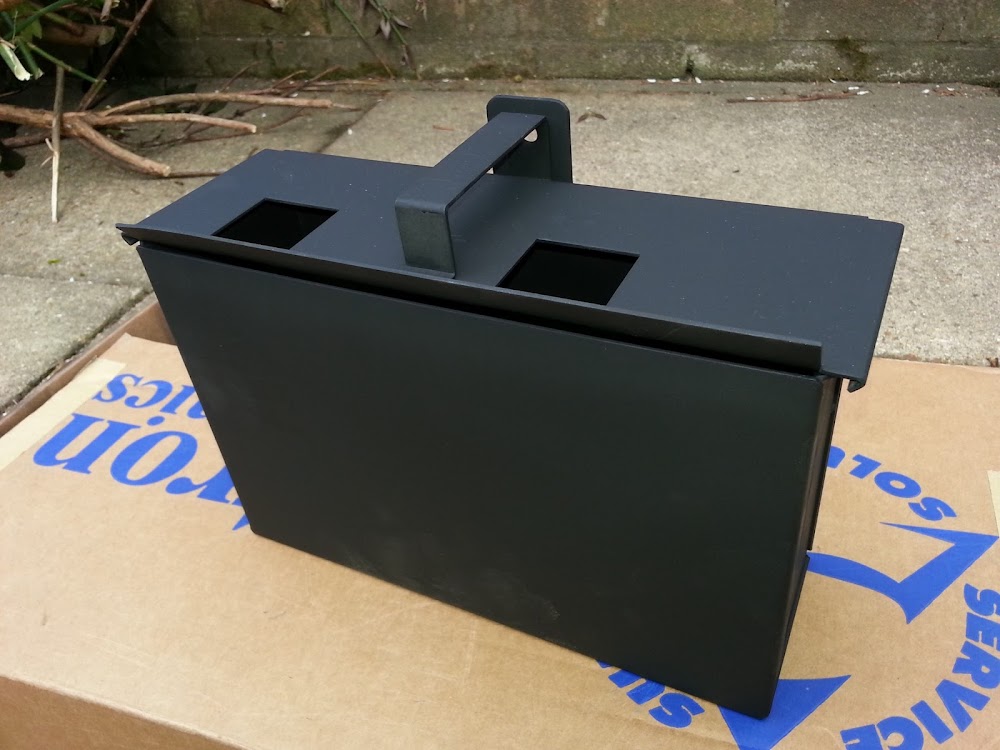
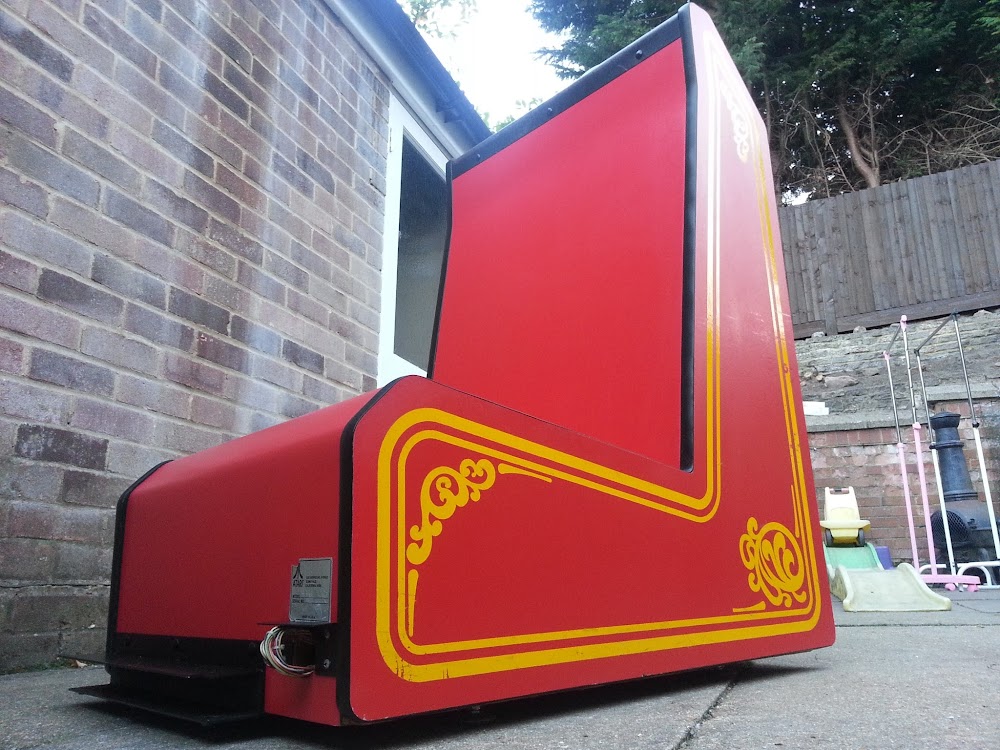
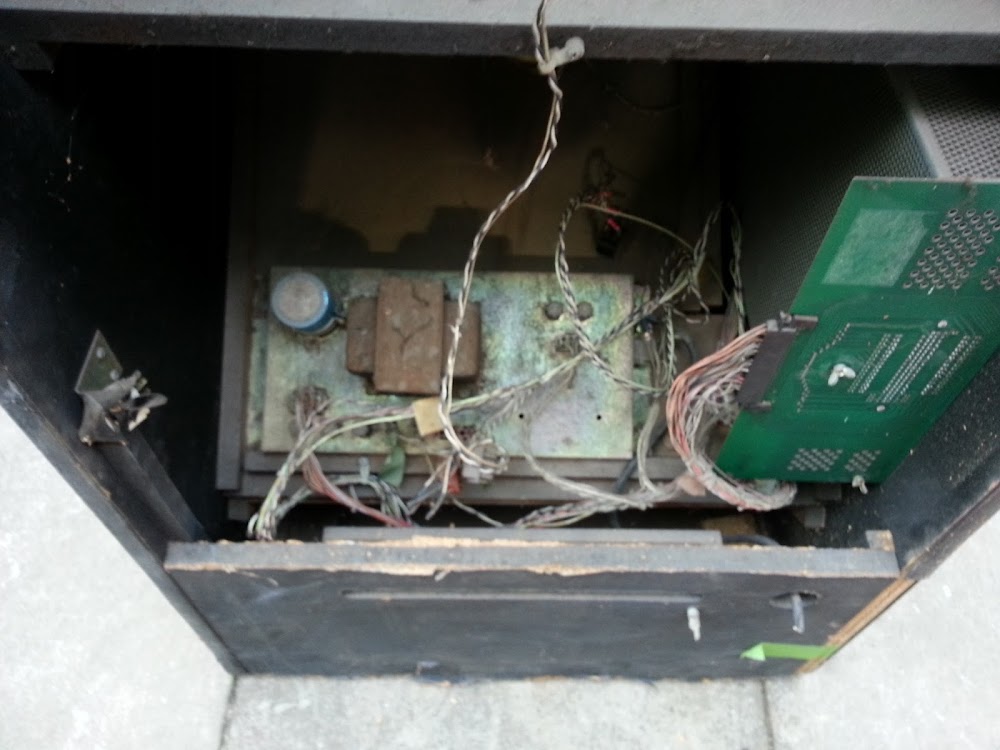
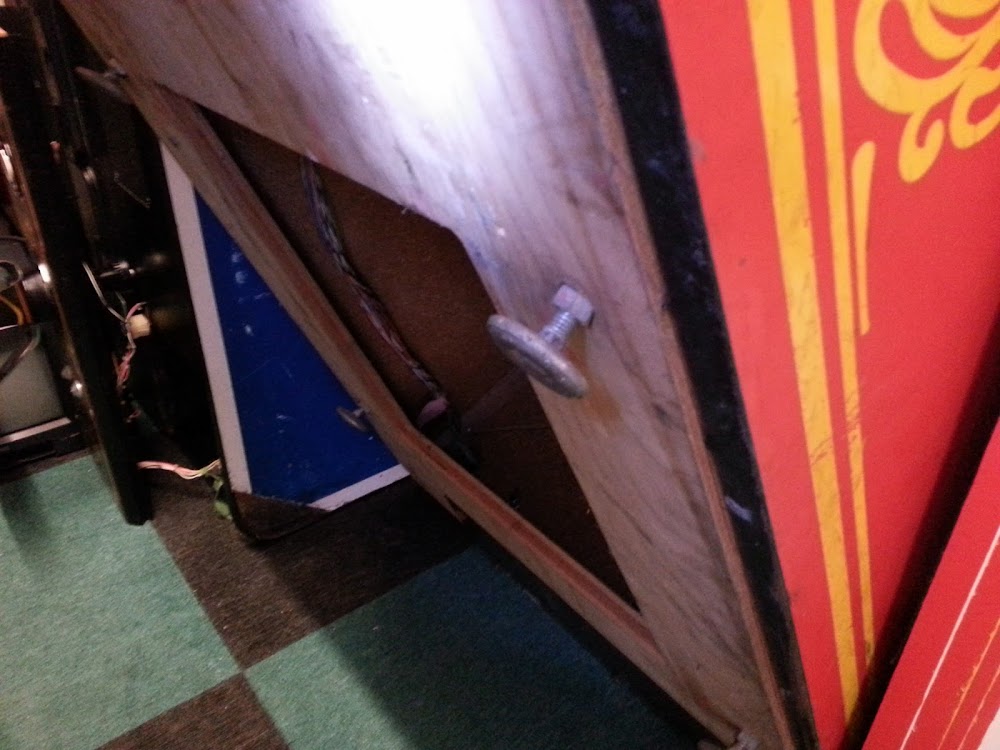
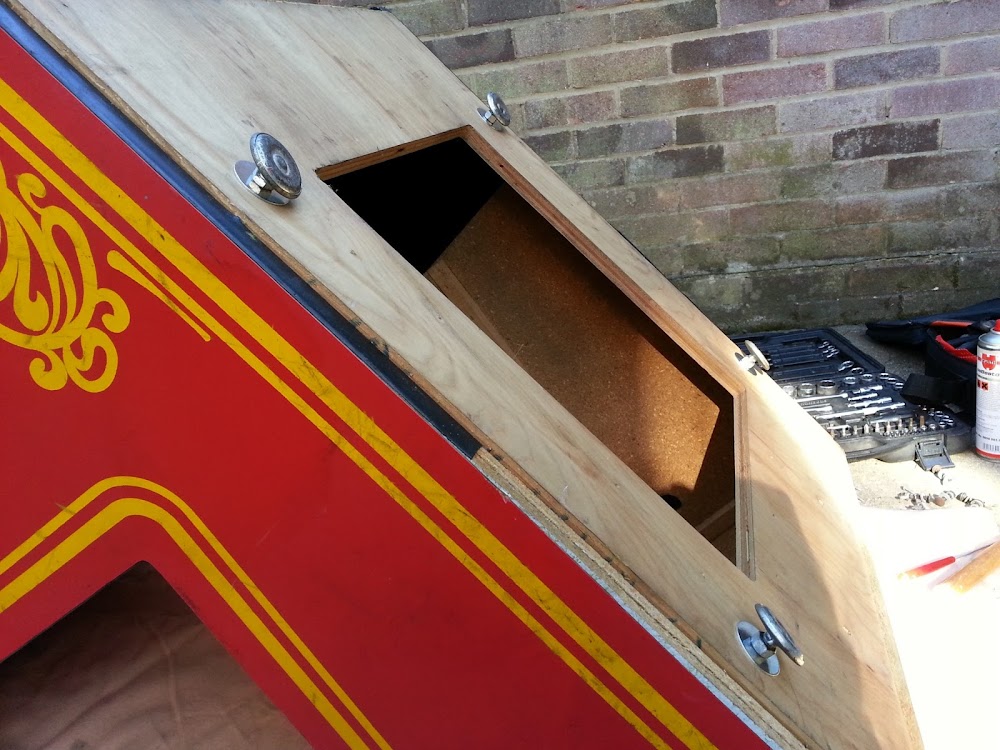
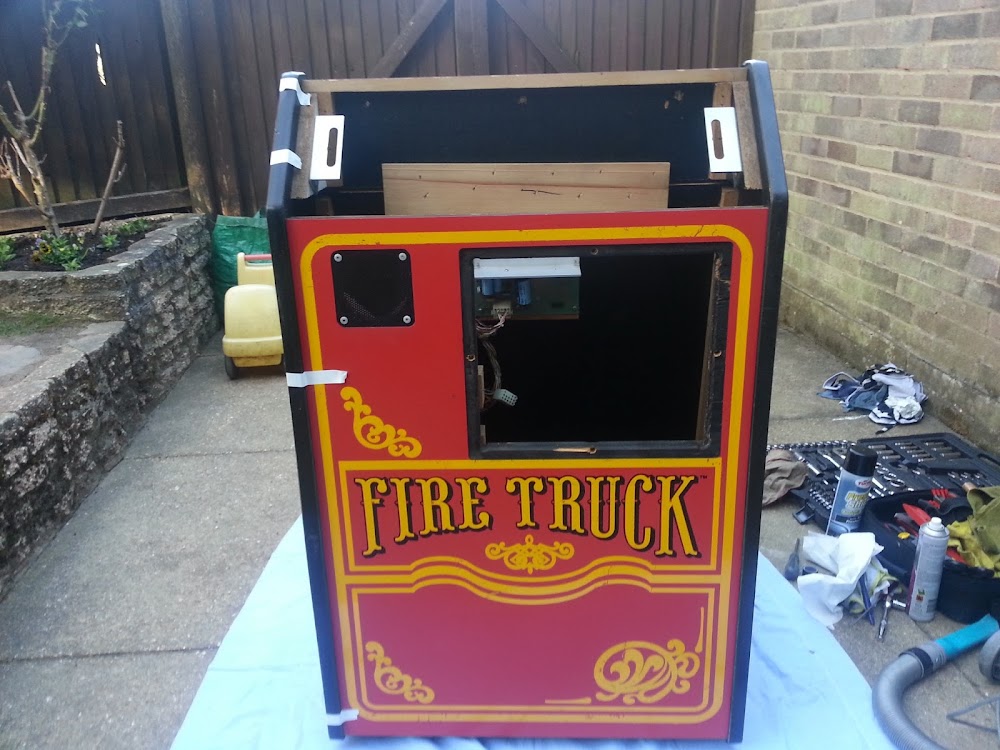
After having some fun playing I decided to have a look at the monitor mounting framework that was part of the original monitor. It turns out that some woodwork was missing from the cab, I made a new part and fixed it to the cab, which is highlighted in the image below.


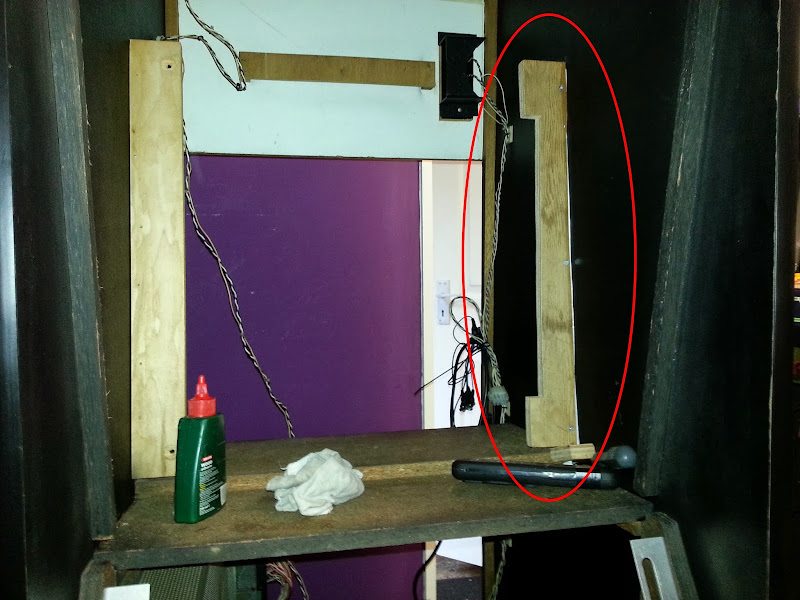
The monitor (that I don't currently have!) will now sit in a wooden framework that attaches to the two pieces in the image above.

Sorry for the slow progress, I'd have liked this resto to have been finished a while back but I've wasted a few days trying to get some colour monitors to work unsuccessfully with the game, I really need an original black and white CRT if anyone has one laying around spare?

Next time... The cab will be completed. Remaining items to completion are as follows:

Find, fit and test a suitable monitor.
Make a new back door for the main cab, paint it or cover it in black vinyl.
Make a cardboard monitor bezel to fit the cab.
Fit locks to the main coin door and the back door.

Once the above are complete I'll make another, better produced video and post up some quality photos of the finished cab.

Until next time, thanks for reading, Mart.

92
Great stuff, Paul.

You've certainly put some graft in to get the cab up and running, well done. Great game too.

93
Arcade Lifestyle / Re: Super Monaco GP Deluxe Air Drive
« on: October 15, 2013, 08:39:53 PM »
I remember playing this load on the Megadrive, think I played an upright arcade version a few times. I seem to remember the gear change paddles being made of thick yellow plastic. Good luck getting it working, is it just the seat that moves within the cockpit then?

94
...could you use a bit bigger pictures ? They're so tiny, and I'm old ;)

Done.

Still living in the '90's thinking posting a photo above 640x480 is bad web etiquette. :) All photo's in this thread are now larger.

95
03/10/13 Fire Truck. Main cab, Work begins...

Moving on from the rear seat, its time to get the main cab on the road so it can put out some fires! Work carried out so far in no particular order.

1. Cab stripped out of all components and thoroughly cleaned.
2. New Leg levellers fitted and the cab had none, no doubt this had caused some of the damage around the bottom of the cab.
3. Laminate sides glued back on.
4. Small repair to a bottom section of the cab that broken off.
5. New T-Moulding fitted.
6. Top and rear section of cab re-fitted back into place with glue and original nails.
7. New power switch fitted as the last one had been home to some wasps and I think they ate most of it!
8. Wire loom had a bath and some new connectors fitted as the plastic had become brittle and snapped off the locking lugs.
9. Power brick stripped and cleaned. All five fuse holders replaced as the old ones had gone brittle, both the internal metal and the plastic cases broke off when opening the holder to check the fuses.
10. Steering assembly stripped and cleaned.

Time for some photos...


Empty cab full of grime.


All the innards.


I thought about taking the whole cab to bits but decided against it!


After a clean up with paint on the transformer and new fuse holders


Damage to the laminate side. New screws adding strength to the base.


More T-Cut applied to clean the sides.


Steering assembly stripped for maintenance.

There's plenty more to do but things are moving on nicely, more soon.


09/10/13 Fire Truck. Gas pedal clean up.

Small update from my last few evenings work...

The gas pedal on the cab looked in a pretty bad state, plenty of wet shoes and cold storage had caused the surface of the pedal to to turn a lovely glowing rust colour. I wasn't sure if I would need to spray this black to 'hide' any damage but as things got this has turned out nice :)
The metal backing plate was also sanded back, primed and sprayed in black, I with I had shares in black spray paint as I have used lots of it in the past year or so.


Pedal ass'y as found on the cab


Eek! elbow grease required, anyone got some!


A good bit of cleaning and polishing later...


Gripped up, with metal plate sprayed. Mmmm.

That's all folks! Only a quick update as time permits, the next update will hopefully be of the cab cosmetics complete, minus the monitor which will require a lengthy post as I've got some work to do retrofitting an LCD monitor ;o) a CRT monitor to replace the missing 23" Black and White which would have originally been installed.

Thanks, Mart.

96
That looks bloomin amazing! Lovely stuff  :shock:

97
Arcade Lifestyle / Re: The Eagle has landed ! (aka the Lunar Lander project)
« on: September 06, 2013, 08:50:08 PM »
Last step has started.....

Oooh, what are your plans then, Re-chroming? I sprayed mine with Chrome paint for my FT, but I think I should get it done properly. It looks OK but you can tell its not the real deal.

98
Arcade Lifestyle / Re: SuperBug restoration
« on: September 05, 2013, 09:56:26 PM »
Good luck with the resto, great to see some more Atari B&W love going on! These old games need to be saved  ;D

99
Fire Truck. Rear seat Complete.
I have a couple more items that I've completed in this update. The rear seat now has new T-Moulding, and I've refurbished the coin door metal work along with the bracket that links the front and rear unit together. First up are the brackets that link the two halves of the cab together.


Before. Tardy, rusty paintwork.


With the help of my small hand sander, I got things looking like this.


Primed up in a matt finish.


Completed Item ready to fit back onto the seat.

I have also give the coin box a covering in the direct to rust primer, and I think I'm going to leave that in the matt black finish as it looks pretty good.


Coin box painted

Because the laminate sides has lost their stick to the main wood sides of the cab, I decided I would put the cabinet on its side, remove the T-Moulding, glue the sides back on and then refit the new T-Moulding.

There's no really much to show, but I used some spray contact adhesive on the wood of the cab and the laminate sides then after a few minutes the parts were pressed together. Once the glue had cured I then moved onto the T-Moulding. Starting with the underside of the cab to avoid any joins showing it was a case of using a mallet to guide the T-Mould into the existing slot, I did cut some of the groove out on the tight corners to make sure it pushed home and was a nice tight fit. The same process was repeated for the other side.

I've also stripped and resprayed the coin door, this looks really nice now and I'm happy with the results.


Below are a few photos of how the seat looks now. At this point there's not really a lot more that I'm going to do to the seat other than fitting a lock to the coin door and a bulb holder for coin door light. The next update will be when I make a start on the main cab.


Since the last update I have also resprayed the bolts that hold the 'Horn' button in place as well as the rounded head bolts that go through the control panel, even though the Control Panel isn't in great condition these items looked out of place in their original condition.

Finally, Andy from Andys-Arcade.net is in the process of looking at the game board. Hopefully it won't be a too painful repair for him, I'm really looking forward to making progress with the main cab now.

100
Arcade Lifestyle / Re: Atari Fire Truck Restoration.
« on: September 02, 2013, 10:54:21 PM »
Thanks for all the comments. Glad you like what I'm doing with the cab  ;D

Hopefully I'll have another update this weekend. I've spent a few hours this past weekend doing a few more bits, the seat is almost complete.

Cheers, Mart.

101
Hey All, I've got a Fire Truck restoration on the go. I'll update the thread as I make more progress but here's the story so far...

Well a few years back now three (yes THREE!) FT's were up for auction on eBay UK, I had an itchy finger but never bid on them, no one else did either and life moved on until earlier this year when I was reminded about the FT's and found out someone local to me had actually picked them up after the auction ended. After some gentle persuasion I was Offered one of the cabs, still in the same untouchecd condition as below. Photos from the original auction.


/////////////////////////////////////////////

Wednesday, 10 April 2013
Fire Truck in the house! :)

Thanks to a very kind fellow arcade collector, I am now the proud owner of an Atari Fire Truck cabinet.

So here it is, Atari Fire Truck. Serial Number: FT-394


The owner who originally sold all three had them in storage for years, the collector who I bought it from had also never tried firing them up. The main casualty of the cab is that the monitor tube had been 'necked' and removed. Other than that the cab was complete but very dirty! and of course totally untested. Here's a few more photo's from when I unloaded it after making an unusually short round trip of 15 miles to collect it!


Very tidy side art on this side. unfortunately the other side is not half as good.


Front view
                                    

Around the back! Power supply and Main PCB enclosed in its  RF cage.

Items I've noted about the cab so far...
* The seat is made from Plywood whereas the main cab is Chipboard, Its a great shame Atari didn't use ply for both as I expect the main cab would be in 8/10 condition.
* All the artwork is made of some type of laminate which was glued onto the the cab. In places around most edges the laminate is flapping loose. This will need some contact adhesive to stick it back together.
* The two player button on the rear CPO is broken, so I'll need to find a replacement.
* One of the main sides of artwork is in a pretty poor state, I'm not sure if it was exposed to cold air or sunlight, but the paint has turned flakey. I'm not sure about the plan for this, It will probably be one of the last items that gets attention.
* The back door sheet which contains the self test and dip switch info had been tucked up behind the RF cage, It has small rips where it was once stapled to the back door.

More updates to come soon, I need some good weather so I can get the cab outside and give it a real good clean.

/////////////////////////////////////////////
Wednesday, 10 April 2013

Fire Truck fired up.
After getting itchy fingers, I just had to find out if the cab was a worker or not. 20+ years of unknown history would the game fire up or maybe catch fire! I wasn't sure what parts would work and considering the mains cable had been chopped short at the back of the cab it didn't give me much hope..

I unplugged all the connectors gameboard, psu coin mech etc, and verified that they were clean and had no bent pins, I had to straighten a few pins on the interlink loom between the front and back half but nothing major seemed wrong here.

I rewired the mains lead, checked the on-board fuses. The main power switch at the back of the cab had been a casualty over time, at some point it had become good friend with wasps or bees and had become completely destroyed. so I have temporarily used some terminal block to have the cab wired in a permanent 'on' state. The back door interlock mains wiring had also worked free from the connector so this needed re-connecting.

With the gameboard disconnected, I fired the cab up and got the distinctive hum for the mains transformer, no smoke, sparks or pops. Good start! All the Power brick voltages checked out against the schematics which was good.

Time to remove the main game board from the RF cage...It turns out the board is in a very tidy condition, and looks like its never been repaired.


Fire Truck main PCB

A visual inspection didn't show any bent pins on the underside of the board, I gently removed and re-seated all the IC's that were in sockets, and after that put the board back in the cage nearly ready to fire it up.

Before turning the cab on I need to improvise a monitor and the original on in the cab was missing. The video signal from the game was standard composite video so without too much fuss I moved in a little test monitor I have and made some temporary wiring to connect it to the original loom.

Time to turn the cab on, and here's what I got...


Cab fired up for the first time in 20+ years

Wee the cab fired up, I got a good solid video image but something wasn't quite right. I had a loud tone constantly coming out of the speakers, and the the main playfield graphics were messed up. The game coined up, but the game wont start properly.


The above photo gives a better indication of what is being displayed on screen. Not great but in truth this was a better result than I had expected. I need to confirm all the cab wiring is correct at some point in the future. I tried the test mode switch which is supposed to show some gradient bars and confirm RAM and ROMs are in working order, but this doesn't seem to work. At this point I'm guessing its a game board fault, but due to the unknown state the cab has been in, I will be doing continuity test on the looms when I next get some time to work on the cab.

/////////////////////////////////////////////
Saturday, 20 April 2013

Fire Truck. Rear control panel overhaul
I decided that I would get the seat section of the cab completed first, leaving the main part of the cab for a bit later in the year when the weather is better as I definitely have some woodworking to do on this section of the cab and my space indoors is limited to say the least. Anyway I thought a good place to start was on the Control panel, below is a photo of how it currently looked.


Original rear CP condition.

As you can see, it was pretty grimey and one of the buttons was missing a cone and it was also broken. The steering wheel also wouldn't freely spin.
Below is a close up of the wheel showing the surface rust that had built up on the wheel over the years in storage.


Steering wheel before a clean up.

The steering wheel cap showed how clean the wheel could be and would have originally been. After a good scrub with a metal scourer and some metal polish I found in one of my old tool boxes it now had a very nice shine!


Steering Wheel with a shine!

The wheel has cleaned up lovely the Control Panel is clean but does have some signs of rust coming through, there's not much I can do about this, but hey the machine is 34 years old so its allowed to show some signs of age.


Rear CP after being cleaned up.

As you can see I've replaced the broken button and put a cone on it, but I will be replacing all three so they match before the project is over. I'm assuming the front Control Panel will come clean up into a similar condition. More on that when I get to the main cab.

/////////////////////////////////////////////

Saturday, 20 April 2013

Fire Truck. Rear seat clean up.

First up was the leg levellers on the cab, they were only threaded with a single nut on either side and as you can see below weren't very straight anymore they had sunk into the plywood under the load of someone heavy playing the game in its past life!


Original leg levellers bent up.

My solution to this was to put some large flat washers either side of the plywood to spread the load over a greater area. Photo below, hopefully this should now do the job better than the original.


New washers on the leg levellers spreading the load over a greater area.

As I've mentioned before, the artwork sides of the cab are actually a laminate which is stuck to the main plywood cab. This has now come loose and the sides are 'flapping' about. I need to glue these back on so I don't damage them when moving the cab about. This will hopefully be done in the next update.


Laminate side coming away from the cabinet.

As for the actual cab clean up, I decided to go down the T-Cut route which is a polish for cleaning cars. It turned out really well, I'm very happy with the results. Photos below:


Front view, CP and coin door removed.


Oh yes! This is clean.


Bad photo, but more of the same.

I really have to look into getting some new T-Moulding now as this is going to let the cab down as it is pretty heavily marked. I don't want to stick the side laminate back on without removing the T-Mould so this would be a good reason to go for new and make the cab really stand out.

Also as you can see from the photos, the coin door is removed and the metal plate that connects the seat to the main cab has also been removed. I will post updates when I have cleaned and re-sprayed these items. More to come soon if the sun keeps shining, I've had a great day today working on the cab, thanks for reading.

EDIT 2. small photos now. EDIT. Sorry the photos are so large, I copied them straight from my blog which is hosted on google and they're massive. Usually I can copy my posts direct from google but that doesn't work with this forum software so I've had to do it manually.

/////////////////////////////////////////////

More updates coming soon :)

102
Arcade Lifestyle / Re: Fired up Break Out ...
« on: August 27, 2013, 10:11:05 PM »
Very nice  :)

Well done for getting it all fixed up and working. How is the side art?

I'd like a Breakout or Super BO in my collection one day.

103
All the rest / Hi. I'm smarty...
« on: August 25, 2013, 08:00:02 PM »
Hi all, I'm Martin and I live in the UK.

Quick introduction as I've been registered on the site for a fair time now. I've been collecting Arcade cabs/games since the late 90's and have plenty of love for late 70's & early 80's Atari games and Mid 80's Sega dedicated cabs. I'm on a few of the UK arcade forums so you may have seen some my posts there. As always with this hobby I never have enough space for all my wanted cabs. I'm currently at full capacity in my small converted garage and have promised myself that I'll complete my current restorations before buying anything else. Yeah right!

Cheers, Mart.

Here's a few photos of my games.

My small Garage arcade. The working side.


Pole Position as I got it.


Pole Position after lots of work.


My Fire Truck in need of rescue.


Current Restoration progress with the seat.


Cabs I currently own:
Atari Centipede Cabaret - Fully working
Atari Tempest Cabaret - Monitor fault but requires restoration to bring it up to standard. Back of the queue for restoration.
Atari Pole Position Midi - One of my current projects, now fully working with some remaining cosmetics to complete restoration.
Atari Fire Truck - Again an Ongoing restoration, planning to be completed early next year.
Subelectro Hunchback - The bottom was rotten so I rebuilt it. Currently running Pac-Land at the moment as the Hunch back has a faulty board set.
Lethal Enforcers - Audio fault on game board, fully working otherwise.
Sega Hang-On Upright- I've owned this cab twice, good condition and fully working.

Previously owned cabs
Atari Asteroids Cabaret
Atari Missile Command Cabaret
Couple of no-name Jamma cabs
Popeye Pachislo
Sega Outrun Mini
Midway Space invaders

Pages: 1 ... 5 6 [7]