Author Topic: :: Workshop :: @!#?@!? [Q*Bert of course] ;-)  (Read 117488 times)

DarthNuno

  • Administrator
  • ArcadeLifeStyler'
  • *****
  • Posts: 11708
  • Singe's castle
    • View Profile
    • Dragon's Lair Fans / Arcade LifeStyle
Re: :: Workshop :: @!#?@!? [Q*Bert of course] ;-)
« Reply #15 on: December 26, 2009, 03:44:56 PM »
Great job for the adapter!

One question: this cab is not the orignal version of Qbert?  :arrow:

[No More Picture]


Well, the one on your picture is clearly not an original US Q*Bert but it may be produced by an other firm, under license (or not...).

For example, my Q*Bert is a French built cabinet *under Gottlieb license*, see the plate  :arrow:


...manufactured by DASCO.

At the first sight, the cab' on your picture looks like a generic one, customized for Q*Bert... with additional buttons...but who knows?!... Do you have access to that cabinet in order to inspect it?
« Last Edit: January 26, 2010, 06:08:36 PM by DarthNuno »

aganim

  • Jr. Member
  • *
  • Posts: 41
    • View Profile
Re: :: Workshop :: @!#?@!? [Q*Bert of course] ;-)
« Reply #16 on: December 26, 2009, 03:56:50 PM »
At the first sight, the cab' on your picture looks like a generic one, customized for Q*Bert... with additional buttons...but who knows?!...

Ok it's my firt idea when I looking this cab.

Do you have access to that cabinet in order to inspect it?

Not for the moment.I saw this cab on the good corner in france  :lol:
Search Nintendo arcade cabinet ;)


DarthNuno

  • Administrator
  • ArcadeLifeStyler'
  • *****
  • Posts: 11708
  • Singe's castle
    • View Profile
    • Dragon's Lair Fans / Arcade LifeStyle

DarthNuno

  • Administrator
  • ArcadeLifeStyler'
  • *****
  • Posts: 11708
  • Singe's castle
    • View Profile
    • Dragon's Lair Fans / Arcade LifeStyle
Re: :: Workshop :: @!#?@!? [Q*Bert of course] ;-)
« Reply #19 on: January 26, 2010, 07:16:16 PM »
It's time to work on this  8)

Let's what I can do regarding the control panel. My initial idea was ... the lazy solution  ;) 
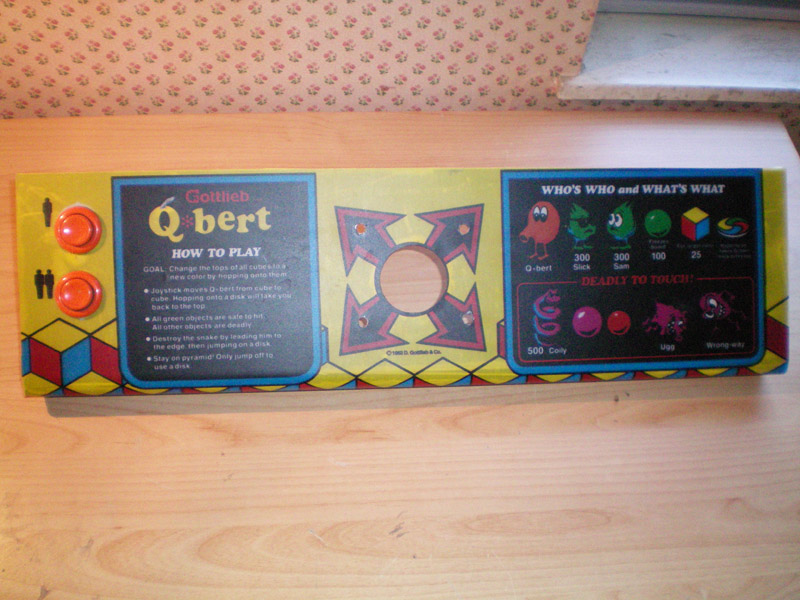
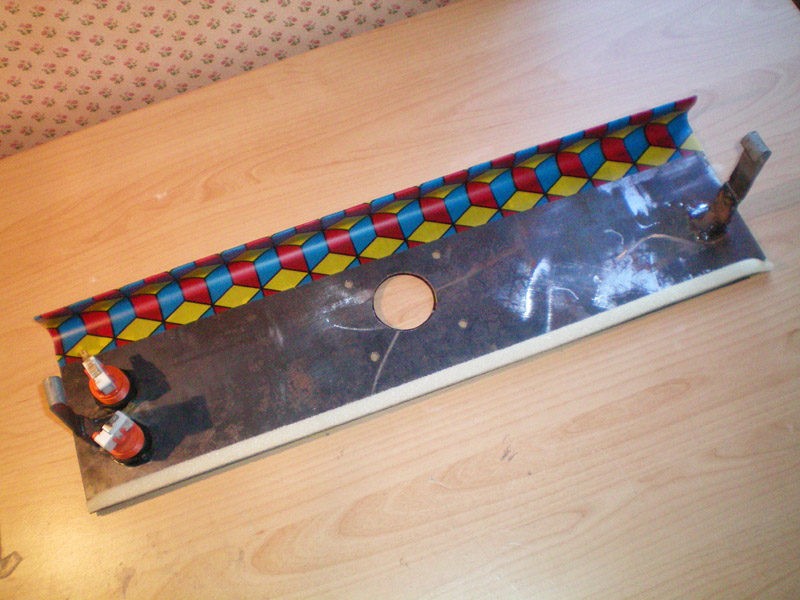
I ordered a complete US panel, with the original buttons and Joystick... in order to remove the 'hand made' one, done by the previous owner, this one  :arrow:


...but I didn't realize the panel size are different when I've ordered the US one, see  :arrow:


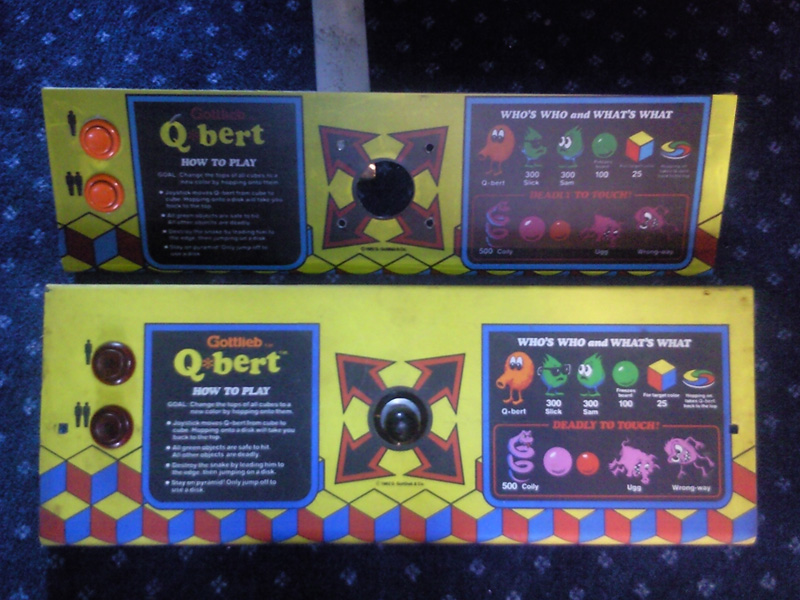
Ok, so I will have to *fix* all the errors done on my custom panel... and as you'll see, a lot of work... but hey, it's Q*Bert here, so let's go  ;)

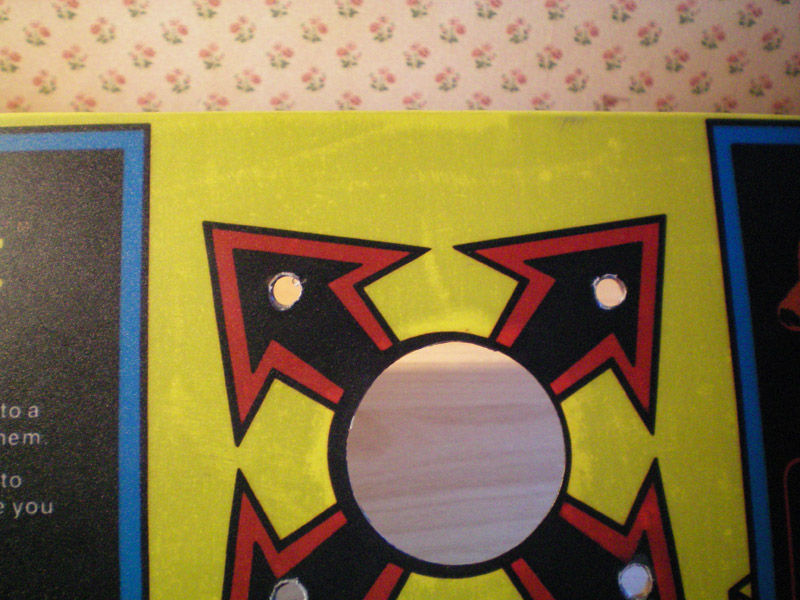
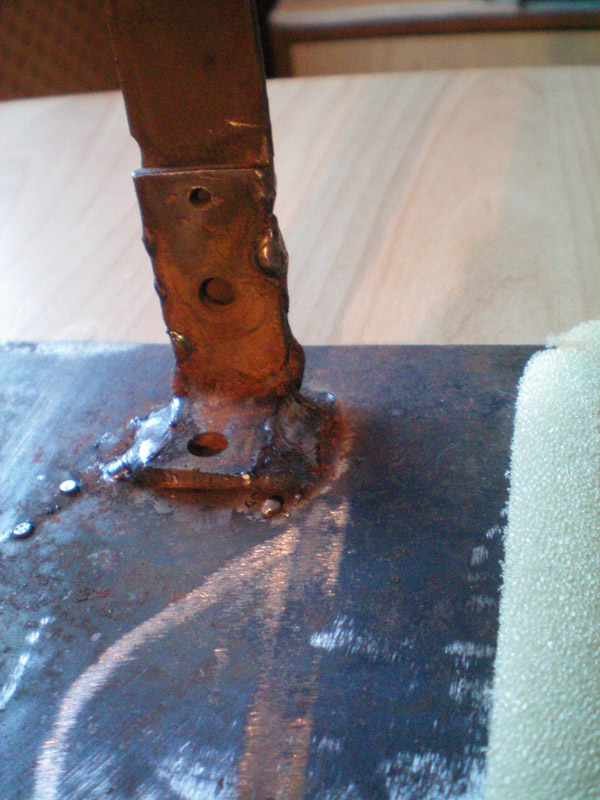
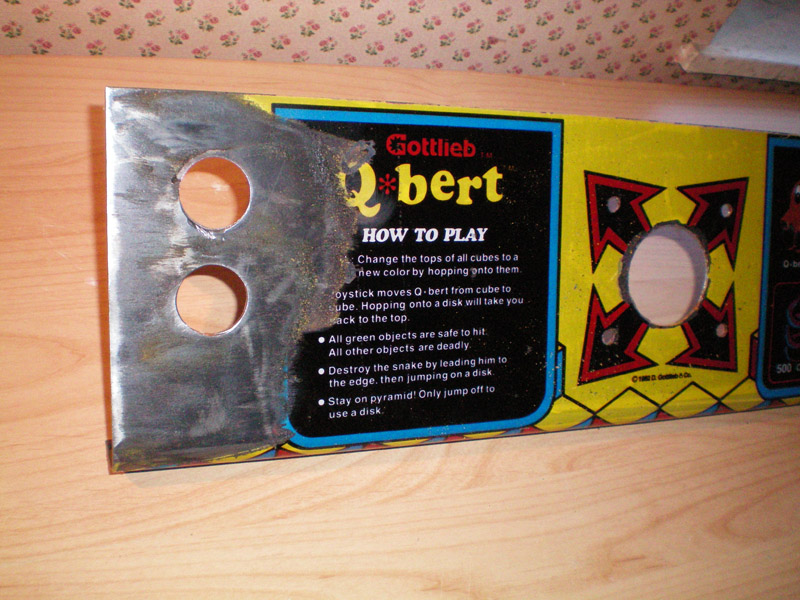
First mistake : the joystick orientation! Although the original US panel doesn't have any holes, the joystick orientation has an angle of 45°! So the holes done on my panel are not correct!  :arrow:


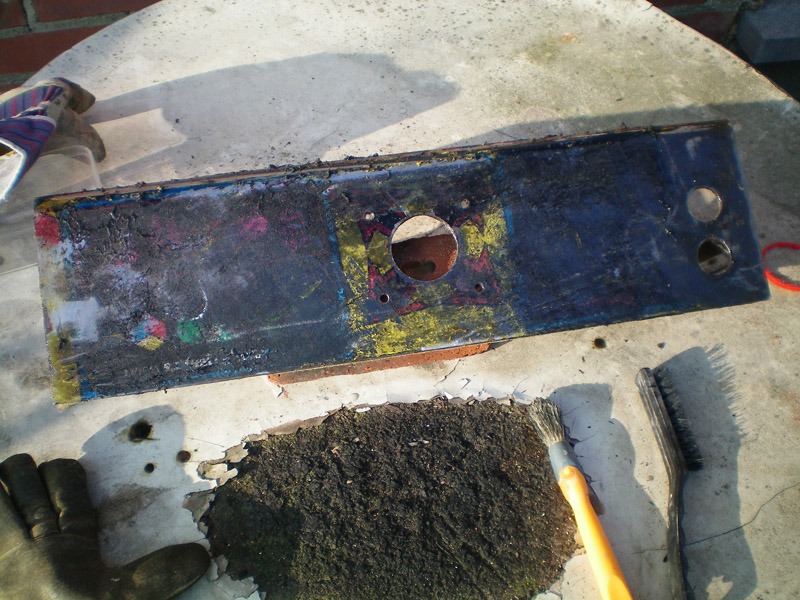
Second problem, the application of the overlay has not been done correctly and/or the metal support wasn't totally ready... you can see some color variations beyond the overlay  :?  I also suspect the quality of this overlay ... too thin and so... too transparent... I believe it's the glue you can see under it :?  :arrow:


As I told you, it's a 'custom made' panel...  :arrow:


...because when the previous owner got it, the original panel was already badly modified : Two joysticks, lot of buttons, ... and that's the reason why he started with a new panel construction.

Ok, first let's remove that overlay...


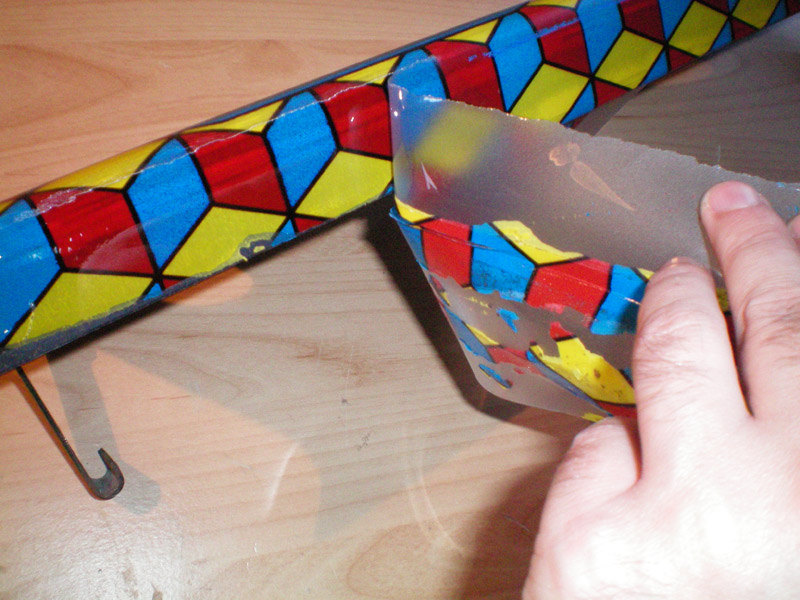
Hum... too much glue... I'm only able to remove the protective layer  :? ...


Let's try to remove the rest like this  :arrow:


Bad idea : It removes the paint, but NOT the glue  :ghost:  :arrow:


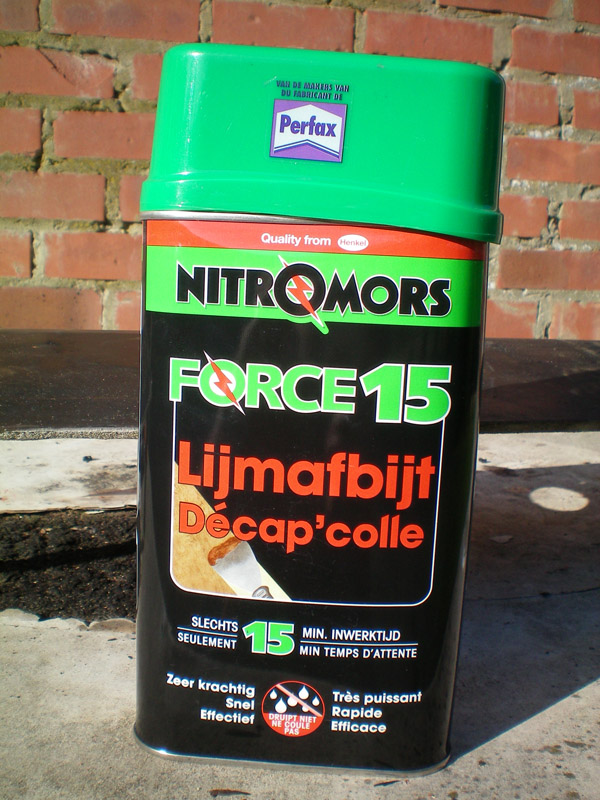
Ok, so let's use this chemical product! Paint stripper :arrow:


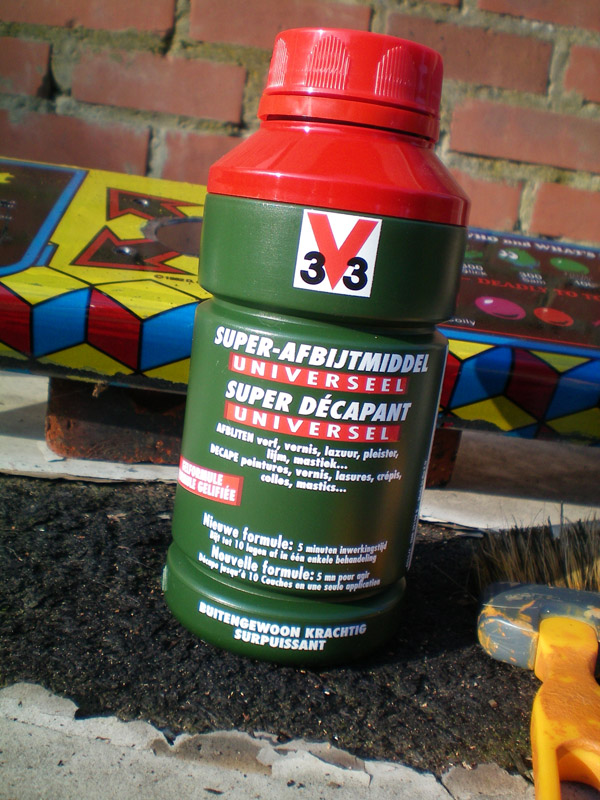
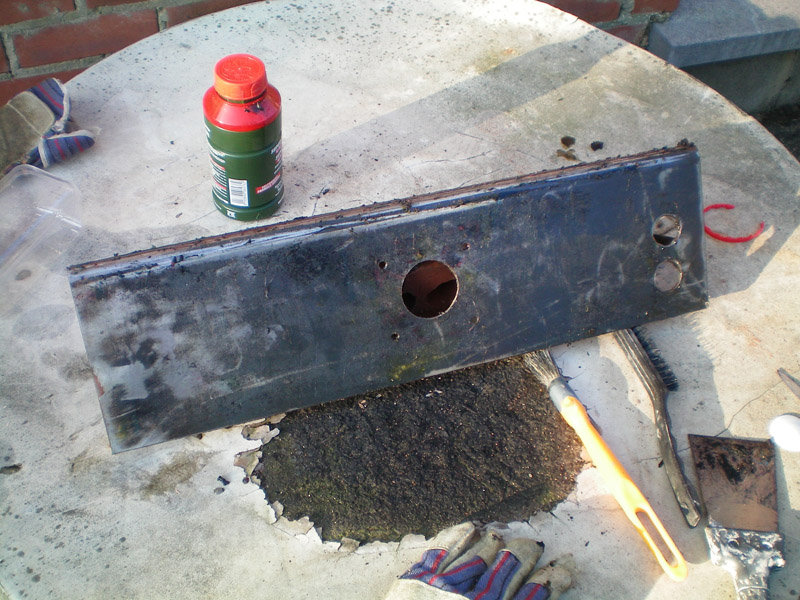
Easy : just apply it with a brush and wait something like 20 minutes... he's the result :


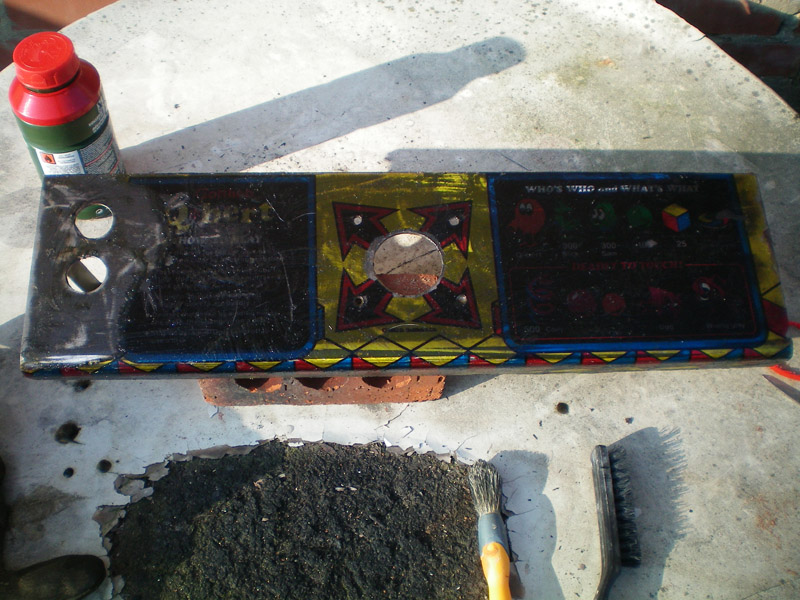
Now I can remove the glue like this :


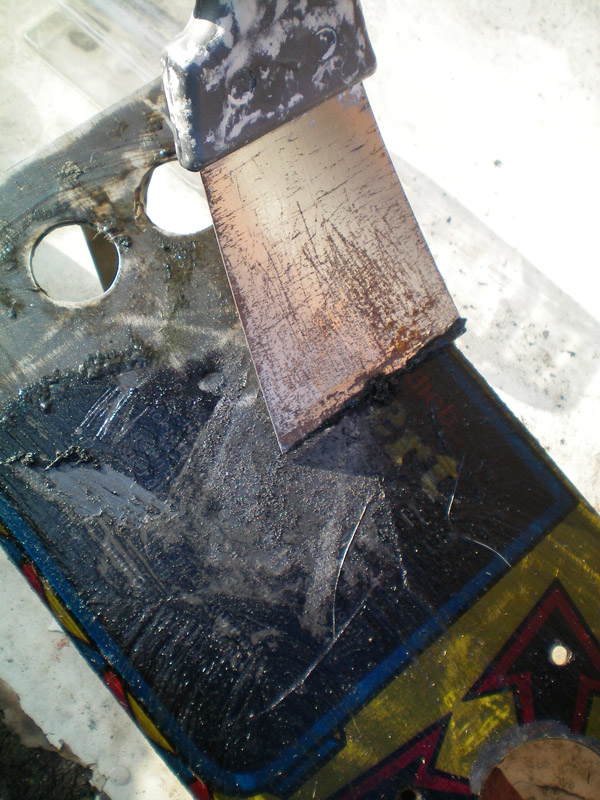
...but it's not as easy... I've to repeat the operation...  :ghost: 


...one more time... almost done ...


Grrrrr! Let's try an other product... more efficient?!


...but still not perfect, but at least... 99% of the paint/glue has been removed!  8)

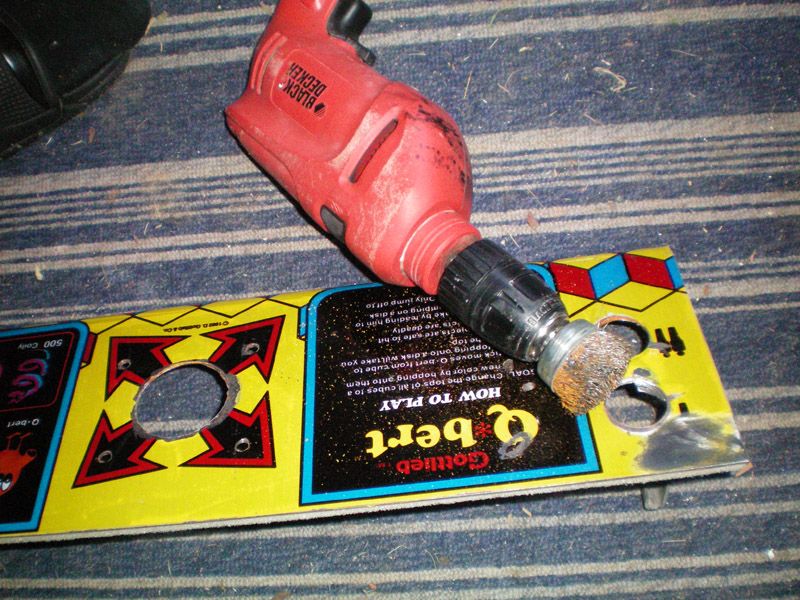
Let's finish the job with a sander ...
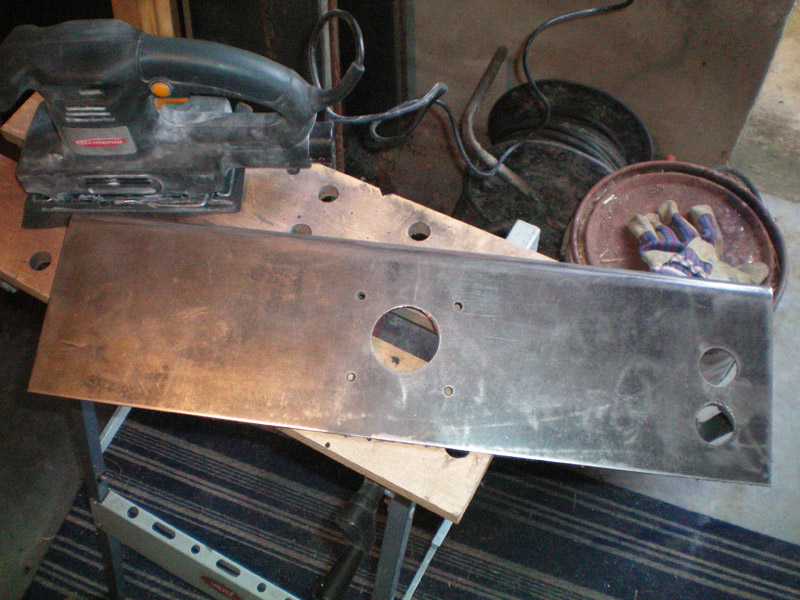


...and this is it!  8) Jesus... what a story/time spent just for that  ::) :P


DarthNuno

  • Administrator
  • ArcadeLifeStyler'
  • *****
  • Posts: 11708
  • Singe's castle
    • View Profile
    • Dragon's Lair Fans / Arcade LifeStyle
Re: :: Workshop :: @!#?@!? [Q*Bert of course] ;-)
« Reply #20 on: January 31, 2010, 07:10:44 PM »
I want to use the original Q*Bert Joystick, the one I got on the original US control panel. As I said previously, the holes done on my current panel are not correct for this joystick / orientation. I'll have to drill four new holes... Get ready!


Easy... but now, the idea would be to use screws with ... mmhhhh... 'no head' (I don't know the English word to describe it  :oops:), like this :arrow:


Of course, in order to fix them, I need holes with a 'square' shape  ??? Remember this post Holes 'square'... any advice?  ::) Ok... I have an 'home made' solution for that  :P I've used a custom made screwdriver! I was a tool I've modified to unscrew 'square' screws, long time ago for a project (damn! cannot remember which one  :oops:)... but now, I'll use it...


...to transform circles in ... squares! Caution, it'll very NOISY !!!!  8)  :arrow:


Yes! It's seems to work fine... let's continue to make noise  :P :P :P  :arrow:


Let's check if the square is big enough for the screw?  ... YES!!!  :-*  :arrow:


Let's repeat the operation... 15 minutes later... I've a terrible headache ... but I got what I need ...


... 4 holes 'squared'  :P

to continue...

Superully

  • ArcadeLifeStyler'
  • ***
  • Posts: 6300
  • Southern Part of Germany
    • View Profile
Re: :: Workshop :: @!#?@!? [Q*Bert of course] ;-)
« Reply #21 on: January 31, 2010, 07:16:49 PM »
I've used a custom made screwdriver! I was a tool I've modified to unscrew 'square' screws, long time ago for a project

i know what you're talking about. almost all the screws on paperboy and championship sprint need a "square screwdriver". it took me a while, but i managed to find bits for my screwdriver which will just do what they were made for: unscrew square screws  ;) my tool collection is growing and growing. everytime i think "now i've got all i need", something new comes up. is this ever going to stop?

nice job on the square holes, bruno. are you going to fill the round ones or will they be covered by the joystick?
all i need is ... PONG - and a select few others: TOUCH ME, DRAGON'S LAIR, JOUST, ROBOTRON, MR DO, SAN FRANCISCO RUSH THE ROCK!!!

DarthNuno

  • Administrator
  • ArcadeLifeStyler'
  • *****
  • Posts: 11708
  • Singe's castle
    • View Profile
    • Dragon's Lair Fans / Arcade LifeStyle
Re: :: Workshop :: @!#?@!? [Q*Bert of course] ;-)
« Reply #22 on: January 31, 2010, 09:56:44 PM »
Well, the big central Joystick hole is a little bit dangerous! I mean the edge around the circle has some cutting parts...


And as you can see, the holes 'square' too :oops:....


Let's fix the central joystick hole with this  :arrow:


...and the four '"square" holes with this one :


It looks better now  8)  :arrow:


...no more danger  ;)


...are you going to fill the round ones or will they be covered by the joystick?

Well, the CPO I'm gonna use looks very thick, and I believe it will cover the four holes without no mark...BUT  ... I would like to experiment 'Metal filler' ... because I simply never did that .... until now  ;) So the next step will be the filling on the round holes  :P

Superully

  • ArcadeLifeStyler'
  • ***
  • Posts: 6300
  • Southern Part of Germany
    • View Profile
Re: :: Workshop :: @!#?@!? [Q*Bert of course] ;-)
« Reply #23 on: January 31, 2010, 10:09:30 PM »
i would NOT leave the holes "unfilled", even if the CPO is printed on thick material. so good luck with the "metal filler", curious to find out which product you are going to use ...
all i need is ... PONG - and a select few others: TOUCH ME, DRAGON'S LAIR, JOUST, ROBOTRON, MR DO, SAN FRANCISCO RUSH THE ROCK!!!

Muerto

  • ArcadeLifeStyler'
  • ***
  • Posts: 3855
  • Denmark
    • View Profile
Re: :: Workshop :: @!#?@!? [Q*Bert of course] ;-)
« Reply #24 on: February 01, 2010, 02:24:52 AM »
if that was me, i would take the cpo to my friend, he has a welder, so simply weld the holes shut and use the dremmel on the excess iron/steel...

DarthNuno

  • Administrator
  • ArcadeLifeStyler'
  • *****
  • Posts: 11708
  • Singe's castle
    • View Profile
    • Dragon's Lair Fans / Arcade LifeStyle
Re: :: Workshop :: @!#?@!? [Q*Bert of course] ;-)
« Reply #25 on: February 02, 2010, 09:00:14 PM »
Well, because I wasn't really sure which product to try, ... I simply got three of them  8)  :arrow:


OK, let's try the one in the middle.

Hey! It's very similar than the usual wood filler  ::) ... Ok let's fill only one hole, just to validate the product ... and the technique  ::) :P  :arrow:


One day later... it's now solid as a rock  :D Let's sand it ... et voilà  :P  :arrow:


I do not need to test the 2 other products yet, because this one does the job perfectly  :-* Same work for the three holes left...  :arrow:


One day later ... after sanding, here's the result :


 8)

Superully

  • ArcadeLifeStyler'
  • ***
  • Posts: 6300
  • Southern Part of Germany
    • View Profile
Re: :: Workshop :: @!#?@!? [Q*Bert of course] ;-)
« Reply #26 on: February 02, 2010, 09:11:51 PM »
looking good! is this material now "hard as steel", that is: do you think you can also fill larger holes with it?
all i need is ... PONG - and a select few others: TOUCH ME, DRAGON'S LAIR, JOUST, ROBOTRON, MR DO, SAN FRANCISCO RUSH THE ROCK!!!

scr33n

  • ArcadeLifeStyler'
  • ***
  • Posts: 1674
    • View Profile
Re: :: Workshop :: @!#?@!? [Q*Bert of course] ;-)
« Reply #27 on: February 02, 2010, 09:56:20 PM »
is this material now "hard as steel", that is: do you think you can also fill larger holes with it?

Yes for sure Ully - great product !!!!  :-*

I use this for small repairs (control panel, small holes etc...):


 :spaceace:


PROJECTS FROM SCRATCH:

Galaga - PacMan - Donkey Kong Red Cab - Track & Field Upright - Tempest - Burgertime - Gyruss - Defender - Track & Field Cocktail - Robotron 2084

RESTORATIONS:

Q*bert - Timber

ckong

  • ArcadeLifeStyler'
  • ***
  • Posts: 3177
  • The Netherlands
    • View Profile
Re: :: Workshop :: @!#?@!? [Q*Bert of course] ;-)
« Reply #28 on: February 02, 2010, 10:56:09 PM »
great stuff, didn't know that this exists. Is it so hard that you can't  push it out of the hole? And can you drill in it, fot instance if some holes in a CP are too big, fill it and drill new holes?

liquidx

  • Member
  • **
  • Posts: 431
  • Bruxhell, Belgium
    • View Profile
Re: :: Workshop :: @!#?@!? [Q*Bert of course] ;-)
« Reply #29 on: February 03, 2010, 01:36:46 PM »
The best stuff I know for this kind of work is JB Weld - http://www.jbweld.net/products/jbweld.php

You can find it in Germany, that's where I got mine.
findapinball.com - The European pinball locator