Author Topic: [Restoration] The Joust Begins ...  (Read 90487 times)

Superully

  • ArcadeLifeStyler'
  • ***
  • Posts: 6300
  • Southern Part of Germany
    • View Profile
Re: [Restoration] The Joust Begins ...
« Reply #30 on: September 02, 2009, 07:14:53 PM »
I would like to see the amount of wood you've removed before applying the wood filer?  8)

i didn't remove that much wood at all. i used a steel brush to brush off dead wood particles, then i used glue and screw clamps to give the base some stability (sometimes it was like a small puzzle: remove the individual pieces, apply glue and re-insert them correctly again). finally, i filled everything up with wood filler. as i've said before: this took several days / multiple layers. i even had a verbal fight with my mother's 60+ years old neighbour because of the sanding noise. he couldn't understand all that sanding i had to do and called the cabinet a "monkey box"  :P
all i need is ... PONG - and a select few others: TOUCH ME, DRAGON'S LAIR, JOUST, ROBOTRON, MR DO, SAN FRANCISCO RUSH THE ROCK!!!

Etienne MacGyver

  • ArcadeLifeStyler'
  • ***
  • Posts: 7611
  • The Netherlands
    • View Profile
Re: [Restoration] The Joust Begins ...
« Reply #31 on: September 02, 2009, 08:16:51 PM »
A "monkey box" !!  what the h3ll this guy is thinking ! , i would sue him  ;D

It's a good feeling to see your treatment Ully !  keep up the good work !

those new leg levelers i recognise from "ikea closets"  8)

Superully

  • ArcadeLifeStyler'
  • ***
  • Posts: 6300
  • Southern Part of Germany
    • View Profile
Re: [Restoration] The Joust Begins ...
« Reply #32 on: September 04, 2009, 06:07:39 PM »

the restoration continues ...

the moment has finally arrived: PAINTING

i'm pretty nervous because i've never used a spray gun before - always rolled on the paint. but using a roller with stencils is NOT recommended, so no matter what, this is the "weapon of choice":  8)


the cab (and the room) has been well-prepared  :arrow:


here we go, first layer of primer applied, however ...


... it only looks good on the picture. in reality, i'm not really happy with the result  :'(. there are some paint runs, the paint itself isn't as smooth as i had hoped it would be and i had too much spray all over the room. i had done some practising before on spare wood where it worked better. i guess the paint wasn't thick enough (too much thinner) and i used the wrong spray valve.

luckily, this is only the first layer of primer, so every paint run and unevenness will be sanded down, but i must make sure that something like that doesn't happen again once i'm moving to stenciling - otherwise the cab will be ruined  :shock:

for now, all i can do is wait for the paint to dry (this will take some time considering it's oil-based paint) and inspect the result closer tomorrow!

note to myself:
- check the viscosity of the paint better
- use a smaller spray valve

to be continued ...

all i need is ... PONG - and a select few others: TOUCH ME, DRAGON'S LAIR, JOUST, ROBOTRON, MR DO, SAN FRANCISCO RUSH THE ROCK!!!

Etienne MacGyver

  • ArcadeLifeStyler'
  • ***
  • Posts: 7611
  • The Netherlands
    • View Profile
Re: [Restoration] The Joust Begins ...
« Reply #33 on: September 04, 2009, 07:02:33 PM »
its always better with spray to do it in layers....  this prevents paint runs

or put the cab on one side so that the "spraysurface" is horizontal

or like you say , the correct viscosity and nozzle

hope for you that you dont need to sand too much for the runs...
(i hate sanding, and also does your mothers neighbour  ;))

anyway , its better to have this now in the primer fase then with the masking fase...  that would be worse...
« Last Edit: September 05, 2009, 07:23:02 AM by Etienne [NL] »

level42

  • ArcadeLifeStyler'
  • ***
  • Posts: 13555
  • Ridderkerk, arcade capital of Europe !
    • View Profile
    • Arcade 42
Re: [Restoration] The Joust Begins ...
« Reply #34 on: September 05, 2009, 12:00:19 AM »
I've read some not so favorable reports on that spray-gun. I do believe this is the HVLP version right ?

I did consider buying this spray gun too but since the "mixed" comments I didn't in the end. Hope your results will improve !

Superully

  • ArcadeLifeStyler'
  • ***
  • Posts: 6300
  • Southern Part of Germany
    • View Profile
Re: [Restoration] The Joust Begins ...
« Reply #35 on: September 05, 2009, 12:53:14 AM »
I've read some not so favorable reports on that spray-gun. I do believe this is the HVLP version right ?

I did consider buying this spray gun too but since the "mixed" comments I didn't in the end. Hope your results will improve !

hvlp-version? no idea. i'm normally not into that type of machine, but saw it being used somewhere on tv with good results. perhaps i'm doing something wrong and i will for sure give it another try, but if the results don't improve, i won't be using it when it comes to stenciling.

i'm open for other suggestions then - don't want to ruin all the hard work i've put into the cab up to now because of the wrong type of equipment!
all i need is ... PONG - and a select few others: TOUCH ME, DRAGON'S LAIR, JOUST, ROBOTRON, MR DO, SAN FRANCISCO RUSH THE ROCK!!!

level42

  • ArcadeLifeStyler'
  • ***
  • Posts: 13555
  • Ridderkerk, arcade capital of Europe !
    • View Profile
    • Arcade 42
Re: [Restoration] The Joust Begins ...
« Reply #36 on: September 05, 2009, 10:50:52 AM »
HVLP means High Volume Low Pressure.

That's a method that spills less paint and is easier to get good results with (AFAIK).

Check out Spyridon's Pac Man restore. He's doing the stenciling now:

http://forum.arcadecontrols.com/index.php?topic=87614.200

He's using a HVLP gun with a compressor:


 I'm looking into this since I already own a compressor but I'm not sure if it's powerful enough for this job. The biggest problem is that I don't really have a room to spray a full cab, and I guess doing it outside is not a good idea because of wind.

Spray painting is all about technique. I'm definitely not a pro, but I've seen a pro at work. He made long, steady motion side to side streaks. At the end of the streaks he turned his hand outwards in a swift but not too fast twist of the wrist and then did the streak the other way (lower where he hadn't hit the part yet). It's important to keep the motion of your arm at the same speed. I tried to copy this technique a bit with the spray can and it worked out pretty nice, but a spray-can is still limited at how even you can get the paint.
Don't sweep left-right-left-right or go random.
I'm sure there are tons of videos and instructions on the internet.

« Last Edit: September 05, 2009, 10:54:22 AM by Level42 »


Superully

  • ArcadeLifeStyler'
  • ***
  • Posts: 6300
  • Southern Part of Germany
    • View Profile
Re: [Restoration] The Joust Begins ...
« Reply #38 on: November 01, 2009, 05:19:58 PM »

the restoration continues ...

it's been a while since you've heard of this, but i haven't been lazy - painting just takes some time. and then there are those "damn roadtrips" which keep you occupied even more ;) 
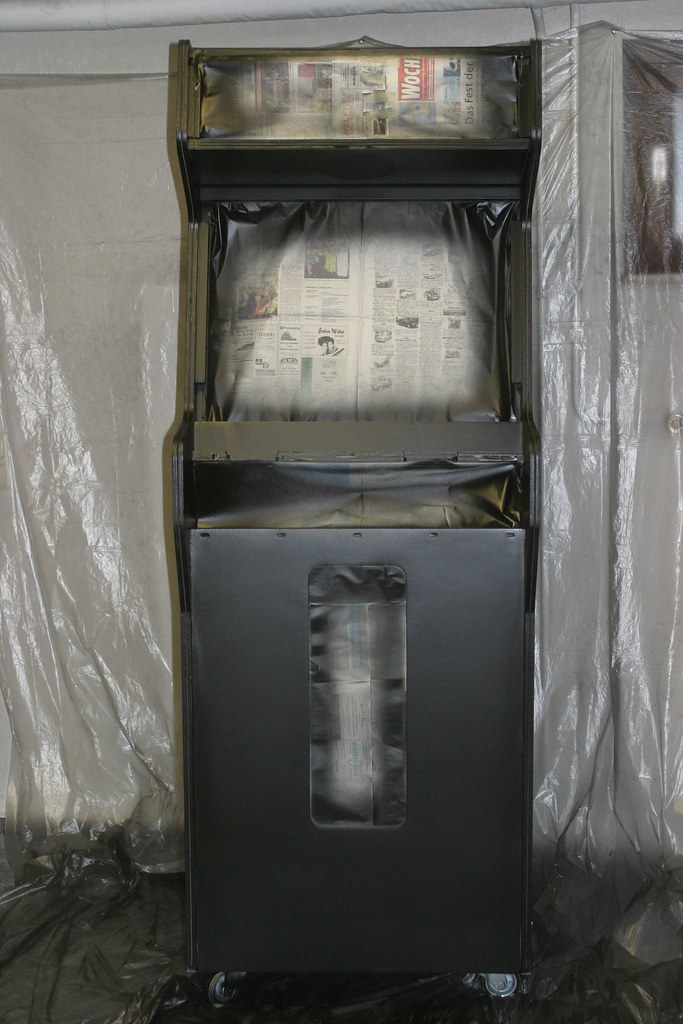
anyway, here's where we left off:


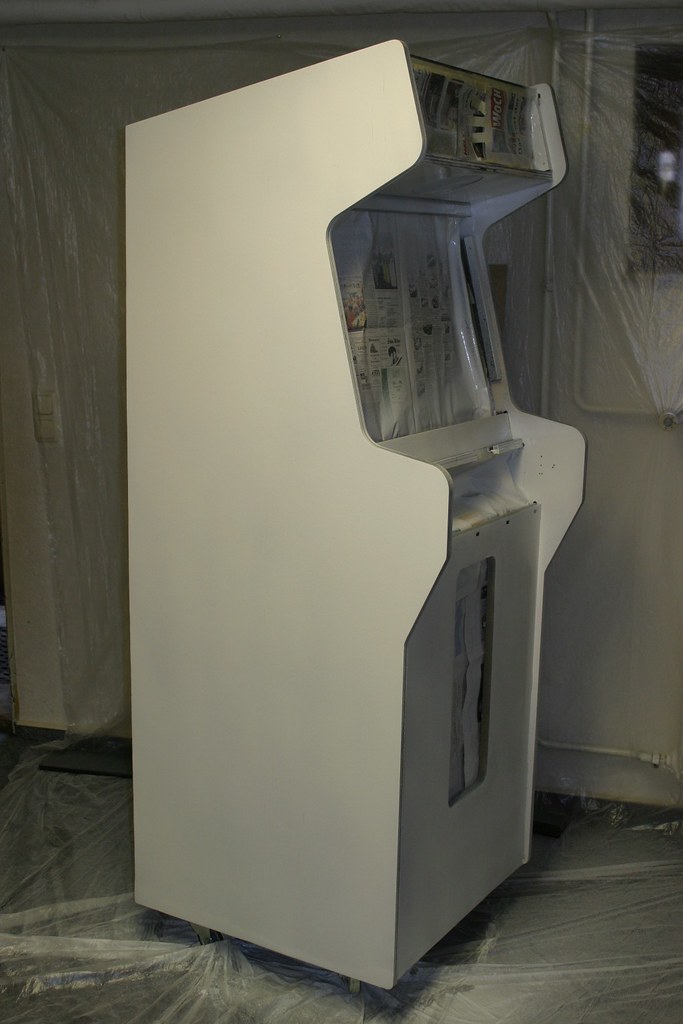
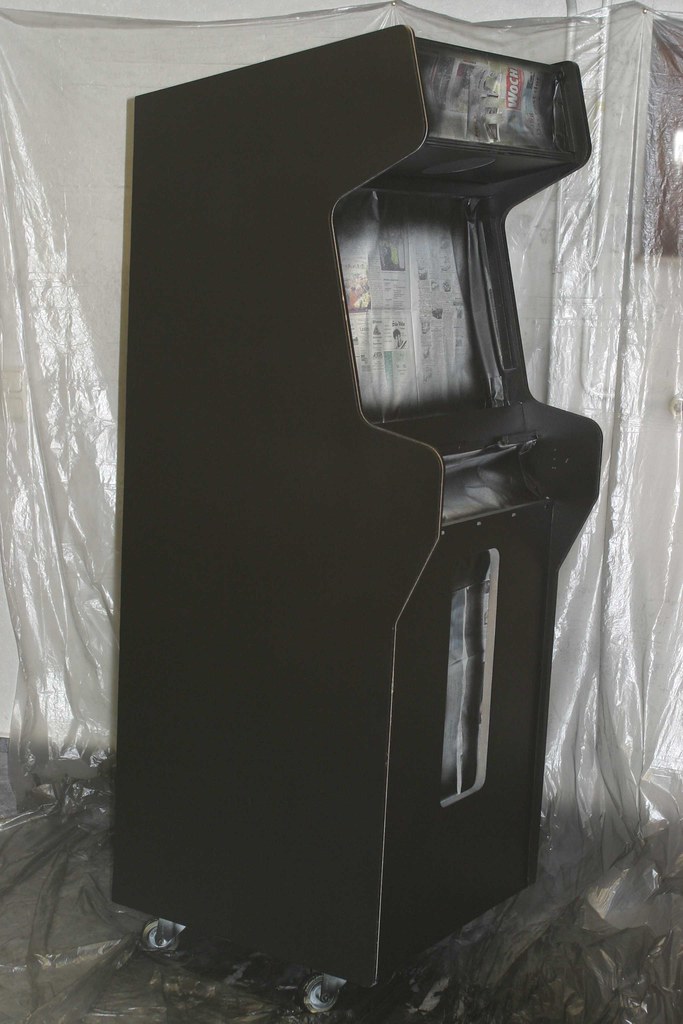
after the primer, it's time for the base:
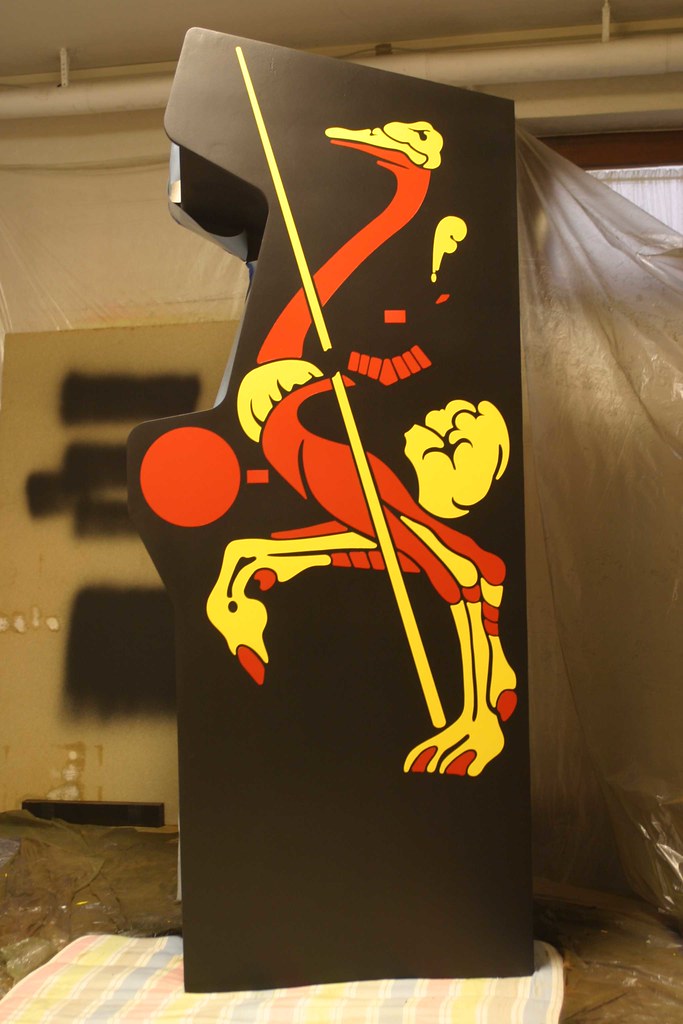
 MATTE BLACK!


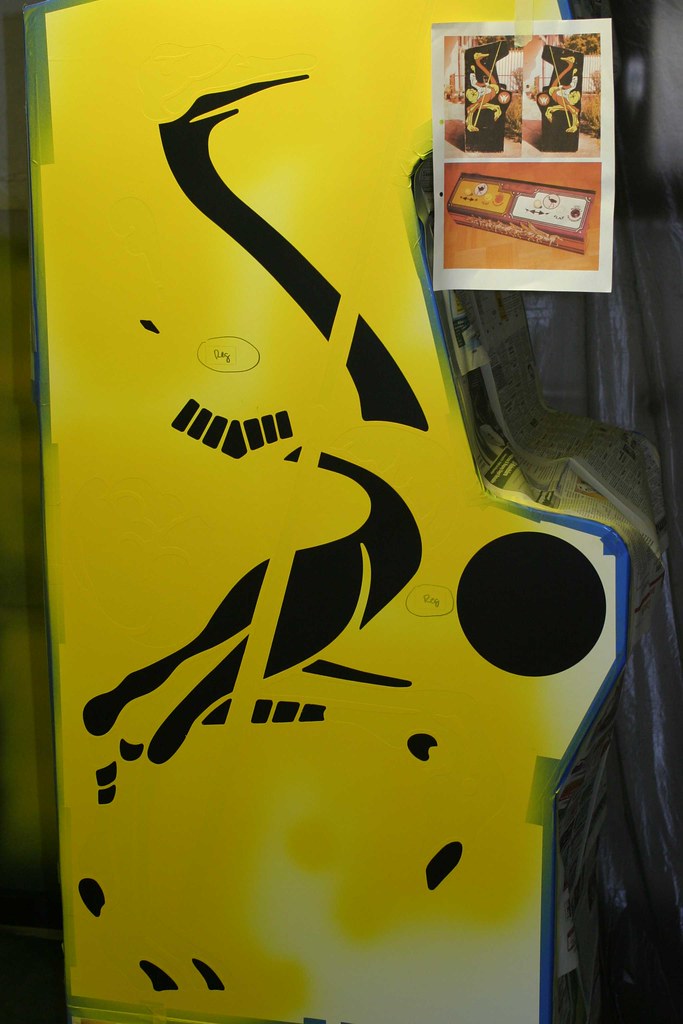
for the artwork i'm using stencils from gamestencils.com. they come in two sets of two pieces: one for the colors yellow and red, the other one for turquoise. after applying the first stencil in the correct position, i'm spraying on the first color: YELLOW!


looking good :)


see what lies beneath


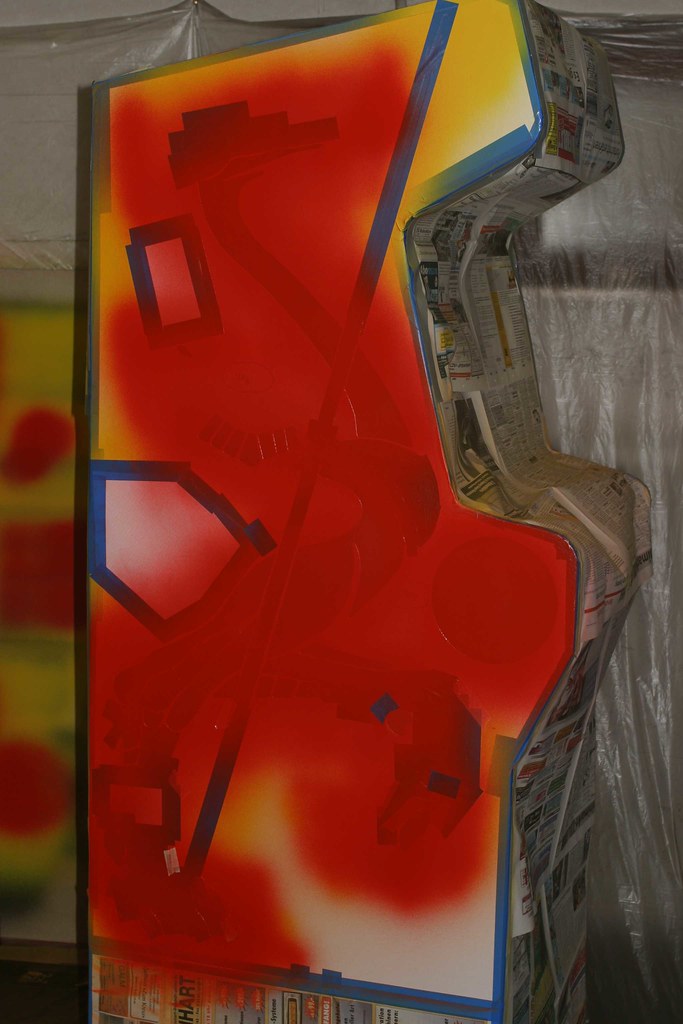
the premasks for the red color removed - looking even better :-*


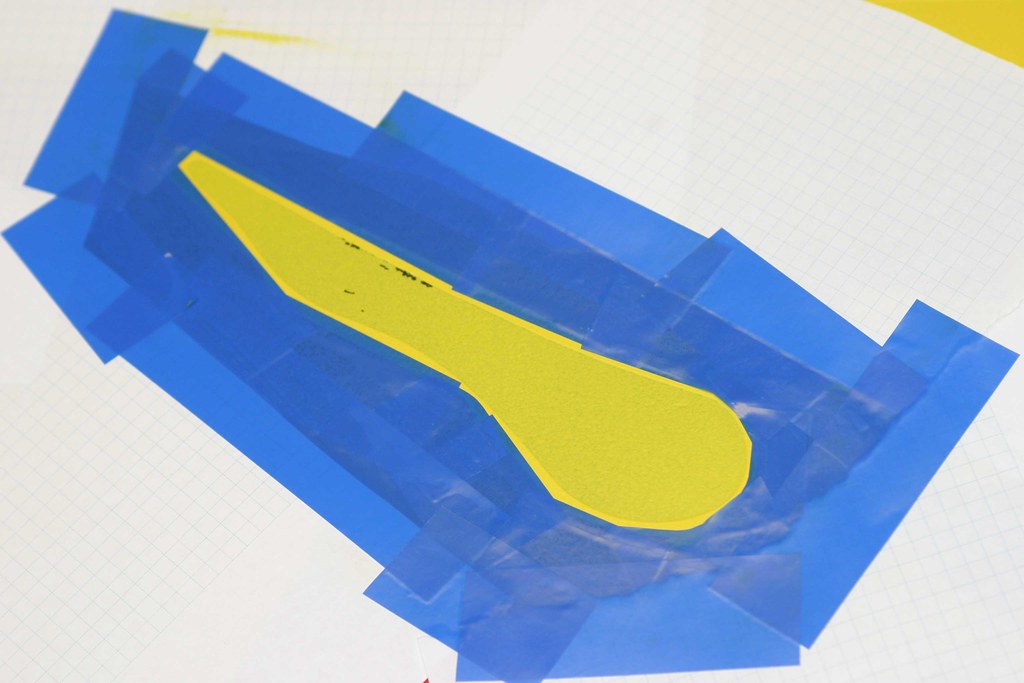
because the first stencil is designed to be used for two colors in a row, the first color (yellow) has to be masked off manually. i H-A-T-E-D it, hated hated hated. this is the suckiest of all the sucky jobs in the world. no fun at all, pure mind over matter. T-O-T-A-L   H-A-T-E   !!!
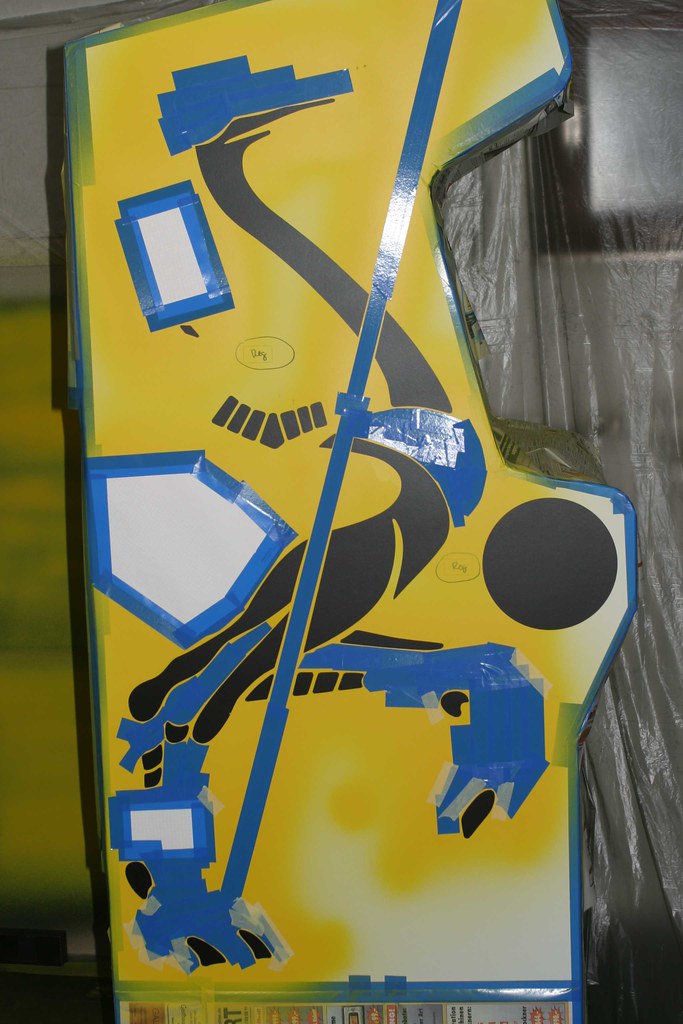
  :evil:


hate in detail  >:( 
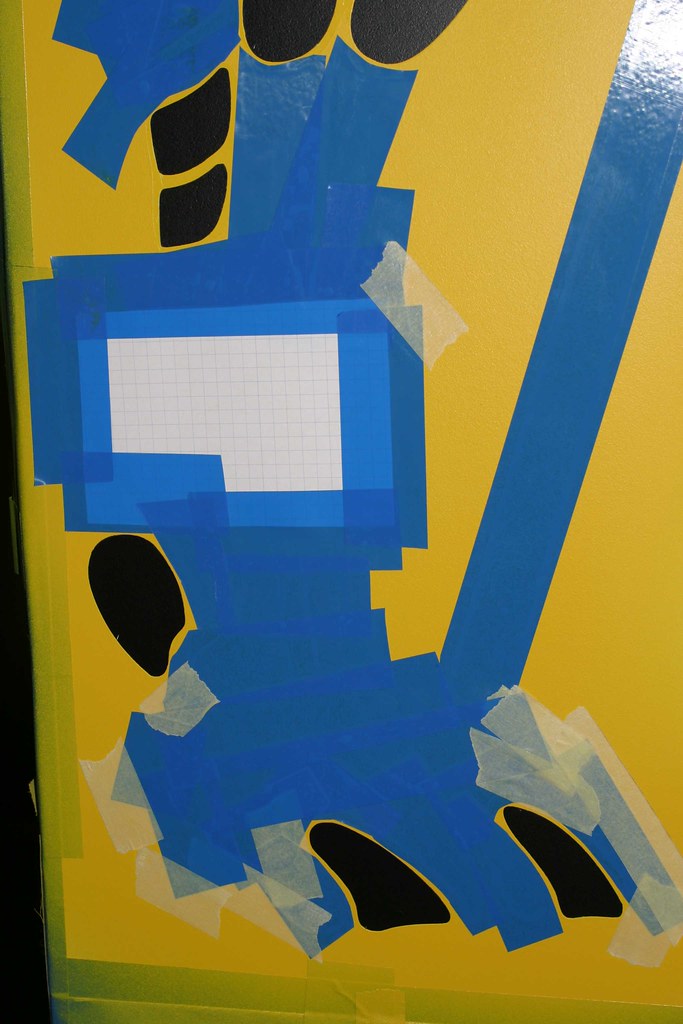
do you see all those damn curves? have i mentioned that i hated that job?


after all the hate has left the building (along with elvis ;)
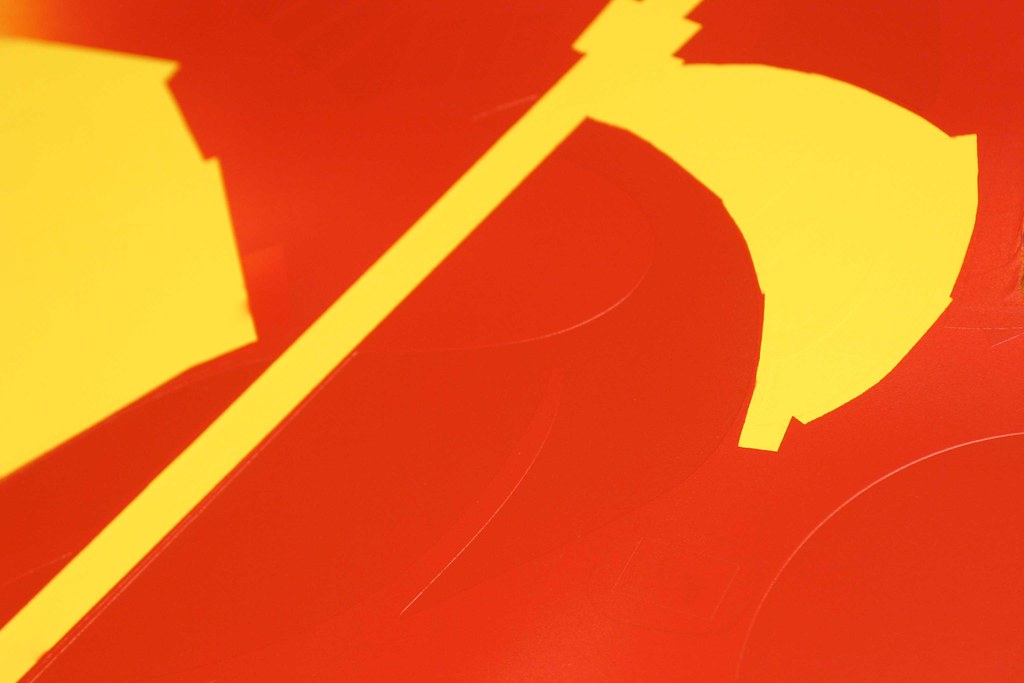
) i can spray on the second color: RED!


where red and yellow collide ...


after letting it dry for days (then weeks, then months), i'm carefully removing the stencils. fingers crossed for this one :ghost:


i'm deeply impressed by the result. doesn't it look wonderful?


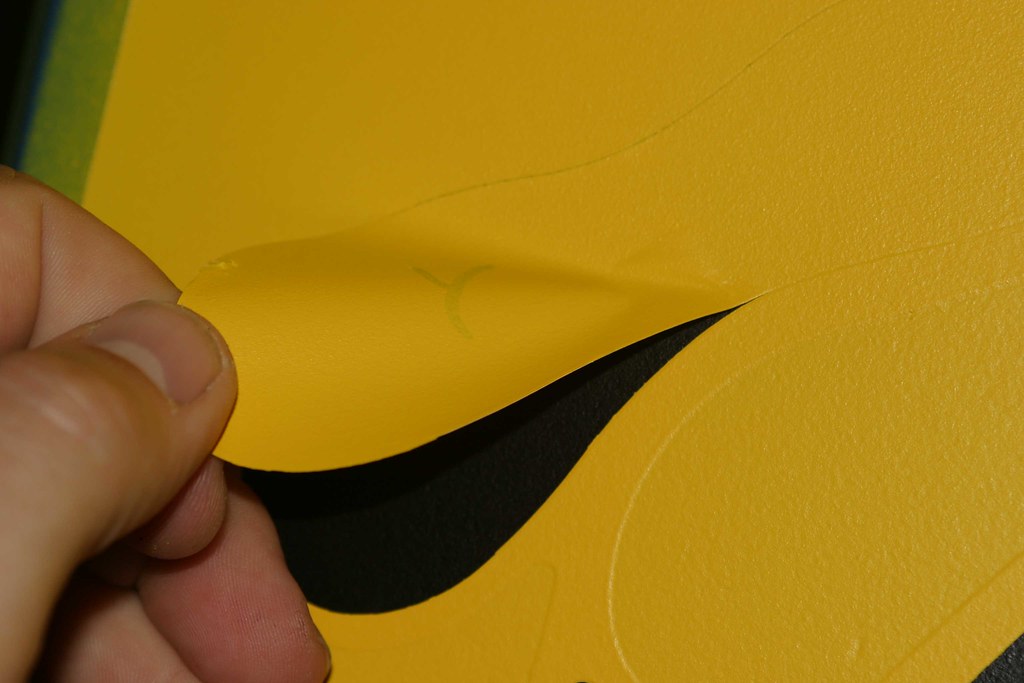
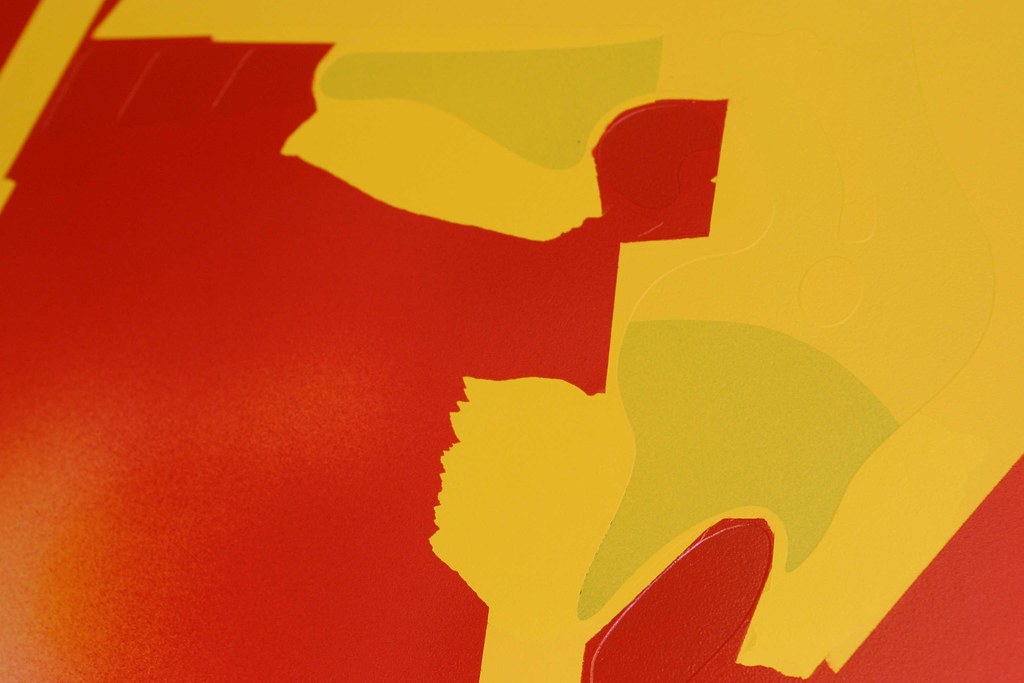
unfortunately, there's a downside to it :(. well, to be more precise: it's not a downside, it's the other side: when i remove the masking on the other side, the top yellow layer peels off along with the masking in some spots - you can clearly see the black base shining through where the yellow color fell off. damn, this shouldn't have happened. i don't know why it did. i've sprayed both sides simultaneously, used the same paint and let it dry for the same amount of time. i didn't hurry at all when i peeled back the parts of the mask. this sucks big time :'(


but i'm not ready to give up :spaceace: i'm masking off the damaged areas to roll on a new coat of paint. hopefully it will stick to the layer underneath this time and the additional paint job won't be visible to blatantly.


the whole top layer of the yellow color on the right side of the cabinet doesn't stick too well and i'm afraid that i'll be peeling it back along with the turquoise mask once this has been used. hmmm, not sure yet what to do. let's see how my emergency operation turns out once the newly-applied yellow coat has dried. if it looks crappy, i will remove the yellow top layer manually, get a new stencil for yellow at gamestencils.com and apply the yellow color again from scratch. red is perfect, it's just that freakin' yellow on the right side ...

to be continued ...

all i need is ... PONG - and a select few others: TOUCH ME, DRAGON'S LAIR, JOUST, ROBOTRON, MR DO, SAN FRANCISCO RUSH THE ROCK!!!

DarthNuno

  • Administrator
  • ArcadeLifeStyler'
  • *****
  • Posts: 11708
  • Singe's castle
    • View Profile
    • Dragon's Lair Fans / Arcade LifeStyle
Re: [Restoration] The Joust Begins ...
« Reply #39 on: November 01, 2009, 05:36:50 PM »
This general view of the job looks awesome  :-*  :arrow:


I know I'll have to do similar job on my Ms Pac Man, I mean the 'mask off with tape'... and I'm already afraid about doing curves  :oops: So afraid that I'm even lazy to start that crazy job now ( :oops: once again).

Regarding the general work on side art ... it's crazy... because... at the end, no one will see the sides of our cabinets, because they will be inside other cabinets...  ::) But for some reasons... we have to do it  :P ;D

Muerto

  • ArcadeLifeStyler'
  • ***
  • Posts: 3855
  • Denmark
    • View Profile
Re: [Restoration] The Joust Begins ...
« Reply #40 on: November 01, 2009, 06:37:29 PM »
that looks amazing ully!!!!!!
cant wait to se this baby up and running!

level42

  • ArcadeLifeStyler'
  • ***
  • Posts: 13555
  • Ridderkerk, arcade capital of Europe !
    • View Profile
    • Arcade 42
Re: [Restoration] The Joust Begins ...
« Reply #41 on: November 01, 2009, 08:19:17 PM »
To encourage you, it's looking great !!!! But uhm....so you're "converting" it from a Joust 2 to a Joust ?

About the taping off, I don't understand that that is needed. This is what the gamestencils.com site says:

Joust stencils come as one full length stencil with all colors in one. The colors do not overlap and this allows for far superior registration. Simply apply the stencil, peel away the next color and paint. repeat until done. Individual color pieces will be marked so you remove them in the correct order!

This doesn't sound what like you needed to do ??

Anyway, the end result will look very tight !! And I share your thoughts, even though they are covered by other cabs, the side-arts needs to be nice ! :D

Superully

  • ArcadeLifeStyler'
  • ***
  • Posts: 6300
  • Southern Part of Germany
    • View Profile
Re: [Restoration] The Joust Begins ...
« Reply #42 on: November 01, 2009, 08:30:00 PM »
To encourage you, it's looking great !!!! But uhm....so you're "converting" it from a Joust 2 to a Joust ?

nope, why do you think so? the sidearts are the same, only different color combinations.

About the taping off, I don't understand that that is needed. This is what the gamestencils.com site says:

Joust stencils come as one full length stencil with all colors in one. The colors do not overlap and this allows for far superior registration. Simply apply the stencil, peel away the next color and paint. repeat until done. Individual color pieces will be marked so you remove them in the correct order!

This doesn't sound what like you needed to do ??

first of all, brian changed the joust stencils from one full length stencil to two smaller ones, one for yellow / red and one for turquoise (well, those are the colors i'm using for joust 2). when you apply the first stencil the premasks for the first color (in my case yellow) has already been removed. i simply spray on the first color. after that i pull of the premask for red. but what would you do next? simply spray on the red color? this would mean spraying over the yellow. in order to avoid that, i have to mask if off - or am i simply stupid? after that i remove the whole stencil, then i apply the one for the turquoise color. the parts that aren't covered need to be masked off by hand.

the description on the homepage sounds easy and i can simply pull off the red premask, but the yellow needs to be protected first! or am i wrong?
all i need is ... PONG - and a select few others: TOUCH ME, DRAGON'S LAIR, JOUST, ROBOTRON, MR DO, SAN FRANCISCO RUSH THE ROCK!!!

level42

  • ArcadeLifeStyler'
  • ***
  • Posts: 13555
  • Ridderkerk, arcade capital of Europe !
    • View Profile
    • Arcade 42
Re: [Restoration] The Joust Begins ...
« Reply #43 on: November 01, 2009, 08:46:05 PM »
It couldn't be because of the different colors used ritght ?

On Joust 2 the neck of the bird is red, on Joust it's yellow. The man is blue on Joust 2 and red on Joust....

But of course, this shouldn't make a difference as long as you substitute the right colors. What you say sounds like very true....I have 0 experience with stencils so I really don't know, but that line on the site made it sound so easy....

Superully

  • ArcadeLifeStyler'
  • ***
  • Posts: 6300
  • Southern Part of Germany
    • View Profile
Re: [Restoration] The Joust Begins ...
« Reply #44 on: November 01, 2009, 09:35:58 PM »
It couldn't be because of the different colors used ritght ?

you mean the peeling away? nope, because i've used the same colors in the same mix ratio on both sides at the same time, so there shouldn't be a difference. as you can see the left side could be removed perfectly, the problem only occured on the right side. but with a lot of patience (and some hot spiced wine afterwards ;)) the result on the right side will be fine, too. it just needs a lot of time and patience!

On Joust 2 the neck of the bird is red, on Joust it's yellow. The man is blue on Joust 2 and red on Joust....

red for the neck and blue for the rider are exactly the colors i am using. see the comparison pic i've attached to the cabinet on one of the pictures - this comparison pic was taken because sanding down the cabine. the only color i'm changing slightly is the red. i had it color-matched to the red on the control panel and it is another shade of red than the one originally used - nevertheless the colors are still the same. i had been thinking about replacing the black with the purple background color of the panel, but decided against it. i'm vetx happy with the colors!

What you say sounds like very true....I have 0 experience with stencils so I really don't know, but that line on the site made it sound so easy....

that's what i feel for, too ;D i'm just happy that this was my first stencilling job and not pac-man, which looks much more complicated. i guess joust is damn easy in comparison. i simply need to get better equipment if i'm planning on doing more painting jobs. the good thing is that i have a room to do it wittout noone bothering, that's a big advantage!
all i need is ... PONG - and a select few others: TOUCH ME, DRAGON'S LAIR, JOUST, ROBOTRON, MR DO, SAN FRANCISCO RUSH THE ROCK!!!