Author Topic: [Restoration] The Joust Begins ...  (Read 90501 times)

Superully

  • ArcadeLifeStyler'
  • ***
  • Posts: 6300
  • Southern Part of Germany
    • View Profile
Re: [Restoration] The Joust Begins ...
« Reply #60 on: May 27, 2010, 03:33:16 PM »

the restoration continues ...

it's been half a year since i worked on this the last time, so let's do a very quick recap. the cab has been stencil-painted completely, one side turned out almost perfect (more on that a little while later), on the other side parts of the yellow peeled off. have a look  :arrow:


of course, i couldn't leave it like that, so the only option was to get replacement stencils for the yellow color and start over again. let me use this opportunity to give a round of applause to brian from gamestencils.com - he's one hell of a guy, always helpful and extremely forthcoming. i contacted him right after the dilemma with the yellow color and he said "don't worry, i'll cut you replacement stencils for the desired parts. just let me know which stencils you need!"

so i took a picture of a joust cabinet and marked the faulty spots for which i needed new stencils in blue


a couple of weeks later, i had to order some parts from brian and he included the replacement stencils in the package. unfortunately, he forgot to cut two of the stencils i needed, so i had to contact him again. i already had a bad conscience because he's got so many projects to work on and i didn't want to waste more of his precious time, but would should i have done? but once again, brian was totally friendly and said he was going to cut me an entire set of new yellow replacement stencils, so that he wasn't going to miss anything this time. if that wasn't already enough, he did all that FOR FREE - what a great guy!!!  :-*

it took a couple more weeks until i had to order some parts from the states / from brian again, that's why it took half a year until i was able to continue with the restoration, but it was well worth the wait!

enough talk, let's see some action!

before applying the replacement stencils, i need to remove the layer of yellow which hasn't peeled off yet, but which would do so eventually


stencils cut to shape and applied


maximum protection before the spray job


after giving the paint time to dry for about a week, the protection gets removed! so far, so good ...


let's see if all the hard work paid off - i'm slowly and carefully removing the stencils! Y-E-S - it's working!!!  :spaceace:


i won't be revealing a shot of the entire cabinet right now, because there's something else which has to be done first. after repainting the cabinet i realized that there was an error in the stencils. the dot underneath the helmet's feather needs to be painted in a different color than the feather itself. have a look at the original artwork, i've circled the dot i've been talking about in white. btw, you'll also realize how sloppy the original paintjob had been done! :o


with the stencils i had it turned out that the colors of the feather and the dot are identical. you know that i'm extremely anal about stuff like that and since i still had parts of the stencils left that brian cut for me, i used those to correct that error!


here we go - now the knight is ready to ride again :-*


i'll be applying a coat of clear on top of the artwork to protect it, but for now I'M THRILLED  :)

to be continued ...

all i need is ... PONG - and a select few others: TOUCH ME, DRAGON'S LAIR, JOUST, ROBOTRON, MR DO, SAN FRANCISCO RUSH THE ROCK!!!

gyruss

  • ArcadeLifeStyler'
  • ***
  • Posts: 2332
  • The Netherlands
    • View Profile
Re: [Restoration] The Joust Begins ...
« Reply #61 on: May 27, 2010, 04:03:36 PM »
Looks sharp, and what a  great artwork, love the color combination.

Superully

  • ArcadeLifeStyler'
  • ***
  • Posts: 6300
  • Southern Part of Germany
    • View Profile
Re: [Restoration] The Joust Begins ...
« Reply #62 on: May 27, 2010, 04:10:51 PM »
i totally agree: JOUST has probably my most favourite artwork, at least it's in the top 5!
all i need is ... PONG - and a select few others: TOUCH ME, DRAGON'S LAIR, JOUST, ROBOTRON, MR DO, SAN FRANCISCO RUSH THE ROCK!!!

Etienne MacGyver

  • ArcadeLifeStyler'
  • ***
  • Posts: 7611
  • The Netherlands
    • View Profile
Re: [Restoration] The Joust Begins ...
« Reply #63 on: May 27, 2010, 04:25:30 PM »
looking super, ully  8)

ckong

  • ArcadeLifeStyler'
  • ***
  • Posts: 3177
  • The Netherlands
    • View Profile
Re: [Restoration] The Joust Begins ...
« Reply #64 on: May 28, 2010, 03:31:59 PM »
Great work Ully. You really are a master of restoration. do you keep track of the hours of work that you spend on the cabs?

Superully

  • ArcadeLifeStyler'
  • ***
  • Posts: 6300
  • Southern Part of Germany
    • View Profile
Re: [Restoration] The Joust Begins ...
« Reply #65 on: May 28, 2010, 08:56:58 PM »
do you keep track of the hours of work that you spend on the cabs?

thx for your support guys! i don't keep track of the time, perhaps i should do so for one of my next restorations. but to be honest, most of the time is spent on waiting for either parts to arrive or stuff to dry ;)! does that count as well?
all i need is ... PONG - and a select few others: TOUCH ME, DRAGON'S LAIR, JOUST, ROBOTRON, MR DO, SAN FRANCISCO RUSH THE ROCK!!!

Muerto

  • ArcadeLifeStyler'
  • ***
  • Posts: 3855
  • Denmark
    • View Profile
Re: [Restoration] The Joust Begins ...
« Reply #66 on: May 28, 2010, 09:11:41 PM »
no

Superully

  • ArcadeLifeStyler'
  • ***
  • Posts: 6300
  • Southern Part of Germany
    • View Profile
Re: [Restoration] The Joust Begins ...
« Reply #67 on: July 31, 2010, 06:01:40 PM »

the restoration continues ...

now that i'm almost done with the cosmic part, i wanted to find out where i stand on the electronic side of the fence. for that i'm "throwing in" all the wiring, the monitor, the pcbs and the power supplies. "throwing in" is the catchword here, because when i started this restoration almost a year ago, i forgot to take crucial pictures of the internal setup, which meant i had no idea how to set up the game :-[. fortunately, ravage owns a joust 2 as well and he was kind enough to snap some pictures of his machine. this helped me BIG TIME in getting my cab together without having any spare parts - except one strange screw :P. thx rav :-*

when i finally turned on the machine, nothing happened except LED 1 staying dark. from what i've been told, LED 1 is the +5V indicator, which means the power supply is shot and the pcbs don't get the power they need >:(


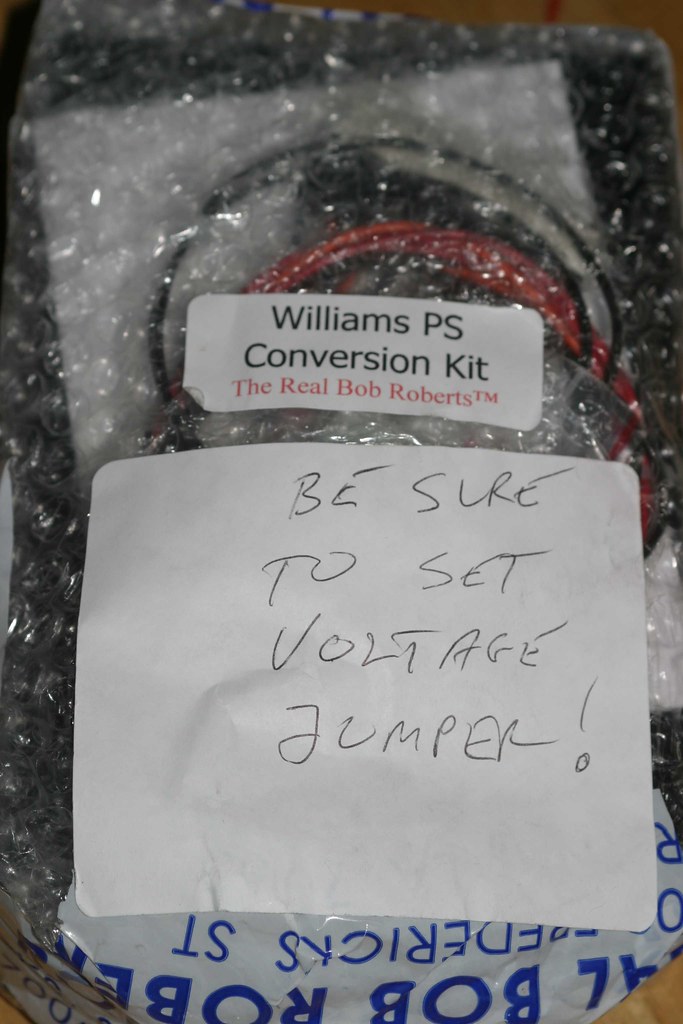
i've asked around a little bit and the easiest option to fix this and to find out where i stand seemed to be to install a switcher along with a williams power supply conversion kit. luckily at that point, colin "liquidx" from this forum was about to order stuff from bob roberts - so i happily jumped onboard! a little while later, a package arrived :)


inside, a lot of great arcade stuff, amongst that two power supply conversion kits (one with a switcher for my moon patrol)!


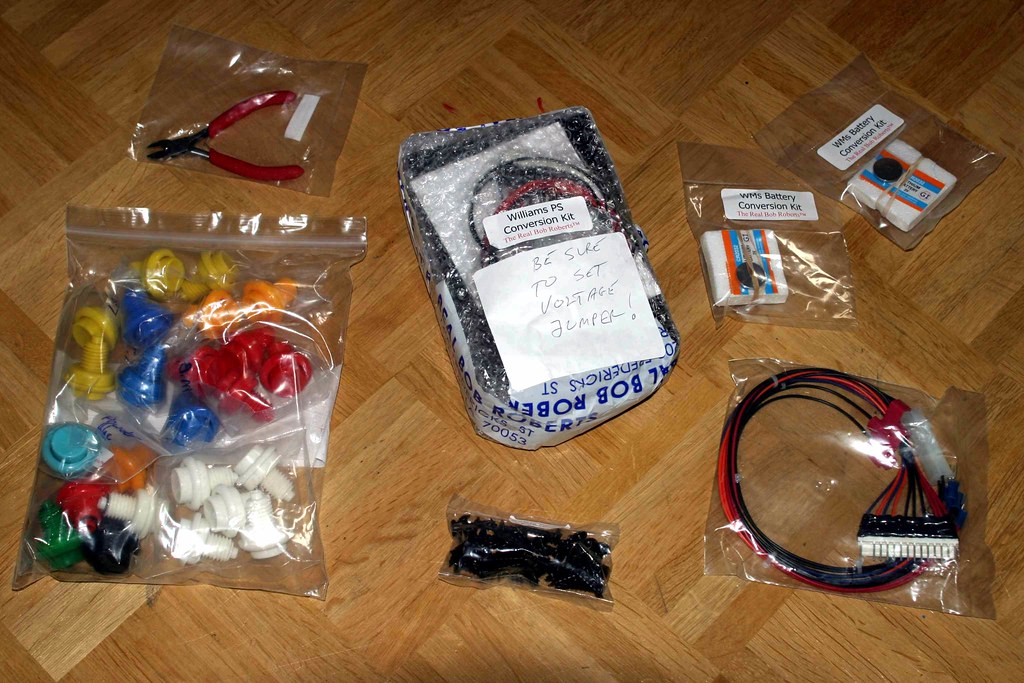
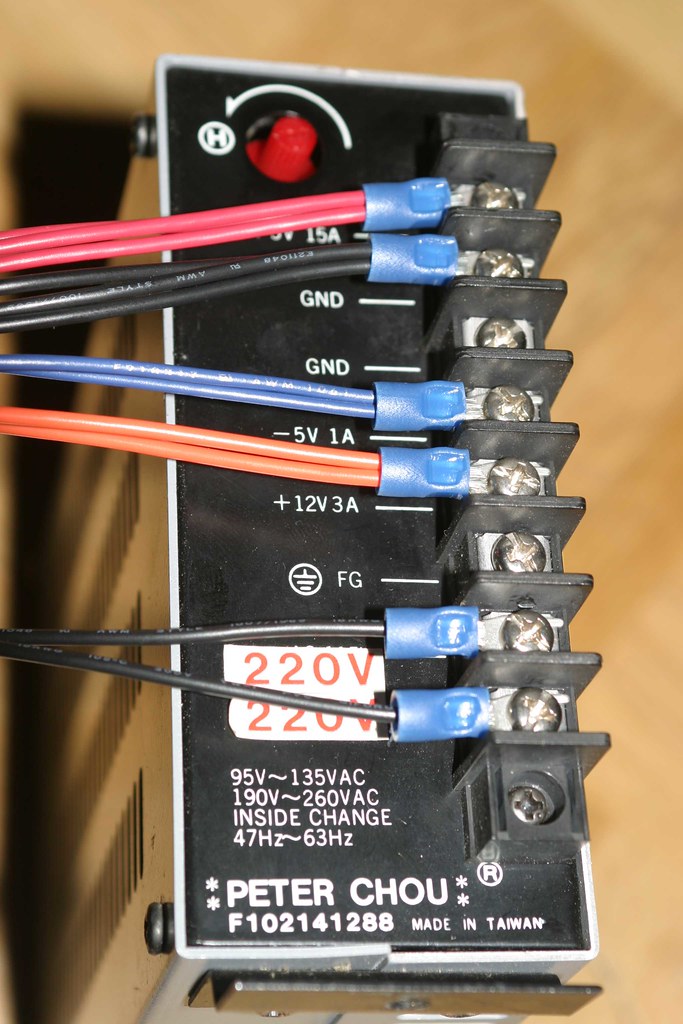
don't you just L-O-V-E bob roberts, he even put on this friendly reminder for us europeans to set the switcher to the correct voltage input!


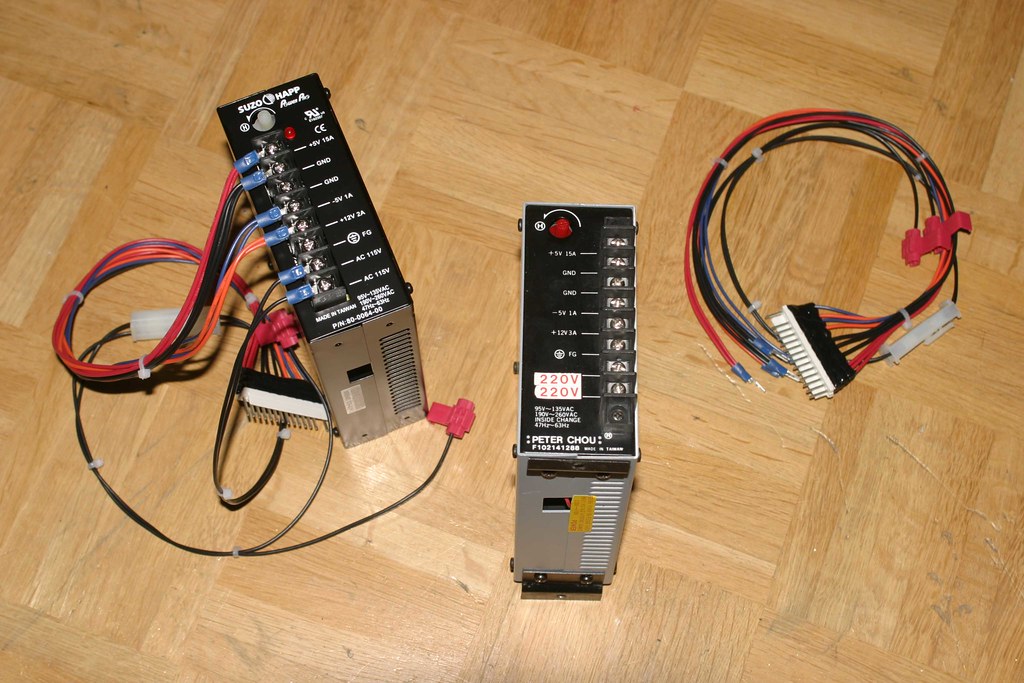
because i have a spare switcher at home, i only needed the wiring for it - the complete set will be used as a template!


everything's hooked up


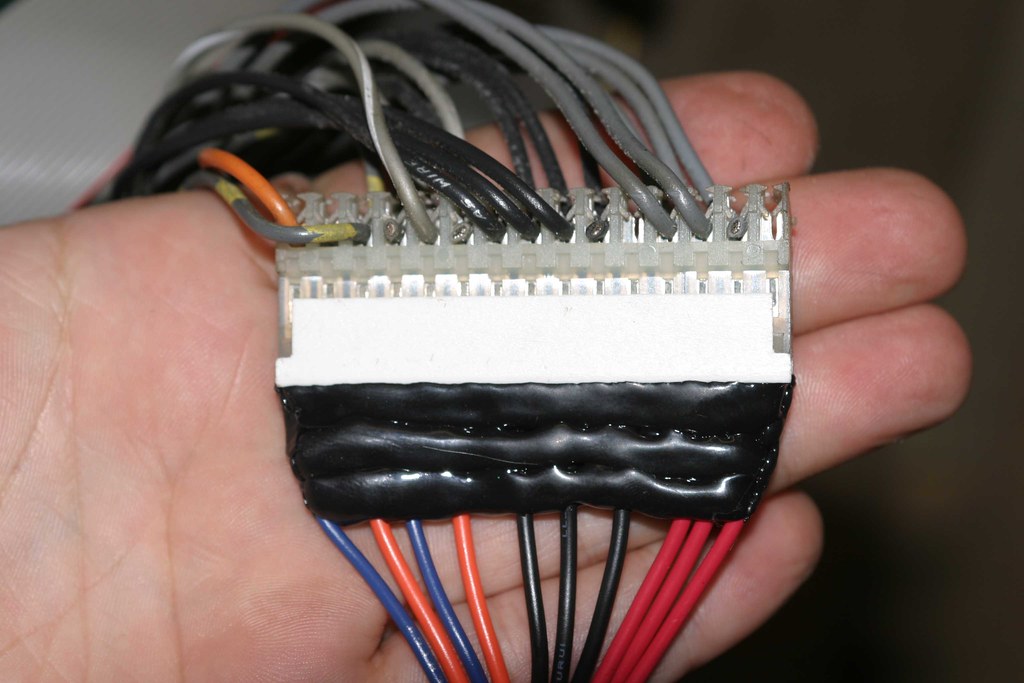
to install the switcher, you have to remove one connector from the original power supply ...


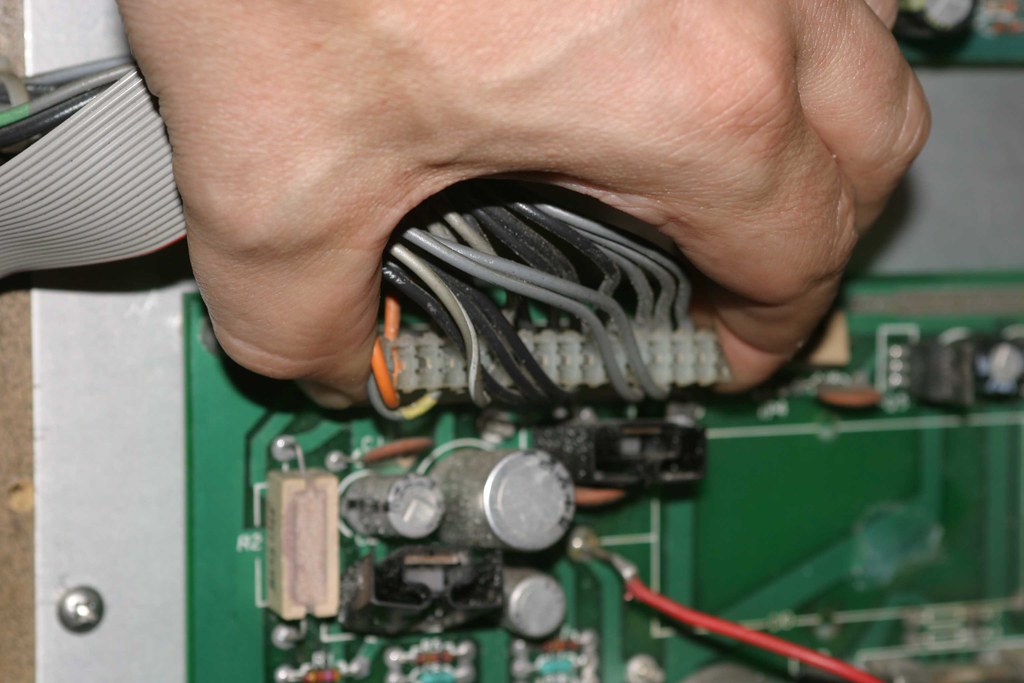
... and plug it into the connector from the switcher!


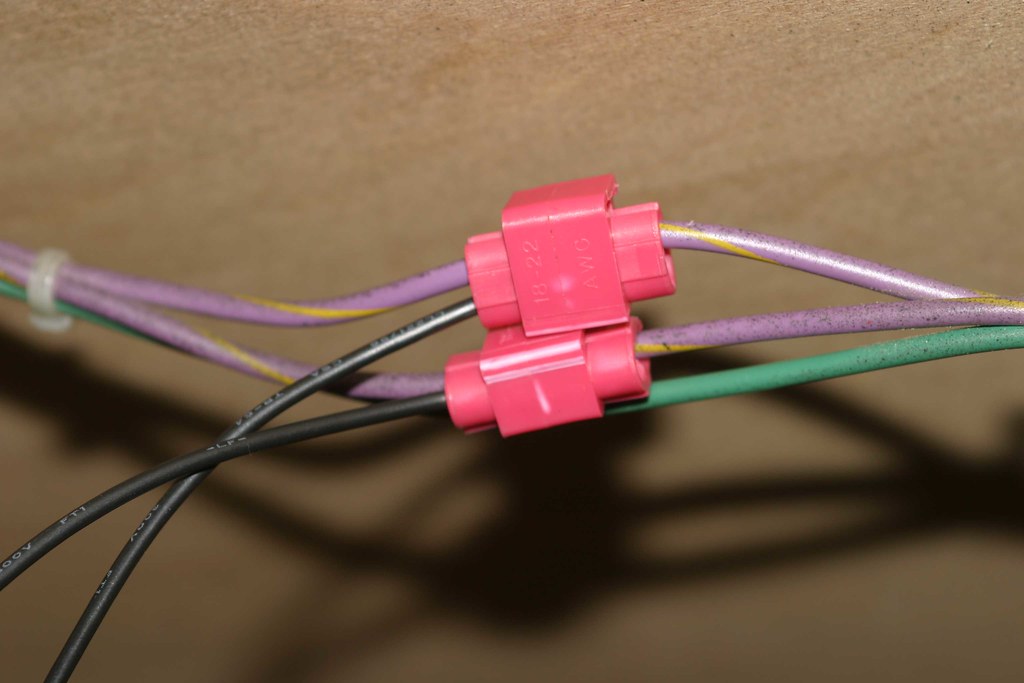
the switcher gets it power by splicing two wires into the AV monitor wiring


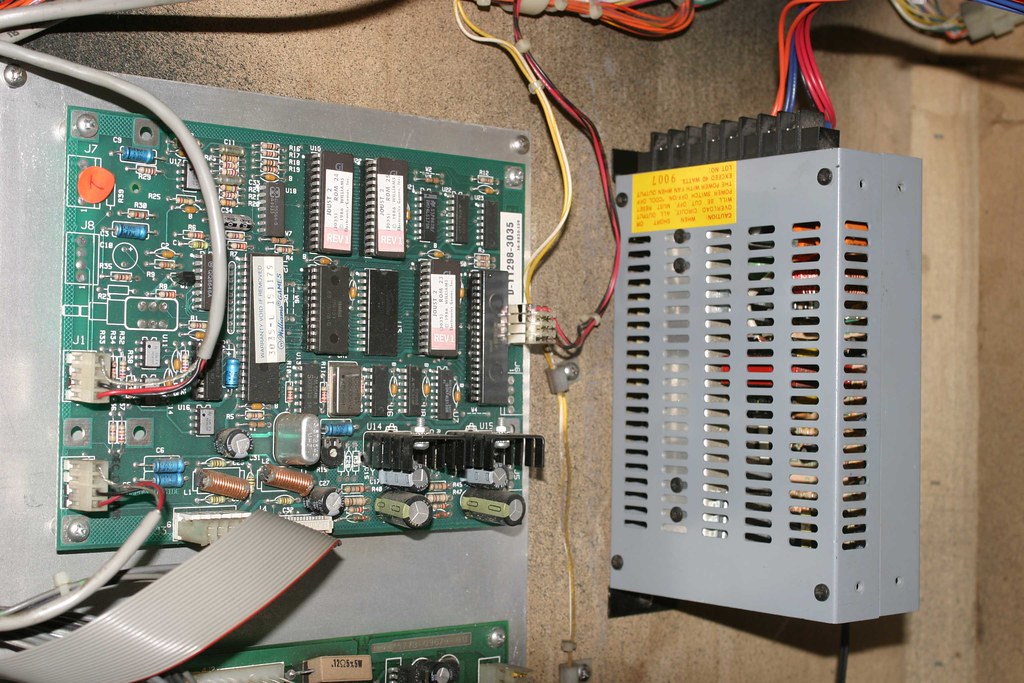
finally, a nice spot inside the cabinet for the switcher :)


last thing to do before testing the new power supply: removing the paper slip that andré put in when installing the battery replacement


ok - let's try this ...


all i get is a grey screen and an 8 (eight) on the pcb's LED display :'(


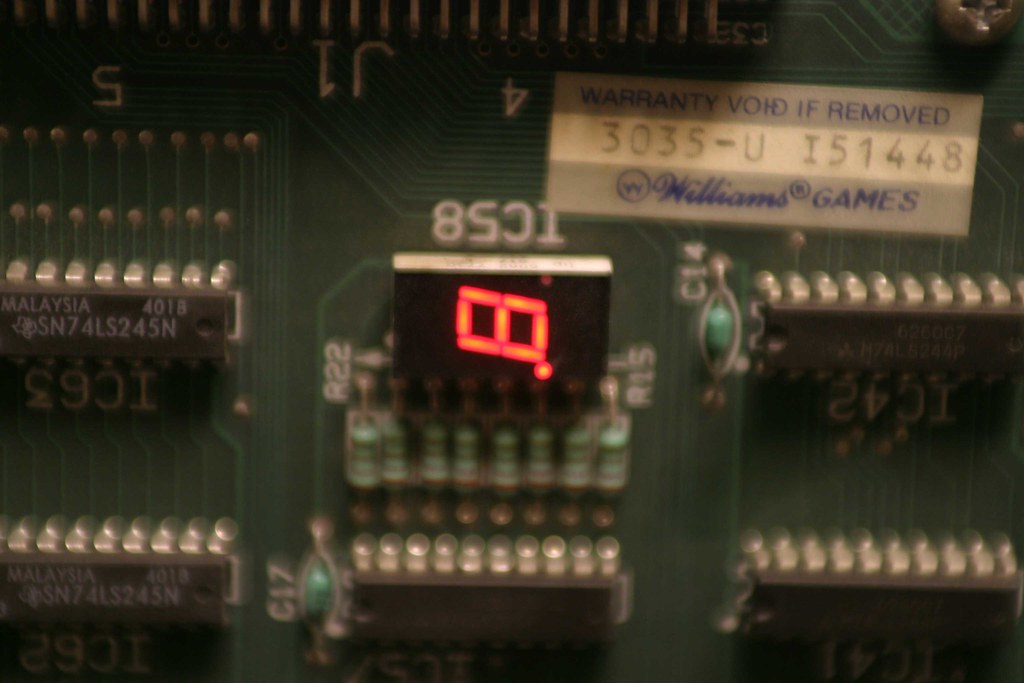
since i don't have a working multimeter atm, i can't measure anything, but regarding that 8, a guy from KLOV told me the following:

It is telling you it is DEAD! The LED should clear and if any of the POST tests ran and failed there would be a flashing error message. No clear = POST test not started.
Could be bad ROM. Could be dead CPU. Could be dead clock circuit. Or about a dozen other things that would stop the POST from starting.


DAMN!!! that's where i'm stuck right now. any suggestions?

oh, i've noticed two things:
- the monitor produces a loud hum when the switcher is installed, the humming is softer once the old power supply is used and the switcher is removed
- sometimes after turning on the game, there is a sound which sounds like a game start up sound, but since i don't know which sounds joust 2 produces at the start of the game, i can't tell for sure (and i don't have the j2 rom set in mame - perhaps someone could check that for me)

perhaps i should go with bruno's "burger time method". powering the switcher from an external source and only hooking up the +5V on the pcb. however, i need to find out first which wire on which of the zillion connectors is "responsible" for the +5V ...

to be continued ...

all i need is ... PONG - and a select few others: TOUCH ME, DRAGON'S LAIR, JOUST, ROBOTRON, MR DO, SAN FRANCISCO RUSH THE ROCK!!!

level42

  • ArcadeLifeStyler'
  • ***
  • Posts: 13555
  • Ridderkerk, arcade capital of Europe !
    • View Profile
    • Arcade 42
Re: [Restoration] The Joust Begins ...
« Reply #68 on: July 31, 2010, 07:57:46 PM »
But......does the +5V LED work now ?

Superully

  • ArcadeLifeStyler'
  • ***
  • Posts: 6300
  • Southern Part of Germany
    • View Profile
Re: [Restoration] The Joust Begins ...
« Reply #69 on: July 31, 2010, 08:23:45 PM »
But......does the +5V LED work now ?

nope - should it? isn't the switcher bypassing the original power supply?
all i need is ... PONG - and a select few others: TOUCH ME, DRAGON'S LAIR, JOUST, ROBOTRON, MR DO, SAN FRANCISCO RUSH THE ROCK!!!

level42

  • ArcadeLifeStyler'
  • ***
  • Posts: 13555
  • Ridderkerk, arcade capital of Europe !
    • View Profile
    • Arcade 42
Re: [Restoration] The Joust Begins ...
« Reply #70 on: July 31, 2010, 10:15:07 PM »
O I thought that LED was on the game PCB not on the original PSU....sorry...

Superully

  • ArcadeLifeStyler'
  • ***
  • Posts: 6300
  • Southern Part of Germany
    • View Profile
Re: [Restoration] The Joust Begins ...
« Reply #71 on: August 04, 2010, 11:04:02 AM »

UPDATE

i've posted my problem on the KLOV forum as well and ken "yellowdog" reminded me that i've probably made an error in the switcher setup - or better: an error in thinking. you know that i'm feeding 230 volts into the machine, BUT let me copy what andré wrote on that subject over at KLOV (hope you don't mind):

"ALL (yes ALL) the arcade machines I've seen here so far run 110V monitors (unless they hacked in a European SCART TV-set).
There was no reason for the manufacturers to switch to a different kind of power supply for the monitors. They only had to use a transformer that had primary windings for all world-wide available voltages, like Atari did. I know many games for the US market only had 110V primary connections, but any stuff that was originally exported to Europe did have a set-up like this. This way the manufacturers didn't have to switch monitor type for the Euro (or other parts of the world) markets."


this means that i'm only getting 110 / 120 volts from the monitor while the switcher is set to operate on 230 volts. since my multimeter is broken, i couldn't measure the voltages when i installed it.

so this morning i went to the home depot to get a cheap transitional multimeter until my fluke arrives from china ;). i paid €6,59 for it - that'll do the trick. ;D

back at my mother's place where the joust 2 is located, i set the switcher to run on 120 volts and got the following measures for AC :arrow:


here are the results of the german jury for +5V. was a little bit too high, turned it down to +5.01V later :arrow:


with those results in, i attached the connectors and turned on the machine ...


the EIGHT on the LED display is gone, but now i have a new number being displayed: ZERO - still no manual to find out what it means!  :(


the monitor picture changed from "plain simple grey" to the following  :arrow:


for those who don't know the boards, the black blocks represent the joust 2 roms on the pcb. could the ZERO and the monitor display want to tell me that there is a problem with the roms? perhaps i should remove, clean and reseat all of them ...

anyway, that's much better than the last results and one step closer to having this game up and running! i'll keep you posted, watch this space ...

all i need is ... PONG - and a select few others: TOUCH ME, DRAGON'S LAIR, JOUST, ROBOTRON, MR DO, SAN FRANCISCO RUSH THE ROCK!!!

Muerto

  • ArcadeLifeStyler'
  • ***
  • Posts: 3855
  • Denmark
    • View Profile
Re: [Restoration] The Joust Begins ...
« Reply #72 on: August 04, 2010, 01:30:16 PM »
have you tried asking om KLOV what the 0 means?

flip971

  • Member
  • **
  • Posts: 236
    • View Profile
    • Retrogame
Re: [Restoration] The Joust Begins ...
« Reply #73 on: August 04, 2010, 02:10:10 PM »
Ully: take a look on this link http://www.robotron-2084.co.uk/manualsjoust.html (manual and other things).

Superully

  • ArcadeLifeStyler'
  • ***
  • Posts: 6300
  • Southern Part of Germany
    • View Profile
Re: [Restoration] The Joust Begins ...
« Reply #74 on: August 04, 2010, 02:27:52 PM »
Ully: take a look on this link http://www.robotron-2084.co.uk/manualsjoust.html (manual and other things).

unfortunately no joust 2 manual there - and joust 1 uses different boards!

have you tried asking om KLOV what the 0 means?

sure, in my joust 2 thread, but the americans are probably just waking up - damn time difference
all i need is ... PONG - and a select few others: TOUCH ME, DRAGON'S LAIR, JOUST, ROBOTRON, MR DO, SAN FRANCISCO RUSH THE ROCK!!!