Author Topic: Space Invaders part II : WIP...  (Read 48220 times)

DarthNuno

  • Administrator
  • ArcadeLifeStyler'
  • *****
  • Posts: 11708
  • Singe's castle
    • View Profile
    • Dragon's Lair Fans / Arcade LifeStyle
Space Invaders part II : WIP...
« on: July 20, 2006, 10:45:44 AM »
First of all, have a look at the 'roadtrip' done to bring that game back to the Nuno' s lair  8)

 :arrow:  :arrow:  :arrow:  https://www.dragonslairfans.com/phpBB2/viewtopic.php?t=112


OK, let's see if it works...  :|

Well, there's no electric plug... cutted  :?  ... I put a new one... no power  :(

I've to open the cab to see the damages but I've no keys so  :arrow:


Argg... there is another one  :?   :arrow:


OK, I can open it now  :arrow:


...more than 26 years of dust  :?  :?  :?


Ok, I remove the set of 2 pcb.

The first pcb  :arrow:


The second pcb  :arrow:


... Wash Wash Wash ...  :roll:


... and it looks like new  :o


OK, the original tube looks dead... I'll replace it with a brand new one  8)
The powersupply is dead too...

If I can't fix the original PCB ( still not tested at this time ), I'll use this VGA to RGB converter...


... on this brand new TV  8)


Preliminary test with ...another game  :roll:  :wink: ( I have not the' SI part II' rom in my test computer  :wink:  )

The quality is similar to a true arcade monitor... normal, I'm using RGB signal / 15Khz with advance mame...


Ok, let's remove everything in order to clean up...


...StAy TUNeD...

Igorstellar

  • Jr. Member
  • *
  • Posts: 87
    • View Profile
    • http://www.italian-laser-games.it
Space Invaders part II : WIP...
« Reply #1 on: July 20, 2006, 03:53:22 PM »
WOW
I see a vectrex in the photos !!!!

compliments you have indeed of everything


 :D

DarthNuno

  • Administrator
  • ArcadeLifeStyler'
  • *****
  • Posts: 11708
  • Singe's castle
    • View Profile
    • Dragon's Lair Fans / Arcade LifeStyle
Space Invaders part II : WIP...
« Reply #2 on: July 20, 2006, 09:35:59 PM »
Hey Igor  :D  I never had the chance to own a vectex when I was young  :?
It's a revenge from the past  :twisted:  :twisted:  :twisted: I buy it for two games : Scramble & Star Hawk  8)  

OK, back to topic  :roll:  :wink:

As I need to test & repair other pcb, I decide to wire ... a Commodore 1084S  :o

On its back, a DB9 socket, and a GREAAATTT indication : RGB  :idea:  :idea:  :idea: Sounds great !!!

After a "1084s pinouts" query in google :


Perfect, let's make a quick interface VGA/DB15 to 1084S/DB9  :arrow:


I'm using the same test computer (AdvanceMame / old ATI Rage card / Dos), so once again here's DEFENDER !!!  :P  :P  :P


Yeah, it's working great  :P Now I'm sure I will be able to test real pcb on that Commodre monitor  :idea:  :idea:  :idea:  :wink:

OK, this is not the DEFENDER topic, so forget it here, and go back to SPACE INVADERS Part II work in progress...  :lol:  :roll:

As i said previously, the original power supply and the monitor are...dead  :?

The easy path would be to put a small computer with AdvanceMame to emulate the game but ...

...but the original "Space Invaders part II" pcb after my washing process looks very clean...  :o

I NEED to test that true pcb before thinking about emulation  :x

 :arrow:  Ok, so let's go for PCB pinouts :


SO I put a brand new power supply and wire directly to the original harness  :arrow:


 :idea: I'm using the *well know* wires Red, Green, Blue, Sync & Ground directly to the Commodore 1084S monitor  :idea:

I power on the pcb and ...


...


...


...


 :shock:  :shock:  :shock:  Ops  :?  :?  :?


... mmmhhhwellllll, let's double check the connection...  :?  :?  :?

Ok, I see a mistake... as written on the Space Invaders part II pinouts : The Power-On-Rest (top board, pin 10) MUST be tied on earth or the game will not run !!!
Ok... fixed now...


... I power on and ....


YEAH BABY YEAH !!!


Greaattttt... the game boots now... ok, just an other mistake in the wires for the monitor : wrong colors on screen... easy fix...


...and now :


It looks beautifull  :P  :P  :P


 :P  :P  :P

Now, see the 'magical moment' on this "teaser video" here  :arrow:  https://www.dragonslairfans.com/sip2/pcb-ok.wmv

StAy TuNeD...  :roll:  :wink:

arcadefever

  • Member
  • **
  • Posts: 232
    • View Profile
    • http://www.arcadefever.net
Space Invaders part II : WIP...
« Reply #3 on: July 20, 2006, 10:51:44 PM »
GREAT STUFF BRUNO !!!!!!!

this is such a good game,

but one thing i've to tell you, if you ever have a chance to own the stand up arcade, buy it !!!!!!!!!! this is nothing compare to the cocktail.

you see the stand up has a black light with the moon station, the monitor is on the bottom of the cab and the image is reflected on a miror ...

when you play the game, the invaders look like they are floating on top of the moon base, and the black light make the deco glow...

this game is the oldest in my game room and the one that everybody is talking about...

take a look at theese pictures:
http://www.arcadefever.net/RESTOFMYCOLLECTION/invadersII/invaders.html

you cant see the drawing on the moon , coz of the camera.
but if i've time i will do a little video so you can see what i'm talking about....

anyway, great that your coktail is working now  :D

DarthNuno

  • Administrator
  • ArcadeLifeStyler'
  • *****
  • Posts: 11708
  • Singe's castle
    • View Profile
    • Dragon's Lair Fans / Arcade LifeStyle
Space Invaders part II : WIP...
« Reply #4 on: July 21, 2006, 06:31:21 PM »
Wooow Arcadefever  :shock:

Your Space Invaders Deluxe looks terrific  :o  :o  :o

Even if you don't plug the game, the cab' looks so nice  :P  I admit it must be the masterpiece of your gameroom, for sure  8)

I'm my next trip to US, I must  definitevely have a stop at your incredible gameroom  :roll:  :wink:

...by the way, I like your 'PCB Test bench'  :o with the 5" monitor  :P I'll build something similar for the same reason than you  8)  Do you have a vert/horz size pot for it ?

OK, back to topic now  :lol:

Well, it's time to test the PCB on the final output device... I mean the brand new TV that I bought two days ago (85€), especially for that cab'   :roll:  8)

...I'm preparing the connection PCB -> EURO  SCART :


... power on...


The picture quality is amazing  :P  Remember, I'm sending to the tv the true PCB image signal RGB @ 15 Khz  8)
In europe, new  15 khz arcade monitor are so expensive (near 400€ !!!), so I prefere to buy brand new TV, for the SAME image quality/feeling result. Ok the tube need to be disassembled, and It need some fixation tricks... but it's ok for me ;-)


The size on screen is perfect. It fits hopefully all the tube area  :lol: The bad thing about the TV is that I haven't all geometry pot' to set the game image correctly ...


...I love the title screen  :P  :P  :P   :wink:


Ok, the bad thing now...

The game is perfectly working, but some sounds on the game doesn't work. The pcb include 7 different sound effect. For each sound there is a pot to set the volume.


InstantArcade (http://www.instantarcade.com, thanks to him :) ) gives me a possible soluttion for that problem : change the bad op amp for each missing sound.

I've orderded 8 new LM3900N (7 for the 7 different sounds + 1 for the master volume).

So, StAy TuNeD...  8)  8)  8)

DarthNuno

  • Administrator
  • ArcadeLifeStyler'
  • *****
  • Posts: 11708
  • Singe's castle
    • View Profile
    • Dragon's Lair Fans / Arcade LifeStyle
Space Invaders part II : WIP...
« Reply #5 on: July 27, 2006, 09:47:36 PM »
I replace the old fan with a new one :


Remember the brand new TV ?


This is the brand you TV now :


...sorry  :lol:  This is the brand new TV  :roll:  :wink:  :


I can resist to give a try...  :P  :P  :P


Yeah Baby Yeah  :o  :twisted:

Except the sound problem (to fix soon, once I'll get the new chips), it's fully playable .

:)

...Stay around  :roll:  :wink:

arcadefever

  • Member
  • **
  • Posts: 232
    • View Profile
    • http://www.arcadefever.net
Space Invaders part II : WIP...
« Reply #6 on: July 27, 2006, 10:54:06 PM »
VERY NICE !!!!!!!!!!!!

DarthNuno

  • Administrator
  • ArcadeLifeStyler'
  • *****
  • Posts: 11708
  • Singe's castle
    • View Profile
    • Dragon's Lair Fans / Arcade LifeStyle
Space Invaders part II : WIP...
« Reply #7 on: August 07, 2006, 10:59:07 PM »
OK, time to remove once again the pcb... in order to fix the missing sounds problem  :arrow:


Here is a view of the 'amplifier' chip : the LM3900N. The pcb has 8 chips like that :


Here's now the 8 brand new LM3900N chips, thank ebay  :roll:  :wink:


...the soldier side...


From what I can hear, there are two missing sounds :

- VR2 : laser base when firing

- VR3 : laser base when destroyed

Let's remove the 2 chips/amplifier for these two sounds, and replace them with the new one :


Well, not easy to remove them  :?

The other side :


YEEeeess  :D  the fire sound is now fine  :lol:  but I still don't have the 'base destroyed' sound  :?  Maybe a problem with the pot' ?!

Anyway, it's fully playable like that, the most important missing sound is present (fire sound) now . I'll investigate l8ter for that...

DarthNuno

  • Administrator
  • ArcadeLifeStyler'
  • *****
  • Posts: 11708
  • Singe's castle
    • View Profile
    • Dragon's Lair Fans / Arcade LifeStyle
Space Invaders part II : WIP...
« Reply #8 on: August 13, 2006, 11:39:18 AM »
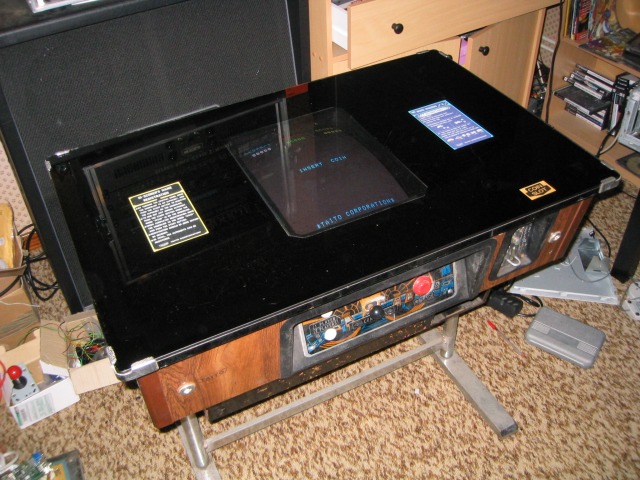
OK, now all the electronics part are done.

Let's repair the top glass... first of all, I remove it  :arrow:


...inside the glass :


Ok, as you can see on the next picture, the black paint on the border is in very bad state :?


...in fact, is back painted...look the back side :


Well, I try by myself to paint on the glass, but it's difficult : It need a special paint for glass which I can't find  :evil:  Here is a try  :?  :


So I go to a glass specialist with my Space Invaders glass, and ask him if can do the job...

He says ok but for at least 230€  :shock:  :shock:  :shock:

...I say him "bye bye"  8)  8)  8)

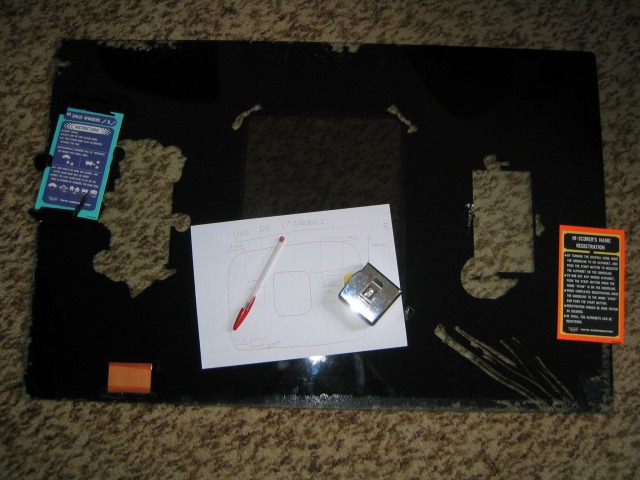
Before removing all the remaing paint, I take some notes  :idea:


...start to remove the paint... easy  :)


...almost naked ...


I use "acetone" to remove the rest...


Now it's 100% clean :


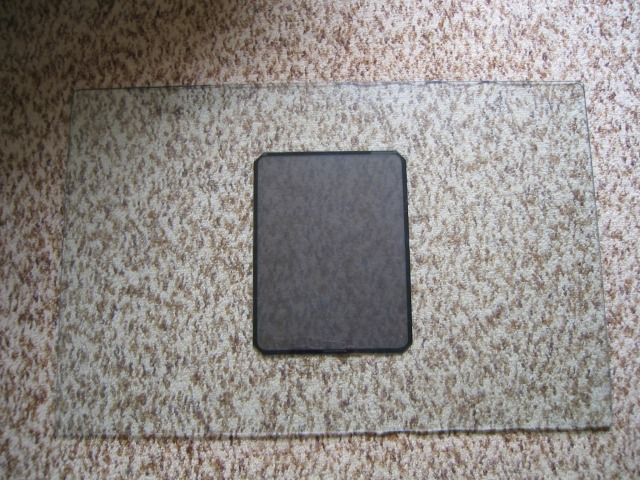
Ok, it's clean but what do do now ??? I still haven't a paint for glass... so...

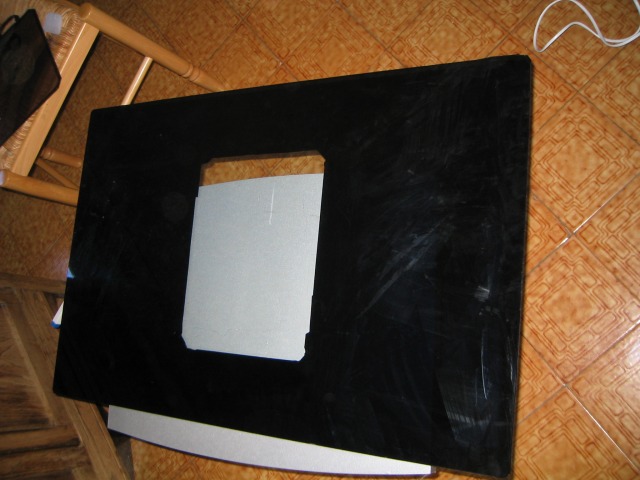
 :idea:  :idea:  :idea:  I'll use black tint film  :idea:  :idea:  :idea:

Yes, the same used in car tuning  :P

I've found one with ony 6% of light transmission, opaque from outside, that exaclty what I need  :o


Not an easy task...  :?


Ok, for the first attempt, is good, but not perfect (still some small air bubble)  :? I'm sure I'll do the perfect job next time  8)  ... but it's ok for me like that now :roll:  :wink:


I have to cut for placing original intruction sheets... at the same place than the original location (remember my notes). I use a pattern  sheet :


...cut & remove...


...and fix the instruction sheets :


Et voila  :o  :


:arrow:  :arrow:  :arrow:  
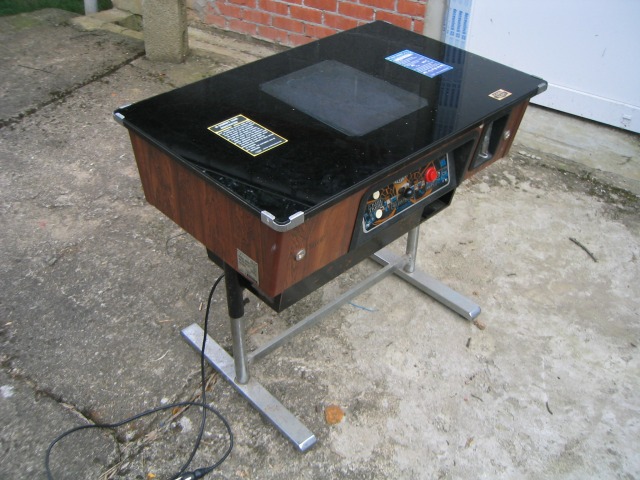
ready to leave my house :


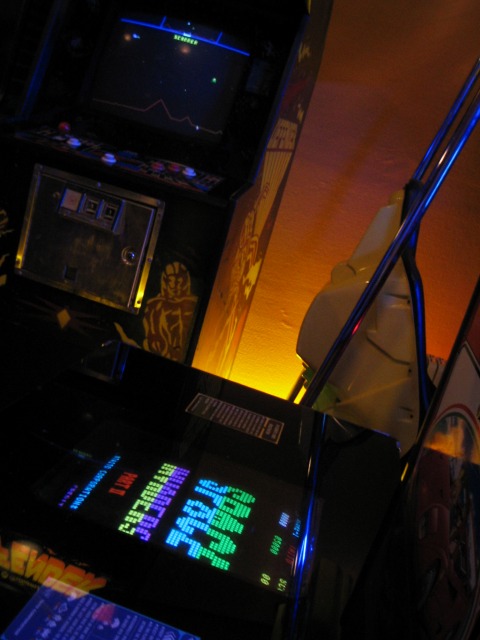
...and entering the Nuno's Lair  :lol:  :lol:  :lol:


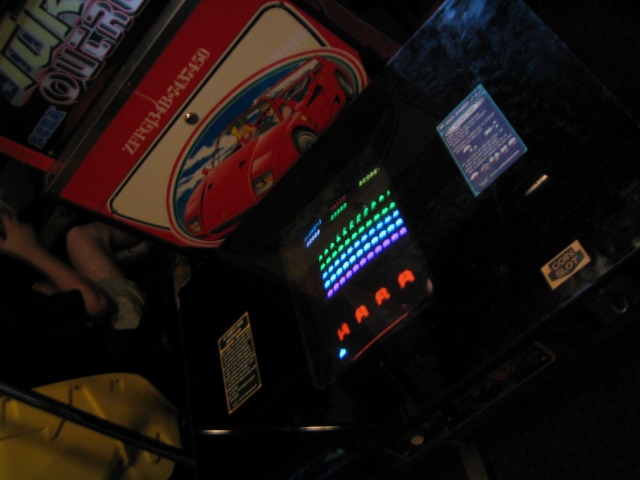
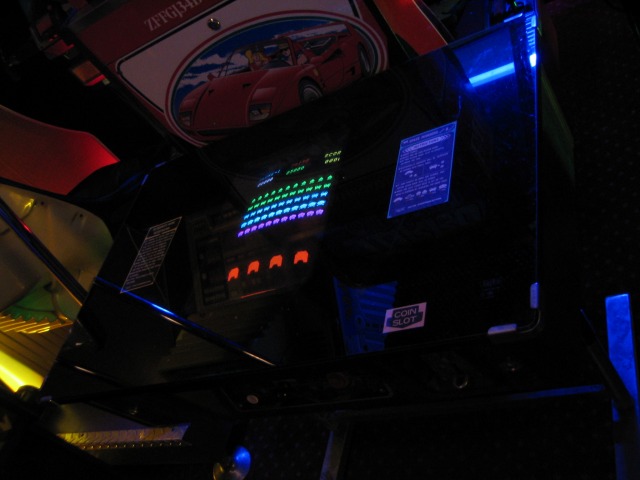
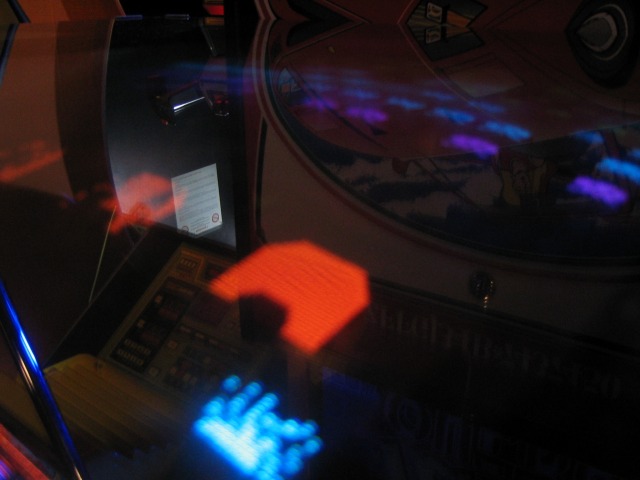
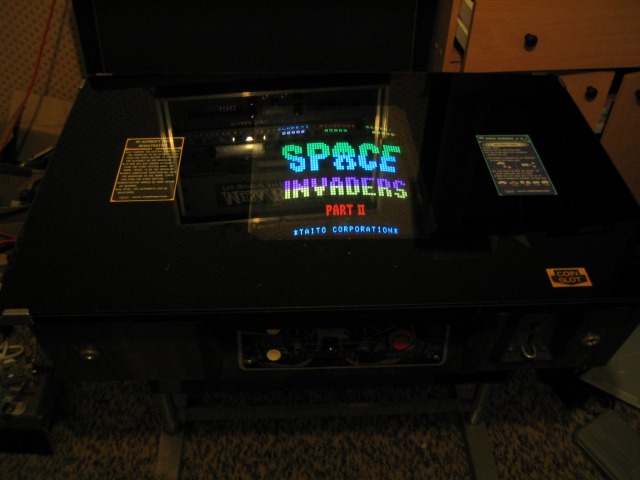
Now, the Space Invaders part II pictures  :lol:  :lol:  :lol:  :


 :P  :P  :P

arcadefever

  • Member
  • **
  • Posts: 232
    • View Profile
    • http://www.arcadefever.net
Space Invaders part II : WIP...
« Reply #9 on: August 17, 2006, 01:49:03 AM »
8)  THAT IS SWEEEEEEEEEEEEEEEEEEEEETTTTTT

in working order...

just one thing, that glass like that with no black on it...
what do you thing about leaving it like that and see the guts of the cab ? maybe have one or 2 small neon lights  :idea:

i did that to my bagman, you can see the pcb....
did you try before painting it black ?

good stuff, that cocktail look great !!!!
also good catch on the chips sound  :o

Giddygoon

  • Member
  • **
  • Posts: 124
    • View Profile
Re: Space Invaders part II : WIP...
« Reply #10 on: January 31, 2008, 01:21:50 AM »
Hi Nuno!

Giddy here! Thanks for the feedback on those buttons, the ones you put on you Galaga, anyway I starting work on my Moon Cresta cocktail, and I have everything, but I was wondering if you could give a little more detail on how you placed that TV replacement in the cocktail cab, I have the cab (empty) 1 TV, 1 pc, the mounting brackets, I don't have the 13" Bezel surround and I don’t have the glass yet!, Now it just occurred to me that I don't have a cradle to hold the TV board, like when I transferred a TV into my Dragons lair machine, I had the original cradle to hold the TV, did you have it for you Space invaders II????? What shall I do???? /

If you could send me some detailed pictures of how you did it on yours, I know there are some on here, but just a few more would be great.

Giddygoon ( more Outrun stuff soon )


DarthNuno

  • Administrator
  • ArcadeLifeStyler'
  • *****
  • Posts: 11708
  • Singe's castle
    • View Profile
    • Dragon's Lair Fans / Arcade LifeStyle
Re: Space Invaders part II : WIP...
« Reply #11 on: February 02, 2008, 06:04:20 PM »
Hi Giddy,

One question : do you have the original monitor brackets, like this ?  :arrow:


If yes, just take off the TV tube with his frame and fix it to these brackets.
If not, you'll have to build two brackets first  ;)


gnokketto

  • Jr. Member
  • *
  • Posts: 18
    • View Profile
Re: Space Invaders part II : WIP...
« Reply #12 on: November 30, 2010, 09:34:14 PM »
Hi,
I have buy a Cocktail Cab, but Unfortunately, it lacks the inside power metal tab that you have replaced with an external standard Jamma, is that correct?
you had to cut the wiring harness, the wiring connections would be made?
Thanks

Vnera

  • Member
  • **
  • Posts: 316
    • View Profile
Re: Space Invaders part II : WIP...
« Reply #13 on: November 30, 2010, 09:48:52 PM »
I Also have a space invaders part 2 i think whit a working monitor but no pcb and glass:( also its a japanees version.
Do you think its worte restoring? I already have the invaders cabinet and my room is very limited.

gnokketto

  • Jr. Member
  • *
  • Posts: 18
    • View Profile
Re: Space Invaders part II : WIP...
« Reply #14 on: December 03, 2010, 09:13:18 AM »
Hi,
I have buy a Cocktail Cab, but Unfortunately, it lacks the inside power metal tab that you have replaced with an external standard Jamma, is that correct?
you had to cut the wiring harness, the wiring connections would be made?
Thanks


Any news???  :roll: