Author Topic: Restoration - Donkey Kong cabinet  (Read 77889 times)

JG

  • Jr. Member
  • *
  • Posts: 61
    • View Profile
Re: Restoration - Donkey Kong cabinet
« Reply #30 on: November 18, 2009, 12:07:21 PM »
I prefare the blue as well.. mostly because they where blue around here when we had them around. Guess it depends on which color you grew up with.

Is it just the color that are different or are there more things that are not the same on the red and blues?

and why are there red and blues? (or should I already know this and just made myself a n00b? *smile*)


ckong

  • ArcadeLifeStyler'
  • ***
  • Posts: 3177
  • The Netherlands
    • View Profile
Re: Restoration - Donkey Kong cabinet
« Reply #31 on: November 18, 2009, 12:36:11 PM »
I believe the story behind the red DK is this: In 1980 Nintendo of America brought Radarscope out, which was housed in the now well known red Nintendo cabinet. However, people (in the USA) didn't like the game at all and NoA asked Nintendo Japan to help them out with a new game, which was necessary to rescue the coin-up division of NoA. So Nintendo Japan did, it developed the famous game Donkey Kong. Nintendo immediately made a conversion kit of this game (PCB, marquee, side art, etc) to convert the many obsolete red radarscope cabs to Donkey Kong cabs. That's why there are red DK cabs.

Later on, when completely new cabs were needed to facilitate the demand for DK, someone at Nintendo decided to make the color for the new cabs blue. No one knows why this decision was made, but I'm happy with it because I like the blue better.

By the way, I did play Radarscope last week in Mame for the first time, it's not a bad game at all. It reminds me a bit of the Colecovision hit Beamrider.
« Last Edit: November 18, 2009, 12:41:04 PM by ckong »

level42

  • ArcadeLifeStyler'
  • ***
  • Posts: 13555
  • Ridderkerk, arcade capital of Europe !
    • View Profile
    • Arcade 42
Re: Restoration - Donkey Kong cabinet
« Reply #32 on: November 18, 2009, 08:11:51 PM »
Think we discussed that story in the car didn't we  ;D ;D

The initial mission for Shigeru Miyamoto was actually improving RS so it would become a hit. Instead he came up with DK.
It's a shame they left the speech out of DK because it _was_ featured on RS (but it seems not all games have it).

There's a really interesting site about RS cabs right here:
http://www.ostermayer.ch/index.html

You can find the RS speech samples (and other sounds) there too.

Some extra info: RS and DK cabs were build in Japan and in the US. There are a few differences like the wood used etc. Generally the Japanese built cabs are regarded to be of a bit higher quality.

My RS/MB cab was built in Japan and meant for the UK market (shows on the serial plate).

I really am inspired by your way of painting the sides Ckong ! I hope to copy it next spring !

ataritoobin

  • Member
  • **
  • Posts: 410
    • View Profile
Re: Restoration - Donkey Kong cabinet
« Reply #33 on: November 22, 2009, 07:31:02 AM »
Wow it's looking great!  :o

It's funny because the artwork definitely goes well with the red cabs, but works well in the blue as well.  The side art seems to have more colors that compliment the blue cab compared to the marque/bezel/CPO.

Here is a stock photo of a Japanese DK.  The Japanese flyer has this pic in B/W and the U.S. flyer has a tiny photo of it in color (blue cab).  Also note DK's white shadow on the girder on the side art  :lol:  I do wish Nintendo was better about answering historical questions through their websites  :'(


Now, does anybody know for sure what color cab "Sky Skipper" was in?  ???


ckong

  • ArcadeLifeStyler'
  • ***
  • Posts: 3177
  • The Netherlands
    • View Profile
Re: Restoration - Donkey Kong cabinet
« Reply #34 on: November 24, 2009, 01:36:56 PM »
Great news!! My method of painting the sidepanels while keeping the side artwork on (masked) works.

I know that at least one of you is very interested in this method, so here is how I did it (part 2, see above for the first part, the masking).

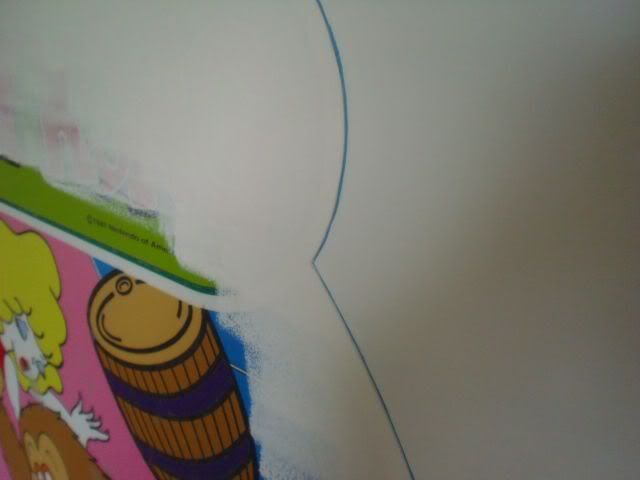
After I masked the sideart, I applied one layer of primer (Histor supergrondverf). When it was dry, I noticed that it kind of ‘creeped up’ against the edges of the artwork. Because I was worried that this would effect the end result (no nice tight edges of the artwork), I took a very common and easy to guide tool to just peel off about 0.5 mm of primer around the edges of the artwork. The tool? My fingernails, sharp, but not too sharp to accidentally damage the artwork.


After that I sanded the sidepanel with sandpaper (400 correl) and water until it was as smooth as a baby’s bottom. Never sanded with water before, but boy, you get great results.

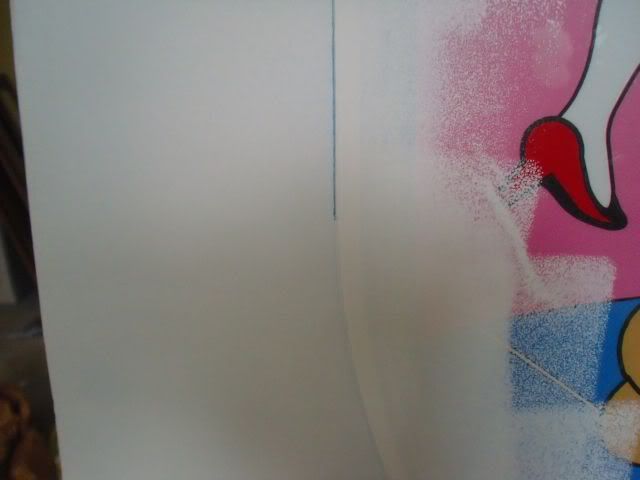
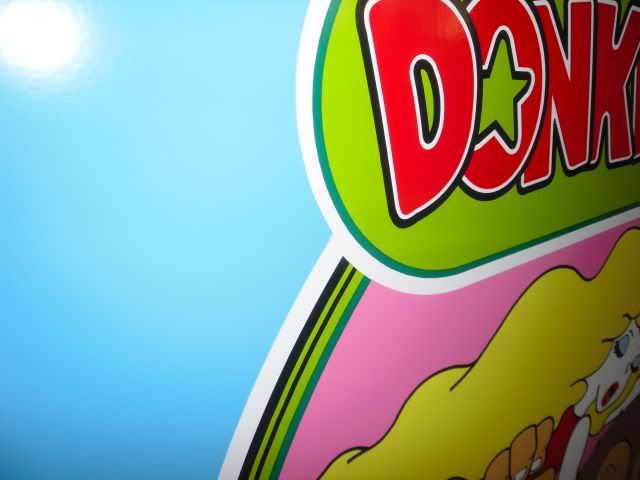
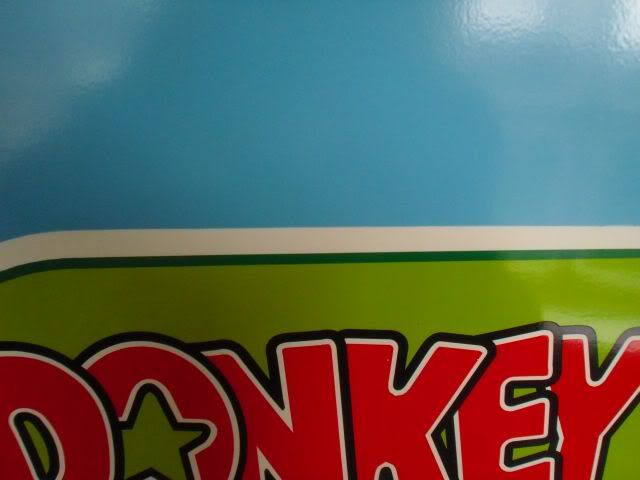
Then I applied the first coat of Nintendo blue. When it was dry I sanded it again, carefully. Then I applied a second coat. Just look how tight the paint is against the artwork (the white line is only there on the photo).


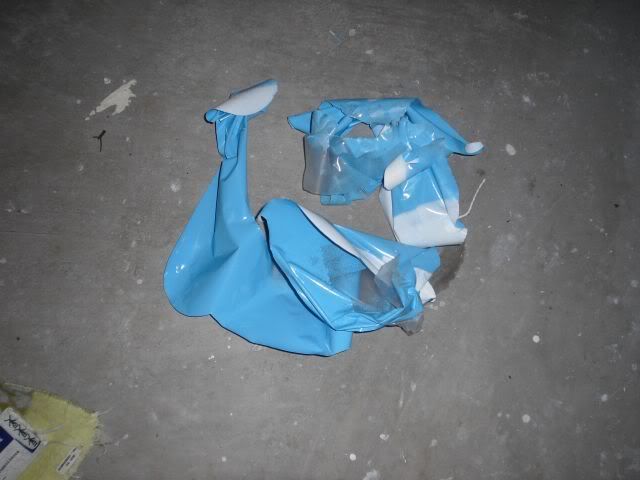
Yesterday evening the moment of truth was there. I couldn’t wait any longer, the artwork had to be unmasked again.


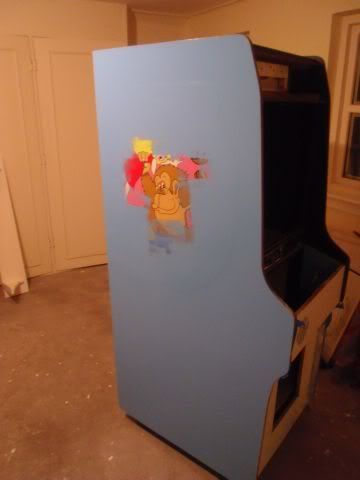
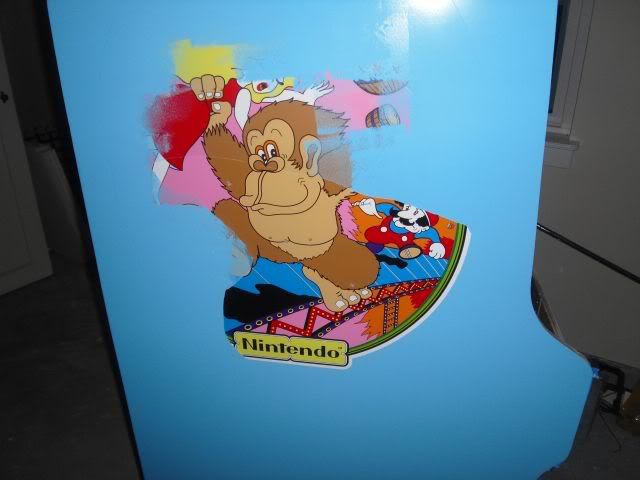
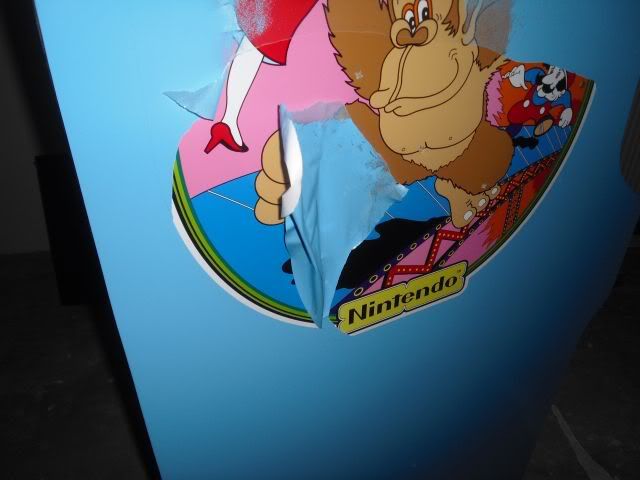
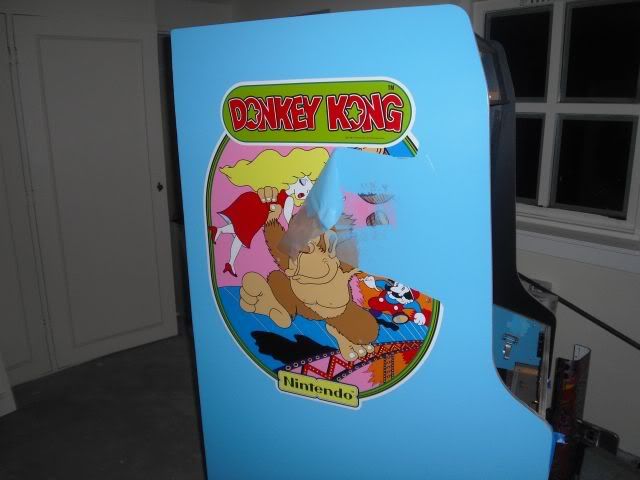
And here is the endresult. It’s beyond my expectation, you can’t see that the artwork never left the building. Uh, the cab I mean.There was no paint leakage on the artwork whatsoever, only a few spots of glue remains from the masking vinyl on the artwork, but this was very easy to remove (be careful with sticker remover, it also removes paint). And although the color of the sidepanel looks a bit off on the photos, it is in fact spot on (inside the cab there is an original blue part wjich I used to match the color).


I don’t know if anybody has done it before, but if you are patient and careful, and use the right tools,  you can do it. Now I can start working on the other sidepanel (I already applied the first layer of blue paint this morning). Can you imagine how happy I am!  ;D ;D

scr33n

  • ArcadeLifeStyler'
  • ***
  • Posts: 1674
    • View Profile
Re: Restoration - Donkey Kong cabinet
« Reply #35 on: November 24, 2009, 01:56:19 PM »
 :shock: :shock: SUPER NICE !!!!  :spaceace: :spaceace:

 :-* :-*
PROJECTS FROM SCRATCH:

Galaga - PacMan - Donkey Kong Red Cab - Track & Field Upright - Tempest - Burgertime - Gyruss - Defender - Track & Field Cocktail - Robotron 2084

RESTORATIONS:

Q*bert - Timber

Ronald Reagan

  • ArcadeLifeStyler'
  • ***
  • Posts: 818
    • View Profile
Re: Restoration - Donkey Kong cabinet
« Reply #36 on: November 24, 2009, 01:59:57 PM »
looks fresh!! :ghost:
An Error Has Occurred!
The last posting from your IP was less than 40 seconds ago. Please try again later.

DarthNuno

  • Administrator
  • ArcadeLifeStyler'
  • *****
  • Posts: 11708
  • Singe's castle
    • View Profile
    • Dragon's Lair Fans / Arcade LifeStyle
Re: Restoration - Donkey Kong cabinet
« Reply #37 on: November 24, 2009, 02:10:34 PM »
Nice technique... never seen it before... clean job... well done  :)

joeks

  • ArcadeLifeStyler'
  • ***
  • Posts: 536
    • View Profile
    • Arcade Art Repro
Re: Restoration - Donkey Kong cabinet
« Reply #38 on: November 24, 2009, 04:11:14 PM »
That is AWESOME! :)
Color seems spot on and the masking, you can't even see it was masked in the first place! Looks perfect, congrats.

Makes Arcade Artwork Reproductions at www.arcadeartrepro.com

Etienne MacGyver

  • ArcadeLifeStyler'
  • ***
  • Posts: 7611
  • The Netherlands
    • View Profile
Re: Restoration - Donkey Kong cabinet
« Reply #39 on: November 24, 2009, 06:18:13 PM »
very well done !, it looks like you put new sidearts  ;)

ckong

  • ArcadeLifeStyler'
  • ***
  • Posts: 3177
  • The Netherlands
    • View Profile
Re: Restoration - Donkey Kong cabinet
« Reply #40 on: November 24, 2009, 06:25:26 PM »
very well done !, it looks like you put new sidearts  ;)

But I didn't  ;D ;D

Superully

  • ArcadeLifeStyler'
  • ***
  • Posts: 6300
  • Southern Part of Germany
    • View Profile
Re: Restoration - Donkey Kong cabinet
« Reply #41 on: November 24, 2009, 06:58:37 PM »
absolutely amazing job, it looks VERY MINTY. congrats  :spaceace:
all i need is ... PONG - and a select few others: TOUCH ME, DRAGON'S LAIR, JOUST, ROBOTRON, MR DO, SAN FRANCISCO RUSH THE ROCK!!!

level42

  • ArcadeLifeStyler'
  • ***
  • Posts: 13555
  • Ridderkerk, arcade capital of Europe !
    • View Profile
    • Arcade 42
Re: Restoration - Donkey Kong cabinet
« Reply #42 on: November 24, 2009, 07:45:55 PM »
Great to see that my idea actually works  ;D ;D ;D ;D

I had exactly the same idea for my Mario Bros, but never got to do it yet...I'm shaking and turning the paint regularly to keep it OK though :D

Forgive my ignorance, is that rolled ?  It looks sweet.

When do you pick up my MB to paint that one ?
 ;D ;D ;D ;D ;) ;) ;) ;)


Superully

  • ArcadeLifeStyler'
  • ***
  • Posts: 6300
  • Southern Part of Germany
    • View Profile
Re: Restoration - Donkey Kong cabinet
« Reply #43 on: November 24, 2009, 07:51:36 PM »
I had exactly the same idea for my Mario Bros, but never got to do it yet...I'm shaking and turning the paint regularly to keep it OK though :D

i'm a witness for that? andré did this on saturday right before playing the game. the paint can is stored behind the coin door  ;)

Forgive my ignorance, is that rolled ?  It looks sweet.

yes, looks like it was rolled (check out the marks it left on the masked off sideart). on the picture it looks damn flat, is there any strucutre in reality?
all i need is ... PONG - and a select few others: TOUCH ME, DRAGON'S LAIR, JOUST, ROBOTRON, MR DO, SAN FRANCISCO RUSH THE ROCK!!!

ckong

  • ArcadeLifeStyler'
  • ***
  • Posts: 3177
  • The Netherlands
    • View Profile
Re: Restoration - Donkey Kong cabinet
« Reply #44 on: November 24, 2009, 07:53:11 PM »

Forgive my ignorance, is that rolled ?  It looks sweet.


Yes. it is rolled. I used paint based on terpetine, both the blue and the primer, and you need rollers which are suitable for terpetine based paint.

Nice to see that we both have the same ideas  ;D ;D ;D

I will arange something to pick up your Mario bros., as soon as I have place to store my then acquired Star Wars sitdown cab also.  ;)

.... is there any strucutre in reality?

No. I did add an extra bit of terpetine to the paint though with the second layer because I found the paint to be a bit thick. It smoothens out very nice.
« Last Edit: November 24, 2009, 07:56:30 PM by ckong »