Author Topic: From Truxton II (to) Pleiads  (Read 136162 times)

Superully

  • ArcadeLifeStyler'
  • ***
  • Posts: 6300
  • Southern Part of Germany
    • View Profile
Re: From Truxton II (to) Pleiads
« Reply #60 on: March 05, 2009, 11:43:29 PM »
NOBODY???  :shock: :( :'(
all i need is ... PONG - and a select few others: TOUCH ME, DRAGON'S LAIR, JOUST, ROBOTRON, MR DO, SAN FRANCISCO RUSH THE ROCK!!!

DarthNuno

  • Administrator
  • ArcadeLifeStyler'
  • *****
  • Posts: 11708
  • Singe's castle
    • View Profile
    • Dragon's Lair Fans / Arcade LifeStyle
Re: From Truxton II (to) Pleiads
« Reply #61 on: March 06, 2009, 05:36:00 PM »
NOBODY???  :shock: :( :'(

Well, maybe no one here has a Pleiads US dedicated cab, or they didn't see your post yet (only one day old)?

Anyway, the best think to do is to found the Pleiads US pinout on the web, and, starting from the connector (on picture7), indentify the all the connectors/wires and follow them until their extremity.
You'll easily find the controls, the video signals (R,G,B,Hor Sync, Ver Sync, ground), the sound, the coin door switch signal, the power (5v,12v (if any?),...).
The rest will be the fluorescent tube, speakers wires, and power supply wires.
 8)

vib_ribbon

  • Member
  • **
  • Posts: 240
    • View Profile
Re: From Truxton II (to) Pleiads
« Reply #62 on: March 06, 2009, 06:04:11 PM »
The rest will be the fluorescent tube, speakers wires, and power supply wires.
 8)

quick learner!!  :P :P

have a nice weekend.

ps- sorry, i'm not technical at all...

italiandoh

  • Member
  • **
  • Posts: 434
  • Italy
    • View Profile
Re: From Truxton II (to) Pleiads
« Reply #63 on: March 07, 2009, 03:42:30 PM »

before i start re-painting the BLUE part of the cabinet, i'm going to put some wheels underneath in order to make that "wooden giant" moveable.

four wheels - each supporting up to 50 kg - that should do the trick!


Hmm... nice wheels ! They carry 50 kg and they're not too tall. I could use some for my cabinets. Can you (or anyone else) recommend an online source for these ? I can't seem to find such wheels anywhere in Italy. I mean, there are plenty of wheels but not exactly like these ones.
Thanks,

Matteo

Superully

  • ArcadeLifeStyler'
  • ***
  • Posts: 6300
  • Southern Part of Germany
    • View Profile
Re: From Truxton II (to) Pleiads
« Reply #64 on: March 07, 2009, 03:45:27 PM »
Hmm... nice wheels ! They carry 50 kg and they're not too tall. I could use some for my cabinets. Can you (or anyone else) recommend an online source for these ? I can't seem to find such wheels anywhere in Italy. I mean, there are plenty of wheels but not exactly like these ones.

Hi Matteo!
I might have something for you, but I will have to check first if they are still available. If not, I could buy as many as you like in "my" home depot (they cost around 3€ a piece) and send them to you.
all i need is ... PONG - and a select few others: TOUCH ME, DRAGON'S LAIR, JOUST, ROBOTRON, MR DO, SAN FRANCISCO RUSH THE ROCK!!!

Superully

  • ArcadeLifeStyler'
  • ***
  • Posts: 6300
  • Southern Part of Germany
    • View Profile
Re: From Truxton II (to) Pleiads
« Reply #65 on: March 07, 2009, 03:50:08 PM »
[Anyway, the best think to do is to found the Pleiads US pinout on the web, and, starting from the connector (on picture7), indentify the all the connectors/wires and follow them until their extremity.
You'll easily find the controls, the video signals (R,G,B,Hor Sync, Ver Sync, ground), the sound, the coin door switch signal, the power (5v,12v (if any?),...).
The rest will be the fluorescent tube, speakers wires, and power supply wires.

thx bruno, i was planning on doing so and have already started labellling the wires, but it would be interesting to know what some of the plugs are for, e.g. picture 3 - i've never seen something like this!
btw, i will use the power transformer which is already in the cabinet and some of its wiring (e.g. the monitor and the power supply), because this is already perfect, but i have to change the control panel and the neon wiring for example because the wires from the old jamma wiring won't be usable.
all i need is ... PONG - and a select few others: TOUCH ME, DRAGON'S LAIR, JOUST, ROBOTRON, MR DO, SAN FRANCISCO RUSH THE ROCK!!!

italiandoh

  • Member
  • **
  • Posts: 434
  • Italy
    • View Profile
Re: From Truxton II (to) Pleiads
« Reply #66 on: March 07, 2009, 06:00:34 PM »
as i've already said, i've never wired a game before, so i have NO IDEA (except for one or perhaps two cables) where those wires have to go. this is where YOU GUYS come into play  ;D

First of all a couple of pics from the service manual to assist you.


My guess is :

1 - cabinet switch & marquee light power supply
2 - monitor power supply
3 - speaker
4 - monitor video input
5 - control panel
6 - coin door
7 - pcb edge connector
8 - power transformer

And don't forget the wires (7 ?) to the switching power supply (missing in the pictures), that you didn't number.
I can also spot some spare earth wires which are to be connected to the metal parts of the cabinet (coin door, monitor frame, control panel, etc).
Use a meter to verify all this and don't blame me if I got something wrong, ok ?  ;)
Bye,

Matteo

Superully

  • ArcadeLifeStyler'
  • ***
  • Posts: 6300
  • Southern Part of Germany
    • View Profile
Re: From Truxton II (to) Pleiads
« Reply #67 on: March 07, 2009, 07:53:37 PM »
My guess is :

1 - cabinet switch & marquee light power supply
2 - monitor power supply
3 - speaker
4 - monitor video input
5 - control panel
6 - coin door
7 - pcb edge connector
8 - power transformer

And don't forget the wires (7 ?) to the switching power supply (missing in the pictures), that you didn't number.
I can also spot some spare earth wires which are to be connected to the metal parts of the cabinet (coin door, monitor frame, control panel, etc).
Use a meter to verify all this and don't blame me if I got something wrong, ok ?  ;)

thx a lot matteo. in the meantime i have been able to lable many of the wires - and you're absolutely right on numbers 4 to 8 (haven't checked 1 to 3 yet). one question remains for now:

which wires do you mean by "And don't forget the wires (7 ?) to the switching power supply (missing in the pictures), that you didn't number."???

could YOU perhaps number them on one of my pics, don't know which wires you're talking about. thx a lot   :-[


-
all i need is ... PONG - and a select few others: TOUCH ME, DRAGON'S LAIR, JOUST, ROBOTRON, MR DO, SAN FRANCISCO RUSH THE ROCK!!!

italiandoh

  • Member
  • **
  • Posts: 434
  • Italy
    • View Profile
Re: From Truxton II (to) Pleiads
« Reply #68 on: March 07, 2009, 08:20:29 PM »
could YOU perhaps number them on one of my pics, don't know which wires you're talking about. thx a lot   :-[


Superully

  • ArcadeLifeStyler'
  • ***
  • Posts: 6300
  • Southern Part of Germany
    • View Profile
Re: From Truxton II (to) Pleiads
« Reply #69 on: March 09, 2009, 10:22:43 AM »
aren't those simple ground wires?
all i need is ... PONG - and a select few others: TOUCH ME, DRAGON'S LAIR, JOUST, ROBOTRON, MR DO, SAN FRANCISCO RUSH THE ROCK!!!

Superully

  • ArcadeLifeStyler'
  • ***
  • Posts: 6300
  • Southern Part of Germany
    • View Profile
Re: From Truxton II (to) Pleiads
« Reply #70 on: March 09, 2009, 10:40:29 AM »
another pleiads package has just arrived  :) this time, it's a delivery from bruno. our cats already are huge fans of it  :-*


of course, the question of the day is: HAS THE GLASS BEZEL SURVIVED A TRIP OF MORE THAN 400 KILOMETERS??? i'm opening it carefully, no sounds of broken glass to be heard. that's a good sign ...


*** DRUM ROLL***


yeah baby! this is it.  :spaceace: bruno, you're the man :spaceace:

« Last Edit: March 11, 2009, 11:49:01 AM by Superully »
all i need is ... PONG - and a select few others: TOUCH ME, DRAGON'S LAIR, JOUST, ROBOTRON, MR DO, SAN FRANCISCO RUSH THE ROCK!!!

italiandoh

  • Member
  • **
  • Posts: 434
  • Italy
    • View Profile
Re: From Truxton II (to) Pleiads
« Reply #71 on: March 09, 2009, 11:10:23 AM »
aren't those simple ground wires?

I don't think so. Track them down, I guess they go to the pcb connector and to the power transformer.
A couple should carry the AC main voltage to the switch supply, the rest should carry +5 V, -5 V, +12 V, GND for main game board supply.

Matteo

DarthNuno

  • Administrator
  • ArcadeLifeStyler'
  • *****
  • Posts: 11708
  • Singe's castle
    • View Profile
    • Dragon's Lair Fans / Arcade LifeStyle
Re: From Truxton II (to) Pleiads
« Reply #72 on: March 09, 2009, 06:09:54 PM »
Glad you got the glass bezel in one piece  ;)

I hope you'll be able to fix the 'slightly broken' corners on it  :?

Superully

  • ArcadeLifeStyler'
  • ***
  • Posts: 6300
  • Southern Part of Germany
    • View Profile
Re: From Truxton II (to) Pleiads
« Reply #73 on: March 09, 2009, 07:20:23 PM »
Hmm... nice wheels ! They carry 50 kg and they're not too tall. I could use some for my cabinets. Can you (or anyone else) recommend an online source for these ? I can't seem to find such wheels anywhere in Italy. I mean, there are plenty of wheels but not exactly like these ones.

@matteo: i can't find the ones online anymore that i was looking for. as i've said before: i could buy them for you and send them over to italy. if the weight of the package doesn't exceed 2kg, it will cost around 10 euros of postage. let me know if you're interested!
all i need is ... PONG - and a select few others: TOUCH ME, DRAGON'S LAIR, JOUST, ROBOTRON, MR DO, SAN FRANCISCO RUSH THE ROCK!!!

Superully

  • ArcadeLifeStyler'
  • ***
  • Posts: 6300
  • Southern Part of Germany
    • View Profile
Re: From Truxton II (to) Pleiads
« Reply #74 on: March 13, 2009, 04:24:21 PM »

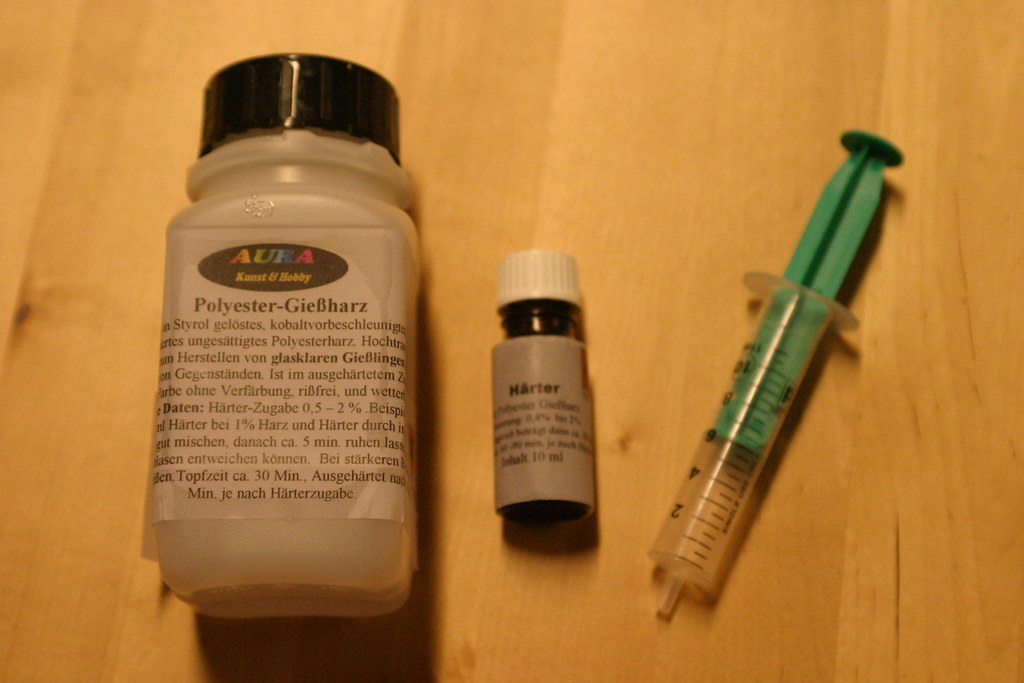
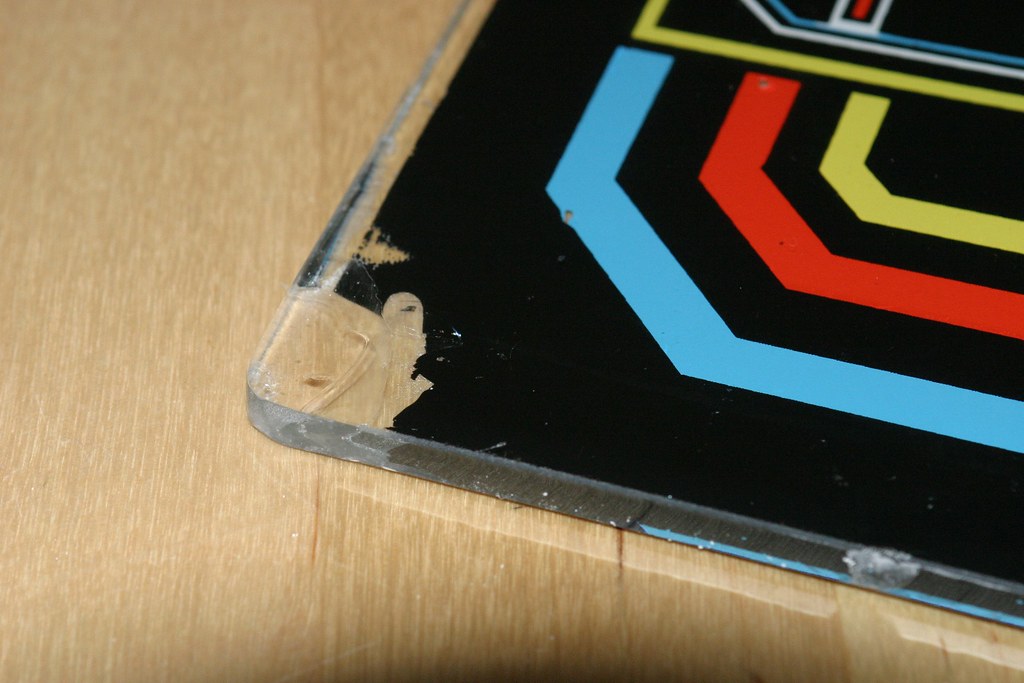
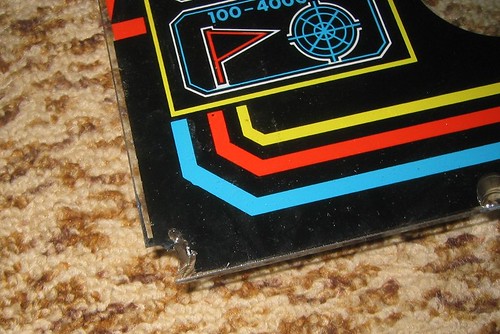
i will be trying to rewire the game soon, however i'm still waiting for some parts to arrive. in order to avoid a standstill, i'll continue with the cosmetic repairs. the "object of today's affection" is the glass monitor bezel that bruno so kindly gave to me. unfortunately, it has some cracks in the glass, especially the edges are pretty rough. after some investigation on the internet on how to repair broken glass, i've found something that might just do the trick: CAST RESIN. here's what i will be using for that operation:


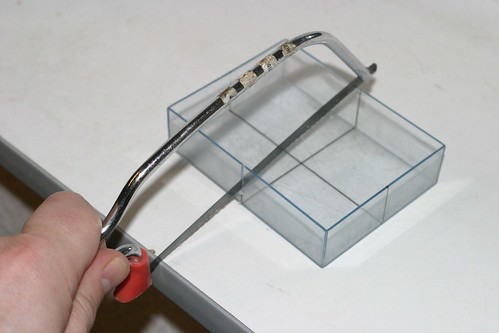
but before i'm able to repair the cracks using the cast resin, i will have to make some molds first in order to keep the resin in shape. i'm using an old plastic box for that which i have already divided into four sections with a marker and then - using a small saw - it's being cut into pieces  :arrow:


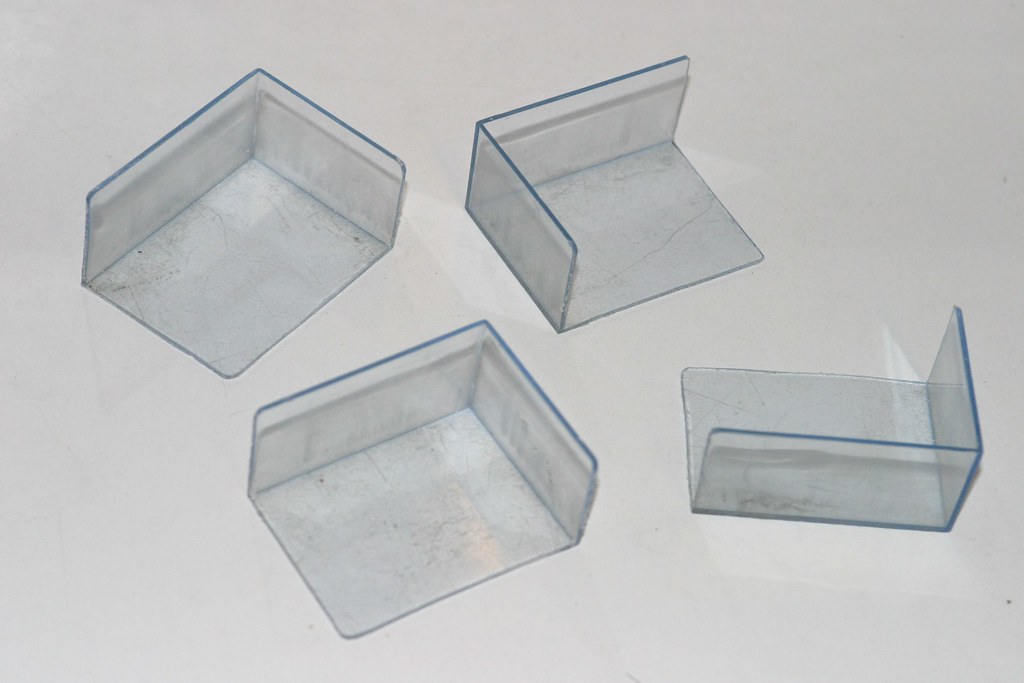
here's the result: four small plastic molds for the four corners of the bezel.  :)


after some (successful) testing on a glass shard with the cast resin, it's time to apply it to the "real deal". i'll start with one corner first to see if the glass shard and the glass bezel produce equal results.

the tools of the day are:


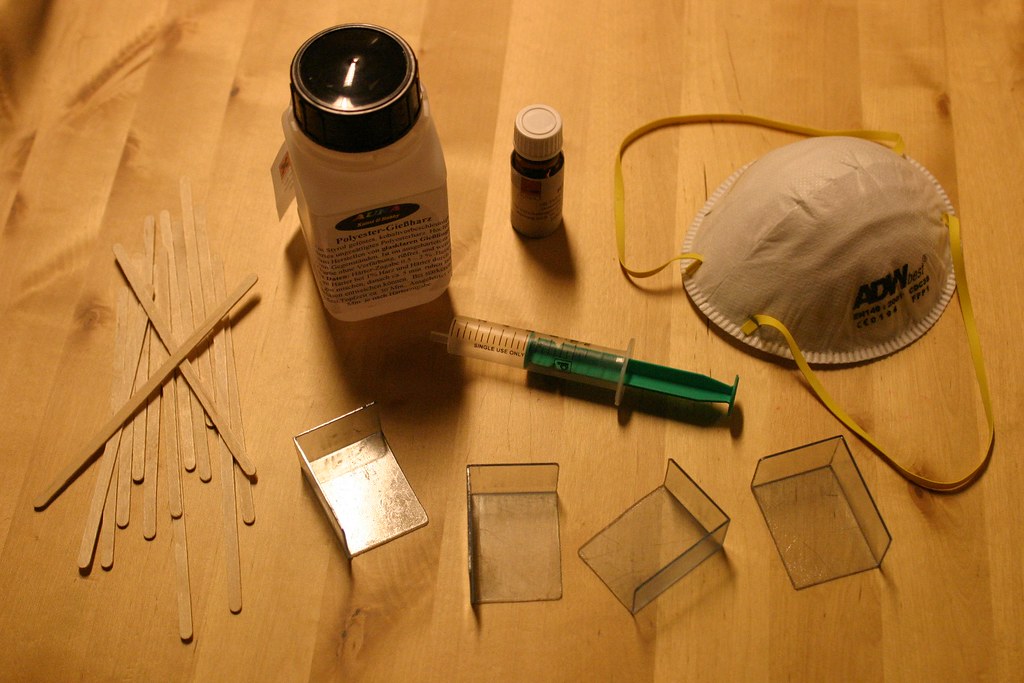
you might ask yourself: "what the heck is a breathing protection doing there?" easy answer: the cast resin stinks like hell, makes you dizzy and causes incredible headache when breathed in for some minutes.

here's another step-by-step description of the procedure:

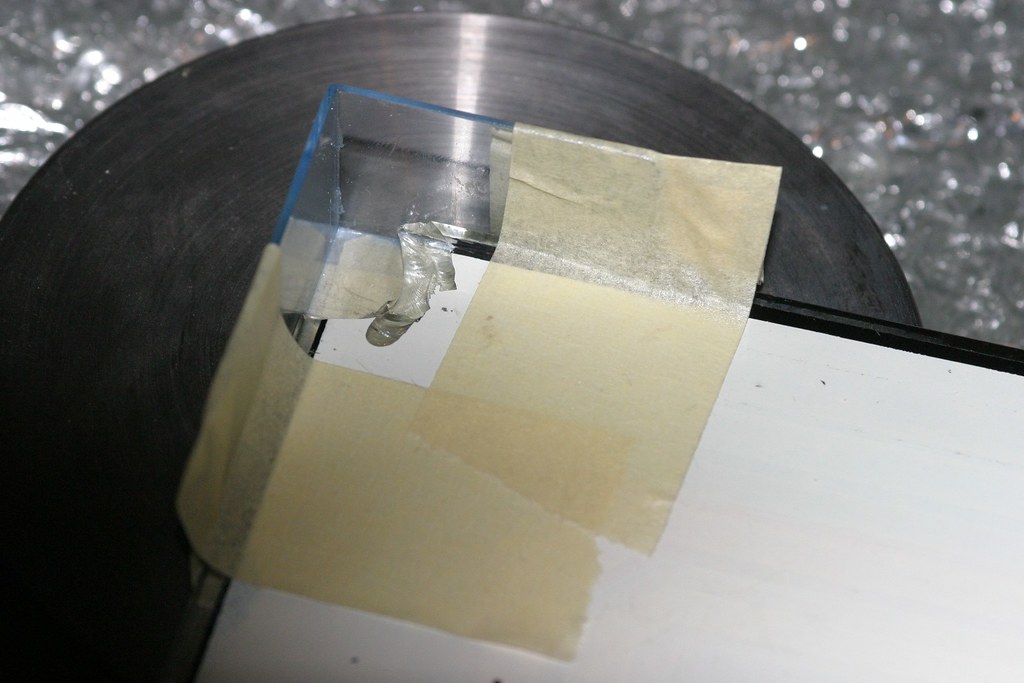
step 1: fixing the mold to the glass bezel:


step 2: mixing up the cast resin with the hardener and pouring it into the mold:


step 3:


step 4: removing the mold


step 5: sanding off the spill-over


step 6: polishing the still milky glass


step 7: dancing around in joy because of the fantastic result   :spaceace:


i'm 
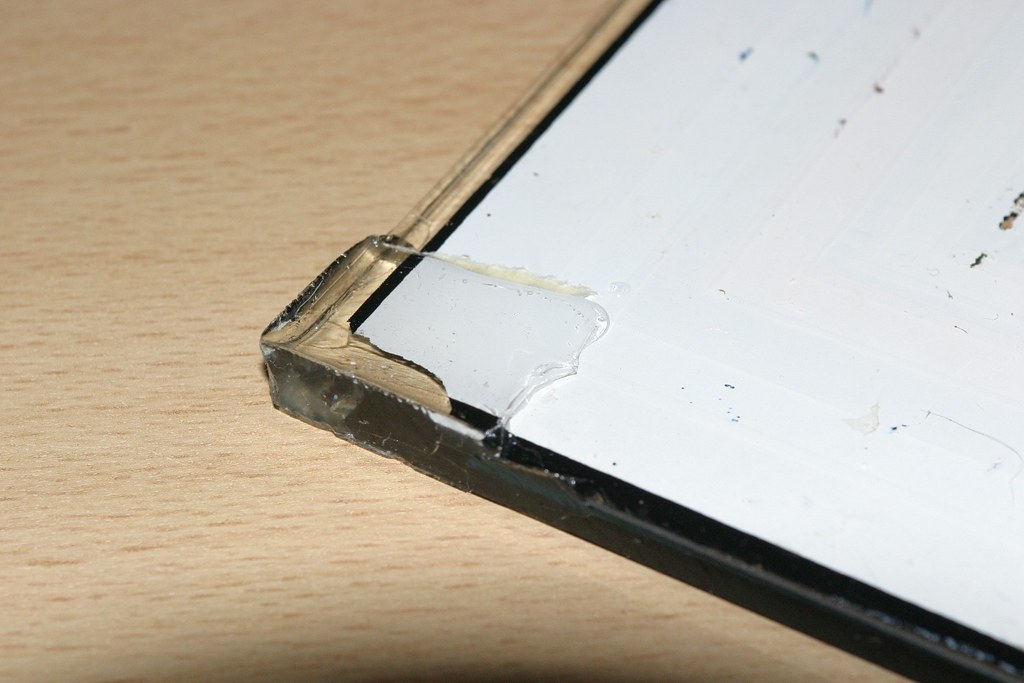
ABSOLUTELY thrilled by the way this turned out. couldn't be any better! let's make a comparison: the typical before and after pictures  :arrow:


monitor-glass-bezel-to-do-list:

- repair all the other cracks major cracks
- put black plastic foil on the back of the bezel where it is missing

what do you guys think? doesn't it look great?

all i need is ... PONG - and a select few others: TOUCH ME, DRAGON'S LAIR, JOUST, ROBOTRON, MR DO, SAN FRANCISCO RUSH THE ROCK!!!