Author Topic: a new PAC MAN cab' is born... WIP  (Read 94051 times)

DarthNuno

  • Administrator
  • ArcadeLifeStyler'
  • *****
  • Posts: 11707
  • Singe's castle
    • View Profile
    • Dragon's Lair Fans / Arcade LifeStyle
a new PAC MAN cab' is born... WIP
« on: December 30, 2006, 06:19:27 PM »
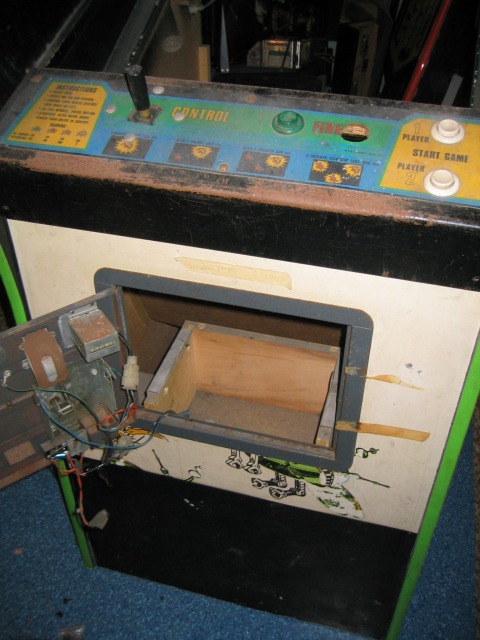
Got a *dead* Galaxian cab...

First checkup :

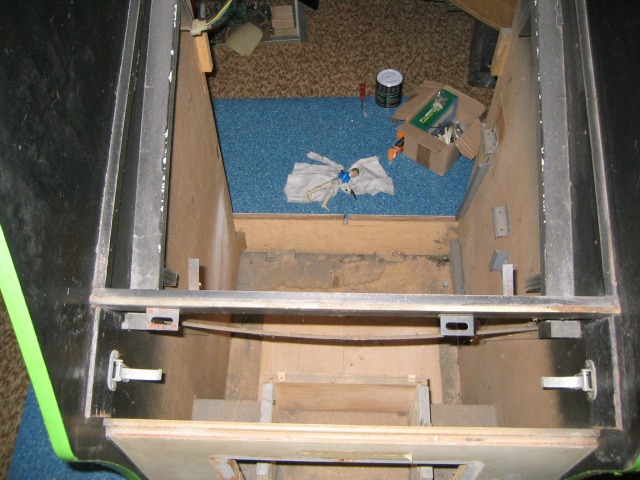
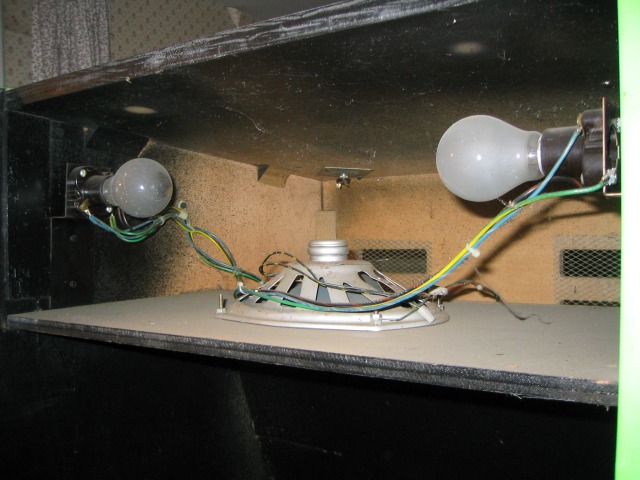
- no electronic parts at all (pcb, monitor, power supply)
- control panel dead and badly modified
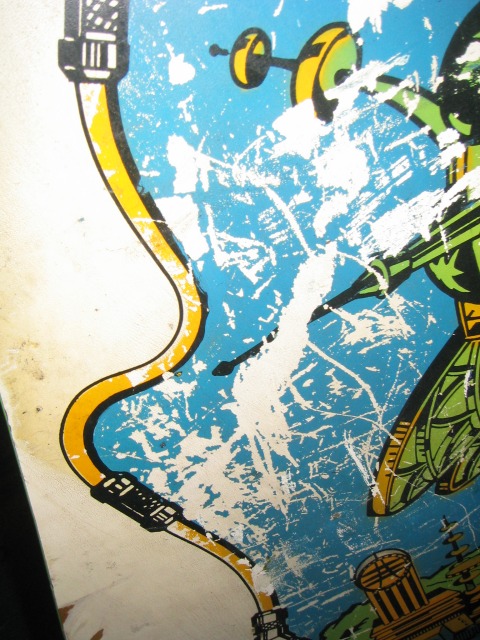
- side arts half destroyed on left side, almost fully missing on the other side
- kickplate graphic destroyed and black painted
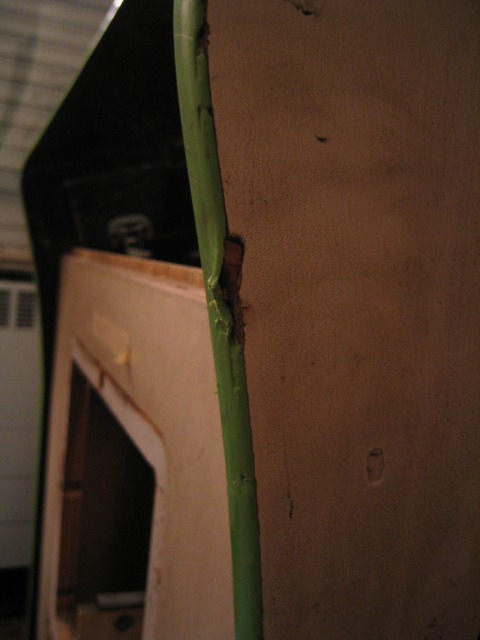
- T-molding destroyed
- No glass bezel

 :evil:  :evil:  :evil:

Well, nothing to keep  :evil:  :evil:  :evil: 
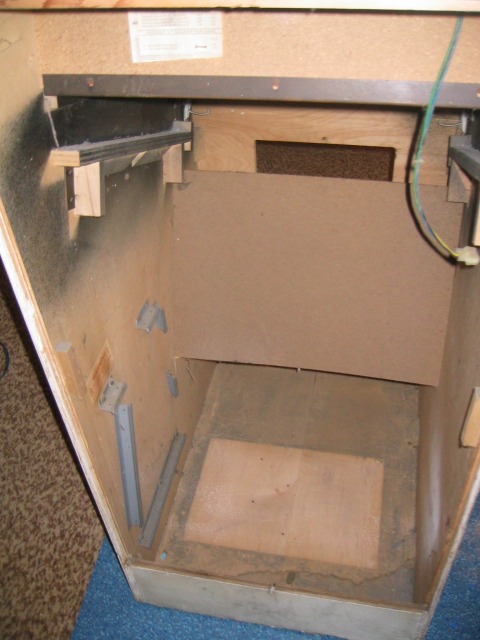
have a look a the pictures :


Ok, so the job to restore it would requires a lot a of reproduction parts to buy. The major problem are all the artworks to replace.

Hopefully it's a Midway cab', so it'll be the perfect candidat for a PAC MAN conversion.

In term of authenticity, It won't be a problem at all because does a set of Galaxian artwork repro is more 'authentic' than a set of  Pac Mac repro artworks ? Same idea for new t-molding, controls, a new monitor ?
And finally, remember that Midway has been built for both games at the end ( like Dragon's Lair cab and the Space Ace conversion)...

 :roll:  :wink:

So, so let's give that cab a new life now :-)

Hopefully, the wood of that cab is quite good, exept some minor scratch.

First thing to do : having a marquee...


Ok, I'm removing the 'remain' of the galaxian side arts. Here's how I remove it :


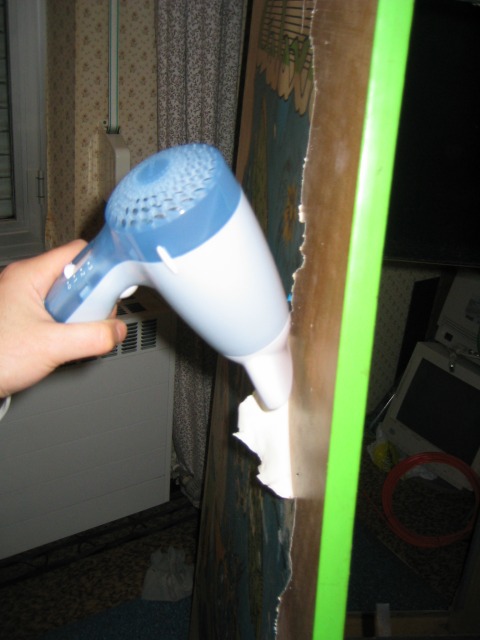
Note that it take me few hours for doing the job...

The original artwork was printed on a heavy white vinyl :


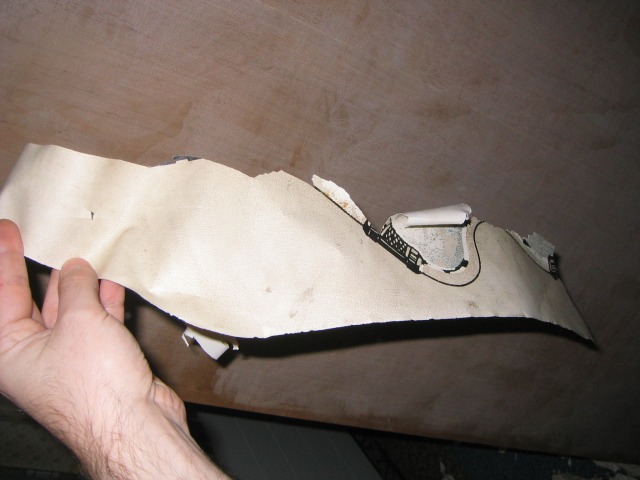
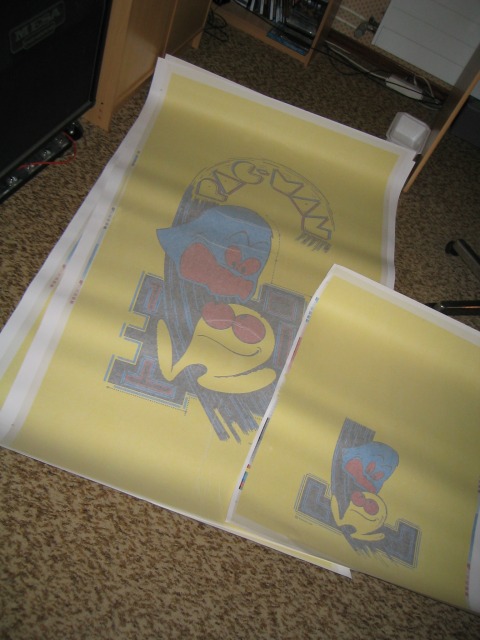
I hope the set a Pac Man artworks ordered at www.twobits.com will have the same quality  :?

...OK all is removed on the first side :


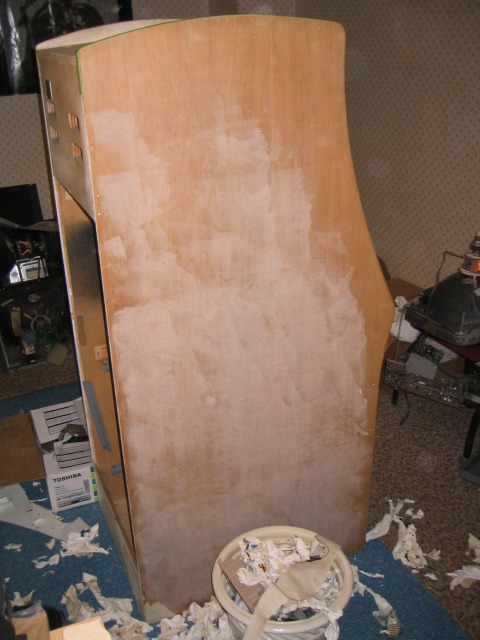
I chose to remove the side art sticker  because it started to be detached all alone  :?

Now the other side ...

I wash it first.


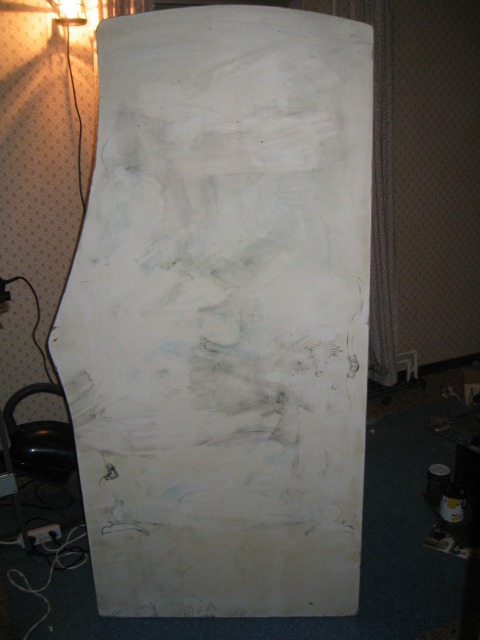
I decide not the remove the sticker like I did on the first side for two reasons :

- the stickers is stronger than the first side, I mean It's seems to be strongly fixed.

- removing the side arts was a pain, even with the hair dry  :?

Great... got a package from US : it comes from TWOBITS  :P


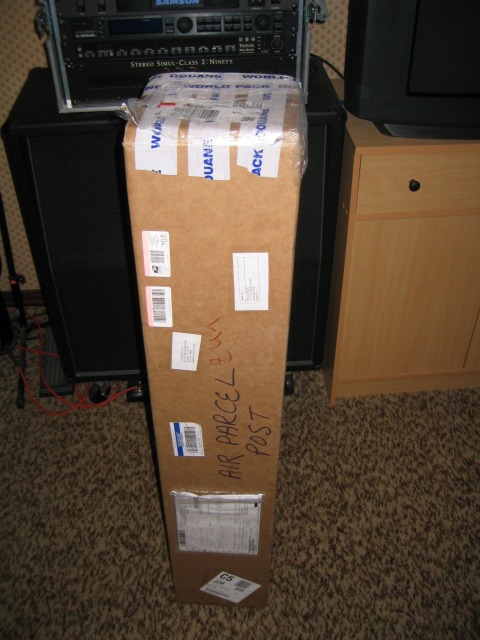
...and inside of it :


...to continue..  8)

arcadefever

  • Member
  • **
  • Posts: 232
    • View Profile
    • http://www.arcadefever.net
a new PAC MAN cab' is born... WIP
« Reply #1 on: December 30, 2006, 07:40:48 PM »
nice !!!!!!!!!!!!!!!!!!!! :D


arcadefever

  • Member
  • **
  • Posts: 232
    • View Profile
    • http://www.arcadefever.net
a new PAC MAN cab' is born... WIP
« Reply #3 on: December 31, 2006, 06:15:27 AM »
by the way, what are you going to use inside ?

MAME ?
3 in one multi jamma pcb (pac-man,miss pac-man,frogger)
original pcb
bootleg...

 :?:

DarthNuno

  • Administrator
  • ArcadeLifeStyler'
  • *****
  • Posts: 11707
  • Singe's castle
    • View Profile
    • Dragon's Lair Fans / Arcade LifeStyle
a new PAC MAN cab' is born... WIP
« Reply #4 on: December 31, 2006, 08:52:29 AM »
Thanks Igor for the link :o

I have already almaost all I need for this project  :o  Thanks also to Fred (ArcadeFever) for sending me parts from US  :wink:

I still need to get a "TEMPERED GLASS MONITOR BEZEL - SILK SCREENED GRAPHICS" ...

Regarding the game, I'll use a true NAMCO pcb  :o


...features : Pac Man (original from Namco), Pac Man Arrangement... and other GREAT Namco games : Dig Dug (original + arrangement) , Rally-X & New Rally X  :P  :P  :P

arcadefever

  • Member
  • **
  • Posts: 232
    • View Profile
    • http://www.arcadefever.net
a new PAC MAN cab' is born... WIP
« Reply #5 on: December 31, 2006, 09:04:26 AM »
stop building and read your mail  :lol:  i send you something important $$$$$$$$

DarthNuno

  • Administrator
  • ArcadeLifeStyler'
  • *****
  • Posts: 11707
  • Singe's castle
    • View Profile
    • Dragon's Lair Fans / Arcade LifeStyle
a new PAC MAN cab' is born... WIP
« Reply #6 on: December 31, 2006, 09:20:51 AM »
Quote from: "arcadefever"
stop building and read your mail  :lol:  i send you something important $$$$$$$$


No luck Fred  :cry:


The starting point shows you a Pac Man who's eating to the left, not right...

SO you have to scratch to the left...  :?

But it still may be a winning ticket  :roll:  :wink:

Good luck for the left path  :)

DarthNuno

  • Administrator
  • ArcadeLifeStyler'
  • *****
  • Posts: 11707
  • Singe's castle
    • View Profile
    • Dragon's Lair Fans / Arcade LifeStyle
a new PAC MAN cab' is born... WIP
« Reply #7 on: December 31, 2006, 09:50:56 AM »
OK, back to work  :)  :wink:

Well, transforming that cab in a Pac Man requires some painting adjustment.

The cab will be mostly covered by artworks from twobits, but the top -by exemple- need to be painted in yellow.

In order to have the same 'Pac Man' yellow tone everywhere on the cab, I decide to go to the paint shop and get the EXACT match of the yellow artworks   8)

Let's go  :lol:


On location, the seller removes on one corner the protective layer, in order to scan the yellow color under that protective paper :


... hail to computers sciences  :P ...


... on the way ...


Great  :P  

Ok, but before painting anything, I've to make some repair first...

I've to remove the damaged T-molding...


 and put legs... Ouch there are also some wood damages here ...


Well, the T-molding is not easy to remove...


...because of this :


They are a lot of very small nails   :?  :


OK, the solution to remove them is ... to destroy them like that :


Here's the new legs :


...StAY TUneD...

Igorstellar

  • Jr. Member
  • *
  • Posts: 87
    • View Profile
    • http://www.italian-laser-games.it
a new PAC MAN cab' is born... WIP
« Reply #8 on: December 31, 2006, 02:31:22 PM »
:D  :D go go go go  BRUNO

DarthNuno

  • Administrator
  • ArcadeLifeStyler'
  • *****
  • Posts: 11707
  • Singe's castle
    • View Profile
    • Dragon's Lair Fans / Arcade LifeStyle
a new PAC MAN cab' is born... WIP
« Reply #9 on: December 31, 2006, 04:01:17 PM »
:roll:  I must finish the cleaning of the cab.  :?

the top :


... after the cleaning ( acetone, soap, water ) :


the back of the cab :


...after the cleaning ( same method). :


Now, let's take care about the wood damages on that cab.

I'm using wood filer, like my previous restoration (Space Ace)  :wink:


...a lot of holes like this to fill ...


...like this :


...also a lot of borders to repair  :?  :


...others holes & crack on the front of the cab :


...same job to do ... wood filling ... wood filling  :lol:  :


The worst part is on the base of that side  :evil:  ...


...let's look closer :


...ouch... and there are a lot of big hits like this  :(  :


...wood filling... wood filling ... wood filling is the only key  :idea:  :wink:  ...like this :


And now, let's sand all of that :


Stay TuNeD  8)

arcadefever

  • Member
  • **
  • Posts: 232
    • View Profile
    • http://www.arcadefever.net
a new PAC MAN cab' is born... WIP
« Reply #10 on: January 01, 2007, 04:49:05 AM »
Quote from: "DarthNuno"
Quote from: "arcadefever"
stop building and read your mail  :lol:  i send you something important $$$$$$$$


No luck Fred  :cry:


The starting point shows you a Pac Man who's eating to the left, not right...

SO you have to scratch to the left...  :?

But it still may be a winning ticket  :roll:  :wink:

Good luck for the left path  :)


 :lol:  i knew that will be to good to be OK  :lol:
I played at 3 am i was tired and didnt read carefully, then i thought that i win and pm you like crazy  :lol:

well next time !!!!

cant wait to see the side on that cab ...

DarthNuno

  • Administrator
  • ArcadeLifeStyler'
  • *****
  • Posts: 11707
  • Singe's castle
    • View Profile
    • Dragon's Lair Fans / Arcade LifeStyle
a new PAC MAN cab' is born... WIP
« Reply #11 on: January 01, 2007, 10:48:11 AM »
No problemo Fred  :wink:

Ok, to become a Pac Man this cab need some painting  modification. The 2 edges in the front of the cab must be in yellow.

I'm using an adhesive paint protection to make a border between the edges, and the rest like this :


...same for the other edge :


Here's here the official 'Pac Man yellow' color  :o  :o  :o   :P  Miam Miam can I eat it ???  :roll:  :wink:


The job is done :


Even if  I'll apply the twobits  artwork reproduction in the front of  the cab, I must overpaint like I did on the previous picture, because If ll cut the artwork too short, it won't be a problem because the yellow is EXACLTY the same, and you won't see any difference between the paint & the artwork.

Closer, the first edge :


...the second on :


Let's start to paint the top too :


Beware.. fresh paint
 :lol:  :lol:  :lol:


Note that I'm using to more adhesive color protection on the top, in order to respect the true Pac Mac color junction between the edges on the top, and the marquee.

Let's wait at least 24 hours, to be sure that the paint is dry...

DarthNuno

  • Administrator
  • ArcadeLifeStyler'
  • *****
  • Posts: 11707
  • Singe's castle
    • View Profile
    • Dragon's Lair Fans / Arcade LifeStyle
a new PAC MAN cab' is born... WIP
« Reply #12 on: January 03, 2007, 07:20:24 PM »
Ok, now let's go with the most delicate part of the work : applying the artworks. These are expensive, I don't want to miss the operation  :?

The first one to apply is the front artwork. Twobits send all the artworks oversized, so let us measure on the cab' the corredt size.

As seen on pictures, there is a protective layer on all the three artworks, so you can write  with a pen on it  :idea:


Remove 1 or 2 mm over the measured width, and cut  :arrow:


You don't have to cut the exact length, it'll be more prudent to do it once the artwork will be applied...


Let's check if the size is correct ...


Ok, now let's clean & remove all dust on the surface, in order to avoid bubbles after applying the sticker...

I'm using a grip to set the artwork in the correct location (red circle). I tighten the grip, but not to hard, in order to avoid to damage the artwork.


...because of the grip, I'm sure the artwork will stay in the correct location. I can now apply the half of the sticker. I''m removing the sticker protection from the green line :


Ok, now I can go the other part of the sticker. DON'T DO IT ALONE  8)


Operation done  :o


Let us cut the too long parts...


..like this :


Done  :P


I won't remove the protective layer now. It's better to do it at the end, once that cab will be in my gaming Room  :roll:  :wink:

StaY TuNeD.

FINNY(uk)

  • Jr. Member
  • *
  • Posts: 88
    • View Profile
    • http://www.jasonfinn.com
a new PAC MAN cab' is born... WIP
« Reply #13 on: January 04, 2007, 02:14:47 PM »
Bruno,

Thats going to be a fantastic looking cab when finished (I want one) I have been looking for one of these cabs to restore, Congratulations, I look forward to seeing pictures of the finished restoration!

regards
-Jas
"Aim for the Moon! if you fall short your be with the Stars"

DarthNuno

  • Administrator
  • ArcadeLifeStyler'
  • *****
  • Posts: 11707
  • Singe's castle
    • View Profile
    • Dragon's Lair Fans / Arcade LifeStyle
a new PAC MAN cab' is born... WIP
« Reply #14 on: January 04, 2007, 11:47:01 PM »
OK, here we go with the first side art to apply  8)

Let's clean all the side, remove all dust, then clean it again & again ...


... and be sure the surface is totally plane. If not, repair all the holes & scractch with wood filler like this :


LIke I've done for the front of the cab, paint all the border of the side with the Pac Man yellow color :


...don't paint too far on the side, it's just on the corner ...


In fact, I'm painting the corner all around the cab like this :


Ok, it's done for all the side border :


To be sure that I'll place correcly the artwork (in term of exact location), I take a lot a picture of Pac Man cabs over the net ( Too bad the cd including ton of your Pac Man cab pictures arrived at my house completly broken ArcadeFever, but thanks anyway my friend   :wink:  )


Ok, so regarding the pictures of the Pac Man cab, I set the artwork as best as possible on the side of the cab, than I fix it with two grips (in the green circles) to be sure it won't move. I also cut the stikers, but I leave at least 10 cm more than the exact shape of the cab, in case of mistake or last time adjustment...


In the same manner than the front artwork, I'm removing the adhesive protection starting the green line and I apply the first half of the sticker.
Of course, you must be TWO for doing that operation :

- the first one (my wife) maintains the end of the sticker, and keep it far from the wood.

- the second one  (me) applies  slowly the sticker, push out the air from center to border.


The first half of this sitcker is stuck, I can removes the grips and apply the second part :


Done :P


I think we did it right  :P  I see no bubbles air or mistake  8)  Great  :P  :P  :P


Note that the 2 strange 'wave forms' on the ghost are not a mistake. It's only the top sticker protection. No impact on the sticker itself   :wink:


I still keep the protection layer on the stickers  :roll:  :wink:

StaY TUNeD  :roll: