Author Topic: Space Ace -> THE restoration !!!  (Read 154395 times)

DarthNuno

  • Administrator
  • ArcadeLifeStyler'
  • *****
  • Posts: 11708
  • Singe's castle
    • View Profile
    • Dragon's Lair Fans / Arcade LifeStyle
Space Ace -> THE restoration !!!
« Reply #15 on: September 23, 2006, 09:05:34 AM »
Painting time  :idea:

Here's the tools of the day :


I'l use satin black paint, as close as possible as the original paint.

A last shot before painting...  :o


First test...


... 16 hours later, Let's sand the imperfection :


I'm recoverning the 'inside border', to protect the origina vinyl from new paint :


First layer :


Beware : fresh paint  :lol:


Ok, now let's wait 24 hours the 2nd layer  :o

DarthNuno

  • Administrator
  • ArcadeLifeStyler'
  • *****
  • Posts: 11708
  • Singe's castle
    • View Profile
    • Dragon's Lair Fans / Arcade LifeStyle
Space Ace -> THE restoration !!!
« Reply #16 on: September 25, 2006, 08:37:47 PM »
OKey, 36 hours later, I'm applying the second layer  :arrow:


... and 36 hours later, it's now all dry... I think 2 layers will be enough  8)


...removing the protection :


...and there it is  :o


I cannot resist... ACE ... Stand Up !!!  :lol:  :lol:  :lol:


I'm really happy with that result  :P


Can't you believe it's the same cab at this point  :roll:  :wink:  :?:


It's not 100% perfect, but it's fine for me  :)


OK... next step : to apply the vinyl  :o

Stay TuNeD  :wink:

FINNY(uk)

  • Jr. Member
  • *
  • Posts: 88
    • View Profile
    • http://www.jasonfinn.com
Space Ace -> THE restoration !!!
« Reply #17 on: September 30, 2006, 04:17:39 PM »
Bruno,

Ther is a Saying that says "YOU CANNOT POLISH A TURD" and with the restoration you are doing on the Space Ace, you have just proved that the saying is unbelievable, as you can certainly polish a turd!!!!! well done my friend, cannot wait to see her up running and finished.

Take care
-Jas
"Aim for the Moon! if you fall short your be with the Stars"

DarthNuno

  • Administrator
  • ArcadeLifeStyler'
  • *****
  • Posts: 11708
  • Singe's castle
    • View Profile
    • Dragon's Lair Fans / Arcade LifeStyle
Space Ace -> THE restoration !!!
« Reply #18 on: October 02, 2006, 09:29:53 PM »
Thanks for your comments Jason  :)

Time to apply the vinyl...

Let's test that first on the front speaker panel.

It looks like this :


I remove the old damaged vinyl, and I'm starting to sand with a very small grain  :arrow:


and I remove all the dust, of course :


OK, here's the NEW vinyl  ( thanks again Jas'  :o  ) :


I can't miss the thing... coz I just have the right amount of vinyl for that, and the two cab' sides  :?


Well, I'm not sure if the glue on that vinyl will be strong enough, so I'll use this adhesive spray :


I apply the spray...


...and put the vinyl :


I'll use this blade to cut it  :arrow:


...like this   :arrow:


and here's the final result :


I'm happy with the result  :D  But I think I don't need to use adhesive spray anymore, coz' the original adhesive on the vinyl looks strong enough  8)

DarthNuno

  • Administrator
  • ArcadeLifeStyler'
  • *****
  • Posts: 11708
  • Singe's castle
    • View Profile
    • Dragon's Lair Fans / Arcade LifeStyle
Space Ace -> THE restoration !!!
« Reply #19 on: October 03, 2006, 08:19:29 PM »
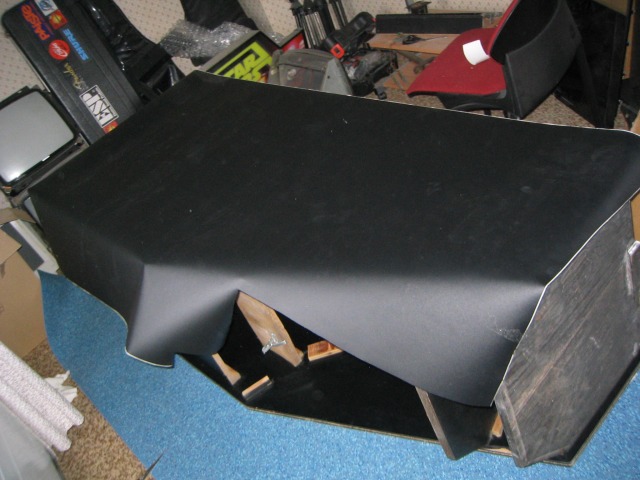
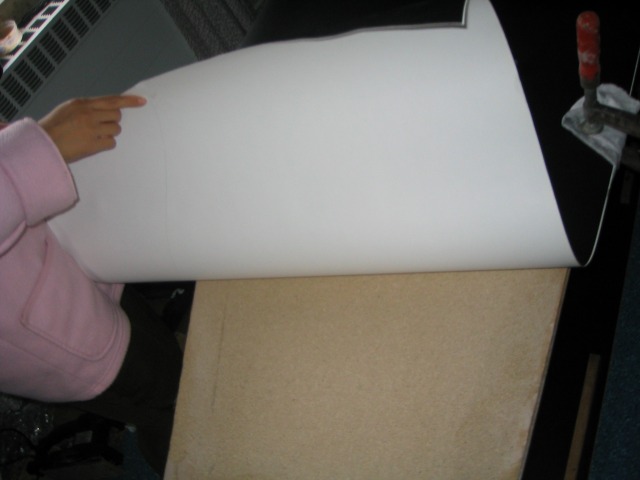
..and now, ladies & gentlemen.. the most thrilling part : new vinyl on both cab' side  :?

Ok,  I cut the first side shape, slightly bigger than the true dimension of course :


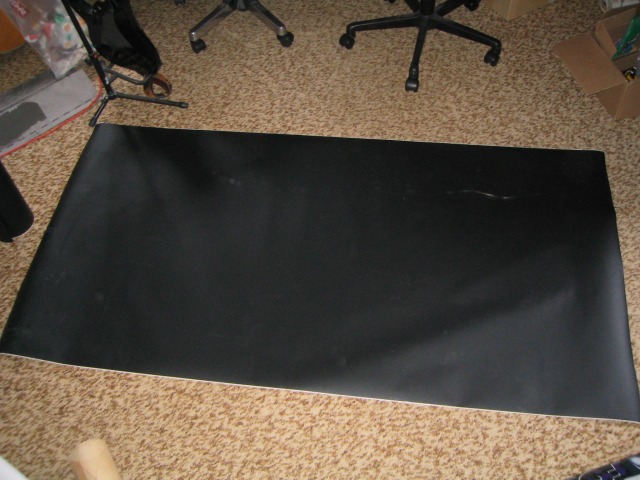
... hopefully, the amount of vinyl that I have is just enough for both side, well done Jas'  :roll:  :wink:

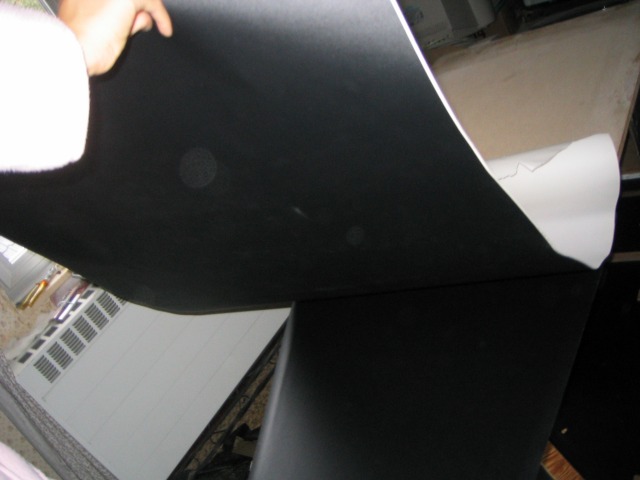
Here's the rest of the vinyl... I'll use it for seconde side l8ter :


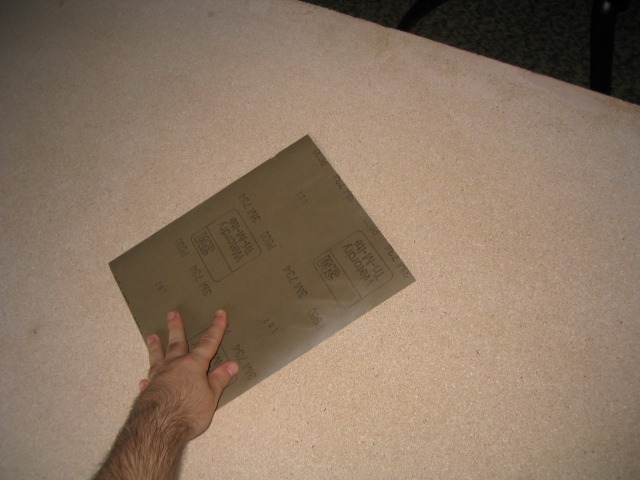
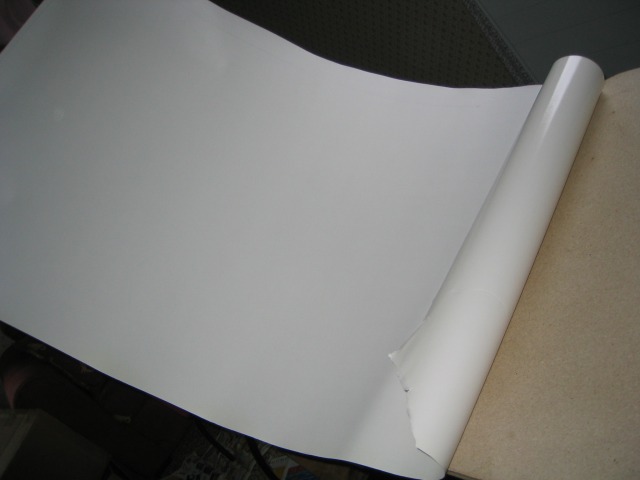
Before applying the vinyl, I'll manually sand the side one more time with a thiny grain :


Here is how I'm fixing the vinyl. I can't do it alone, so... I'm calling "Darth Nunette"  to help me :wink:

I fix the lower part like this...


...I can now apply the upper part :


Now that the upper part is fixed, I can apply now the lower part like this :


Done  8)  :


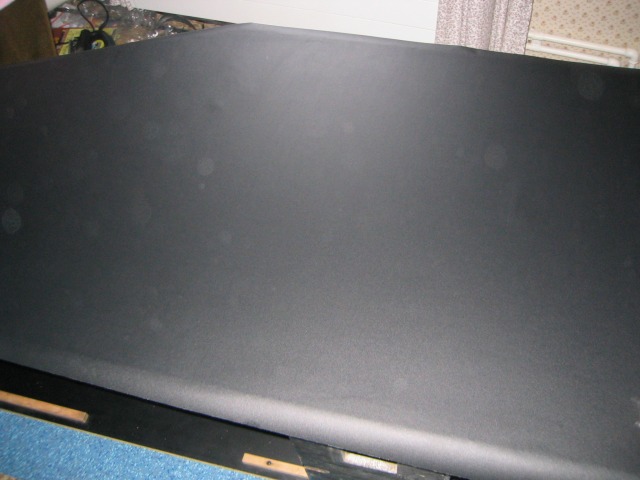
First side is... DONE  :P


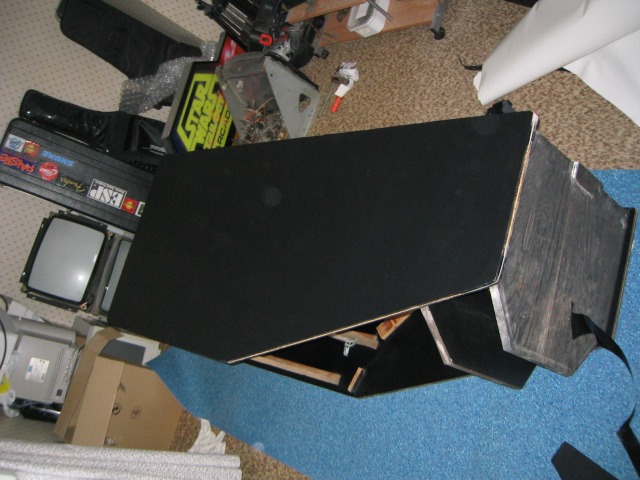
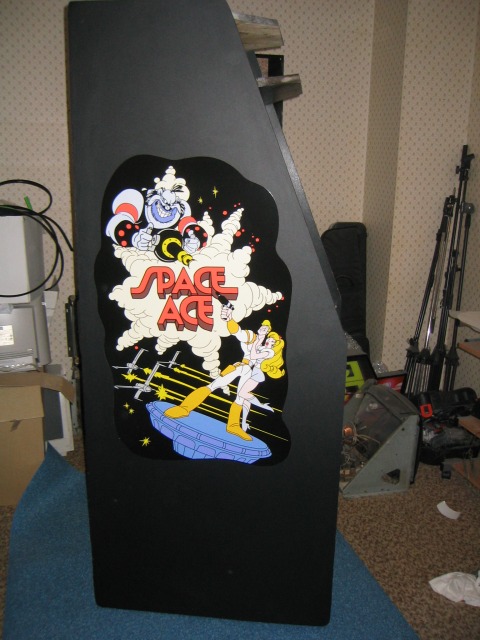
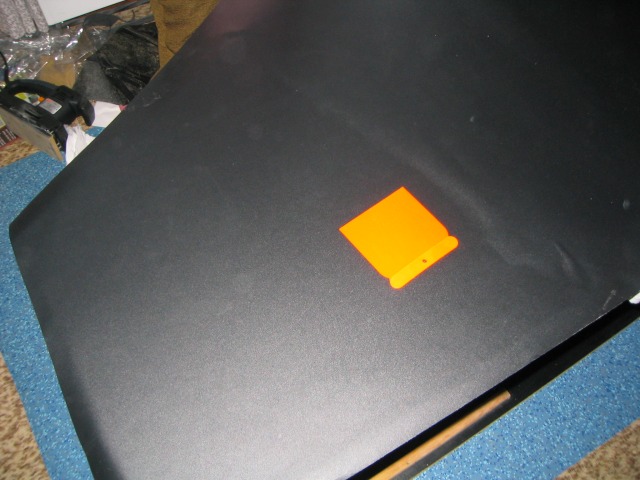
... arg, I can't resist   :roll:  :roll:  :roll:


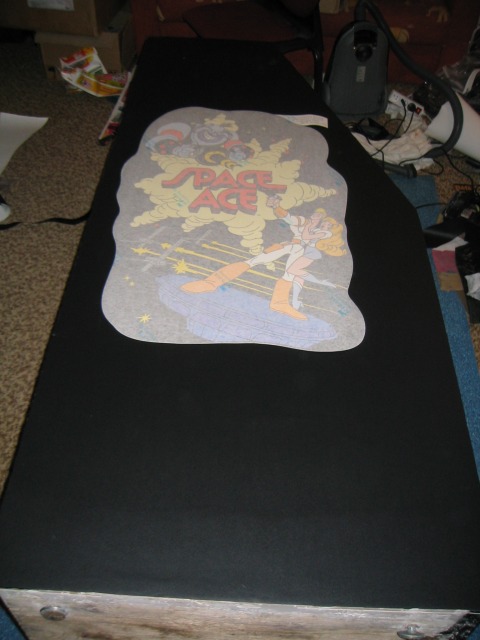
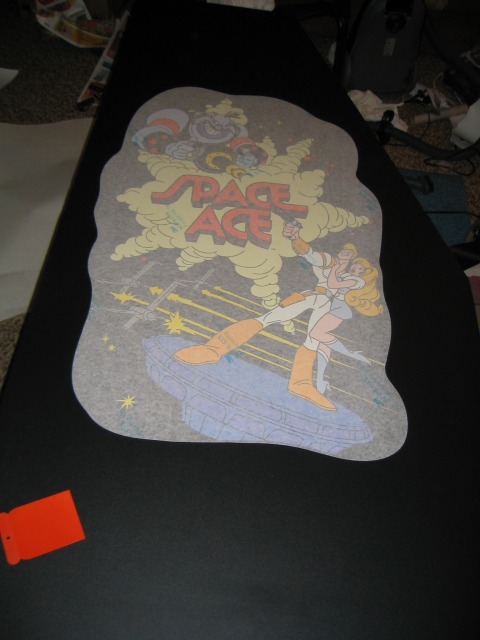
I'll fix it now... I'm choosing the right place for the side ( I've used some Space Ace side  pictures taken at the Jason's Lair to adjust it as best as possible ) :


Like the vinyl, I'll apply the side art sticker in two steps.

1 -> The lower part :


2 -> The rest... easy  :D


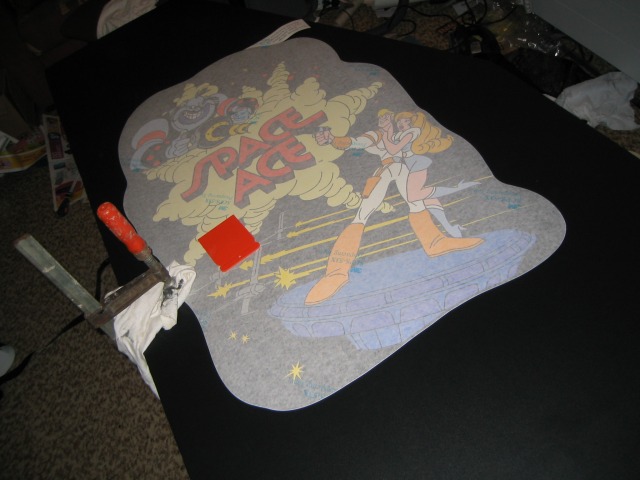
...and I finally remove the protecting layer :


...and there is it :


 :P  :P  :P

DarthNuno

  • Administrator
  • ArcadeLifeStyler'
  • *****
  • Posts: 11708
  • Singe's castle
    • View Profile
    • Dragon's Lair Fans / Arcade LifeStyle
Space Ace -> THE restoration !!!
« Reply #20 on: October 09, 2006, 10:00:37 PM »
OK, let's go with the other side :


...same job : adjusting the vinyl + side art appy...  8)

Time for T-Molding now :


...done for the first side :


For the second side, there is a problem  :? The trench is too large for the T-molding...  :?  I have to find a way to fix it anyway...

DarthNuno

  • Administrator
  • ArcadeLifeStyler'
  • *****
  • Posts: 11708
  • Singe's castle
    • View Profile
    • Dragon's Lair Fans / Arcade LifeStyle
Space Ace -> THE restoration !!!
« Reply #21 on: October 10, 2006, 09:03:52 PM »
...like I said previously, the trench for the second side is too large for the T-molding :


...after trying several glues, I'm still not able to found a solution to fix strongly the T-molding in the trench, so I decide to use wood filer... again  :?


...and, of course, I have to use -once again- the router  :oops:  Not an easy task when I have to avoid damaging the  finished sides  :oops:


Now, let's paint the trench :


...done :


To fill that trench is a very hard job  :evil:  So, I'll try a last solution to fix the T-molding inside the trench...  an hot glue gun :


...closer...


Holy Jesus... THIS is the issue  :P

arcadefever

  • Member
  • **
  • Posts: 232
    • View Profile
    • http://www.arcadefever.net
Space Ace -> THE restoration !!!
« Reply #22 on: October 11, 2006, 04:10:28 AM »
wowwwwwwwww... you did some very good progress....

 :D

DarthNuno

  • Administrator
  • ArcadeLifeStyler'
  • *****
  • Posts: 11708
  • Singe's castle
    • View Profile
    • Dragon's Lair Fans / Arcade LifeStyle
Space Ace -> THE restoration !!!
« Reply #23 on: October 11, 2006, 09:09:14 PM »
Thanks ArcadeFever  :o

OK, now I can finally fix the T-molding with the hot glue gun  :)

Let's start from the back of the cab :


...then the top of the cab' :


... the front, and finally the base :


and voila  :P  :P  :P  


Ok, now that the major wood working is done, it's time to continue the restoration... inside the Nuno's Lair  8)

First stage : to pass this stairs  :D  :


Once again, thanks to "Burt" for his help to get this cab down of the 1st floor  :o

This is it...


Stay TuNeD OF CoUrSe  :P  :P  :P

DarthNuno

  • Administrator
  • ArcadeLifeStyler'
  • *****
  • Posts: 11708
  • Singe's castle
    • View Profile
    • Dragon's Lair Fans / Arcade LifeStyle
Space Ace -> THE restoration !!!
« Reply #24 on: October 12, 2006, 09:29:30 PM »
Time to place the marquee.

Here's the items of the day  8)

- original Space Ace marquee (not a reproduction)

- new repro marquee brackets

- new neon


Now, this is the original neon :


... the original (defect) on top, and a brand new one, same than the original one : same size, same power, same voltage : 35w, 230V  :arrow:


...now in location  :D


DarthNuno

  • Administrator
  • ArcadeLifeStyler'
  • *****
  • Posts: 11708
  • Singe's castle
    • View Profile
    • Dragon's Lair Fans / Arcade LifeStyle
Space Ace -> THE restoration !!!
« Reply #25 on: October 14, 2006, 11:59:28 PM »
Now, time to repair the bezel support. Here's the original one :


 :x completely destroyed   :evil:  Nothing to do with that  :?

I'll make a brand new one  :idea:  Where to find a perfect template ?  :roll:  :wink:


:arrow:  In my Atari Dragon's Lair  of course   :o


Let's check for that piece inside the DL :


Ok, easy to remove  :)   :arrow:


...as I said, I'll use it to draw the perfect 1:1 pattern :


ready to cut :arrow:


...a thing to do carefully is to cut that angle :


...easy, with the exact pattern to follow...


 :arrow:  The DL original and ... the home made reproduction...  :)


Ok, painting time  :arrow:


...fresh paint ...


DarthNuno

  • Administrator
  • ArcadeLifeStyler'
  • *****
  • Posts: 11708
  • Singe's castle
    • View Profile
    • Dragon's Lair Fans / Arcade LifeStyle
Space Ace -> THE restoration !!!
« Reply #26 on: October 16, 2006, 06:58:42 PM »
The bezel support is now totally finished :


Now, let's have a look at the coins doors. One door is missing  :?  The other one, on the picture, need to be paint.


Let's fix the thing. I'll put the two coins doors later, when they will be sanded & painted  8)


Before fixing the speakers support fully restored, I have to remove the nails, full of  rust  :?  ...


...like this :


It really helps to have a Dragon's Lair cab close to me  :roll:  :wink:


Speakers support... fixed :


The twin cabs ... very soon running together  :wink:


I can now fix these original Space Ace/DL  speakers, thanks Jaz'   :)


Here's the location...


Fixed, like it used to be more twenty years ago  8)


The end is near...   :P


DarthNuno

  • Administrator
  • ArcadeLifeStyler'
  • *****
  • Posts: 11708
  • Singe's castle
    • View Profile
    • Dragon's Lair Fans / Arcade LifeStyle
Space Ace -> THE restoration !!!
« Reply #27 on: October 22, 2006, 12:48:51 AM »
OK, it's time to work on the back of that cab'.

The upper part is in very bad shape, have a look :


Impossible to corret it  :( Too much water damages  :evil:  :


Ok, no other choice than to reproduce it  :


Hopefully, I still have some pieces of new vinyl :


Almost done :


DarthNuno

  • Administrator
  • ArcadeLifeStyler'
  • *****
  • Posts: 11708
  • Singe's castle
    • View Profile
    • Dragon's Lair Fans / Arcade LifeStyle
Space Ace -> THE restoration !!!
« Reply #28 on: October 29, 2006, 12:35:41 AM »
Here's the back of the cabinet...


There is three parts to build/repro... I've already done the first one previously... so let's do the others : the main backdoor, and the bottom backdoor (the one for the laser disc player).

The original Dragon's Lair model on the left, and the replica :


I've no more black vinyl, so I'll paint it :


Let's check if it fits the cab'  :?:  :roll:


OK, let's go for the last part... the bottom backdoor :


I've found the perfet metal grille sheet


It's strong, and easy to cut  :)


A view of the top & bottom back door, finished  8)  :


Let's put them on location  :roll:  :arrow:


The actual status :P  :


arcadefever

  • Member
  • **
  • Posts: 232
    • View Profile
    • http://www.arcadefever.net
Space Ace -> THE restoration !!!
« Reply #29 on: October 29, 2006, 12:50:30 AM »
very nice...

do you have the rest ? pcb,player ect...?