Author Topic: Galactic Orbiting Robot Force  (Read 3231 times)

Andreas_AUT

  • Member
  • **
  • Posts: 388
  • hello world
    • View Profile
Galactic Orbiting Robot Force
« on: March 02, 2026, 05:47:07 PM »
... or in short: GORF!

I have bought this cab and Asteroids from Jochen in may 2025. Both cabs worked so far, they just need a bit of touch up. I dont have a problem at all with that, these are old games and people have played a lot of games on then.

Last year, I had a lot of caretaking about my father, so I put the cabs into the garage and well, time go´es on. I tried asteroids and it still worked nicely ( even after my garage/cellar flood from a rain storm ), but Gorf didnt do anything.
So I knew Gorf did work before shipping, but maybe he had a rough journey to austria, who knows :D

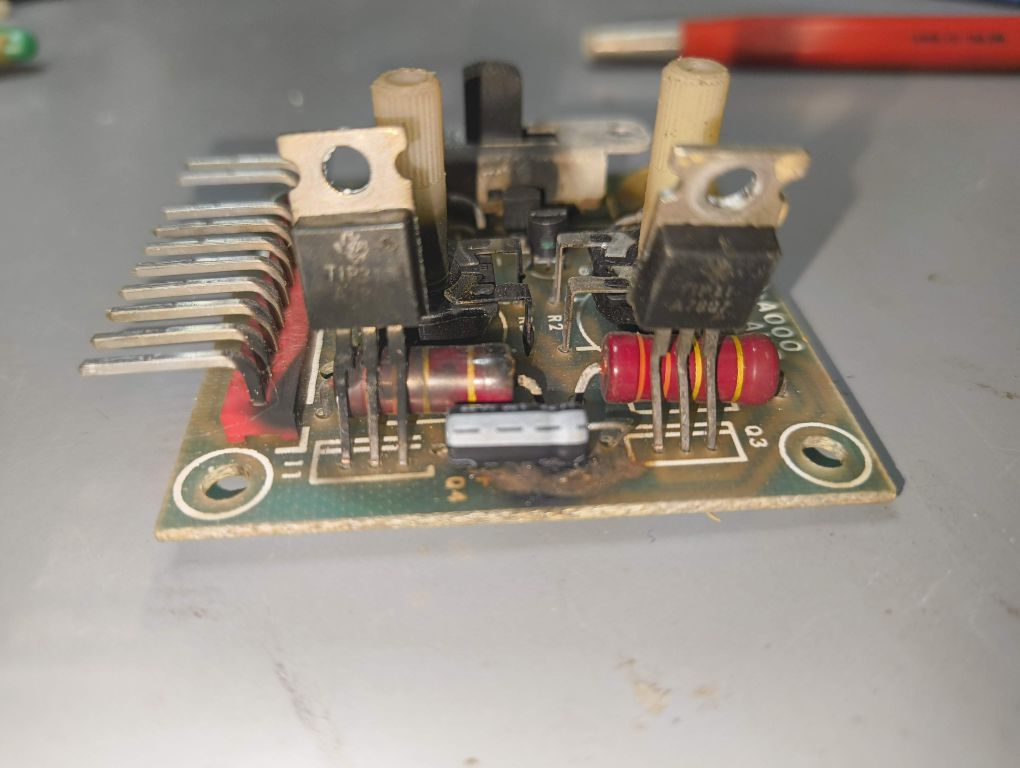
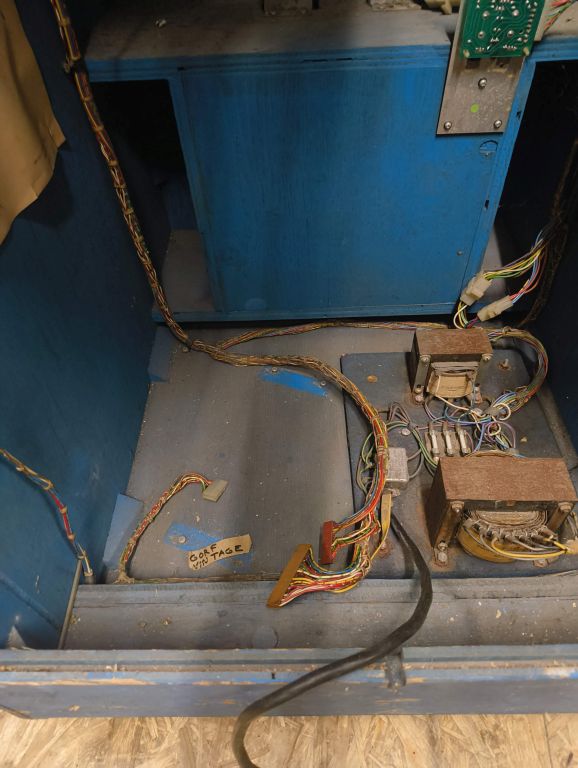
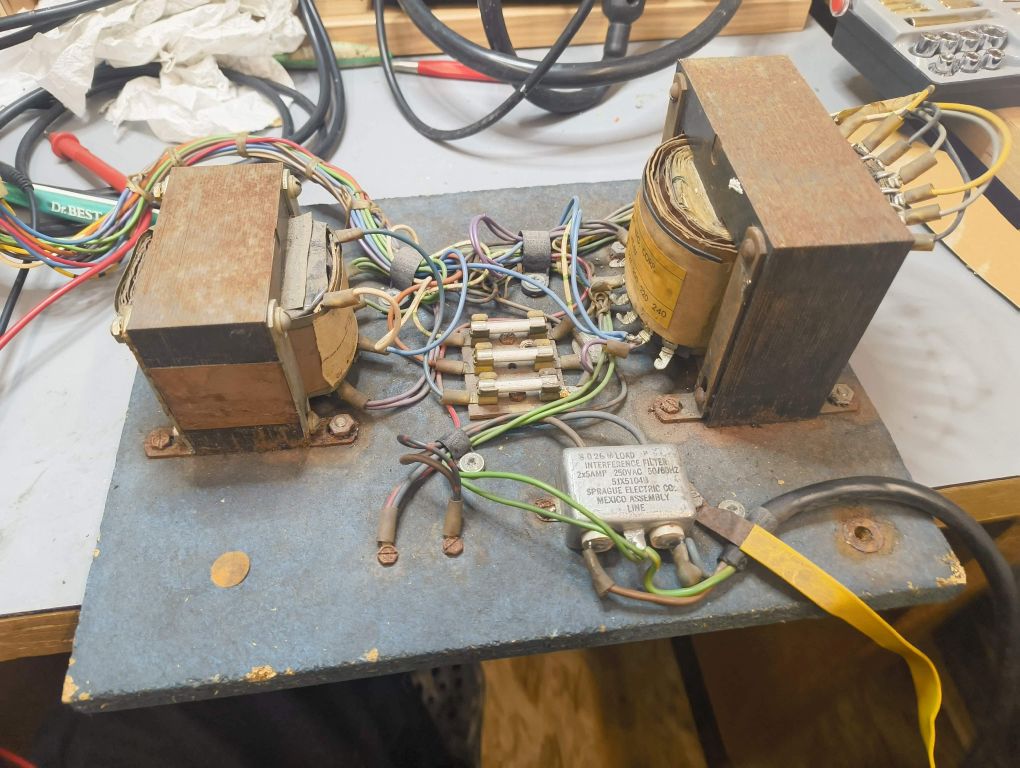
At the end of 2025, I finally had some time to take a closer look at Gorf. I disconnected the pcb and checked all the voltages. 5, 12 and -5v were there. MrDo from another forum mentioned I should put a light bulb as a load. So I took an 12v car-bulb, I saw the light for a short second and it was off again - but in the corner of my eye, I saw some smoke, not great.

A resistor on the power supply went to heaven. Luckily, I had a box with new resistors and diodes, so I changed the broken one.
Here a closer look at the scene, you can see the heat marks from the diode too.


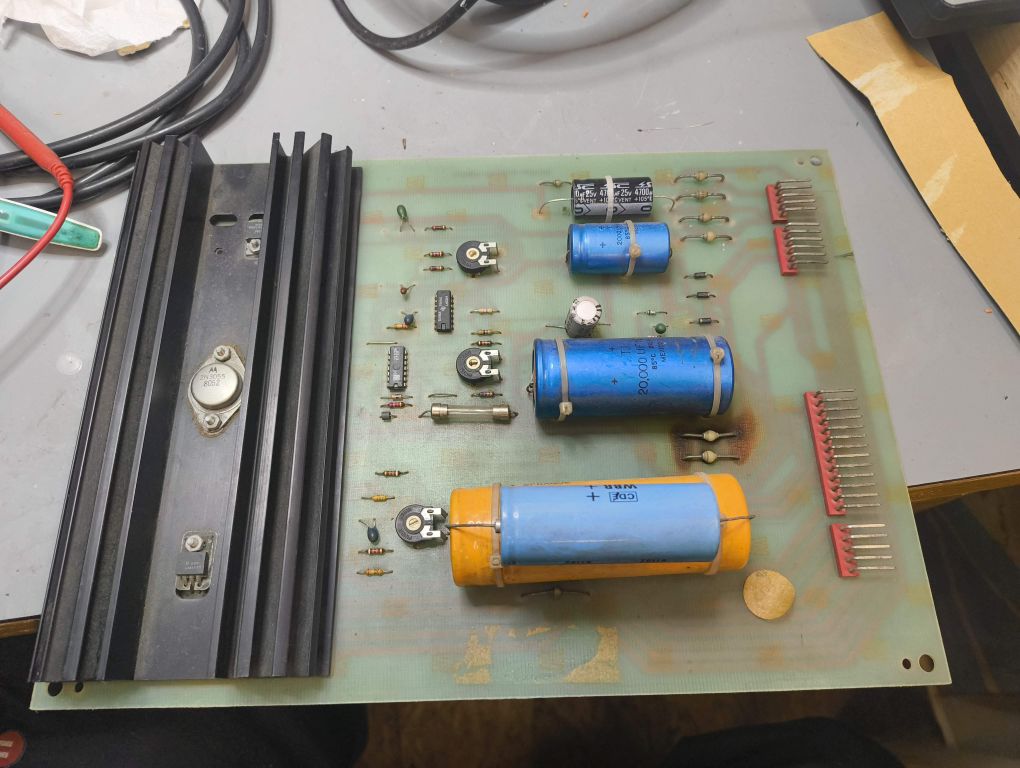
I have changed a few more diodes, and I have changed a few of the caps - not everyone. Funny how small the new caps are versus the old one.


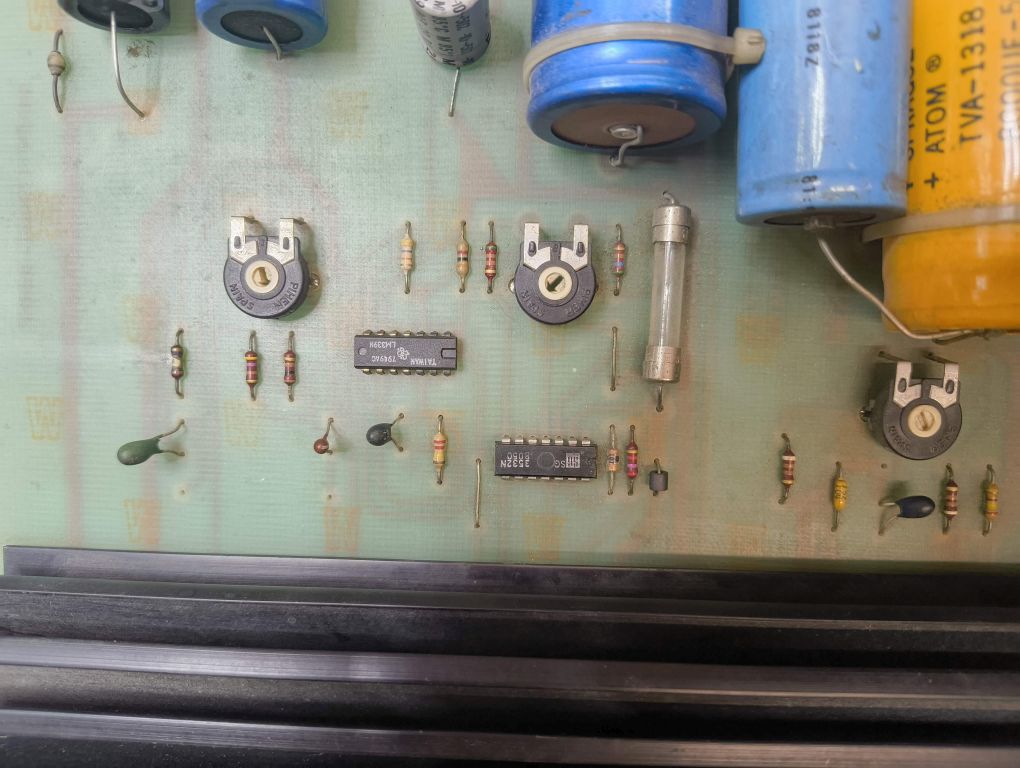
I also want to test the LM339, but when I desoldered him, he already lost a leg. So I ordered an replacement and installed it on a IC socket ( on the picture, you see the old original one )


Ok, time for a new test. The bulb lit up at the beginning for a short time, but the brightness decreased until it was off again. Ah yeah and smoke... again.

The same resistor burnt up again. I replaced it again with an 10 Ohm and continued searching for the problem. I already read that people are not that happy with the original midway PSU, a lot of them replace it with an universal one ( they offer this mini pcb for the universal psu and the original wiring harness ). But I didnt want to give up that quick, I continued to search for the problem.

Next, lets check the 2N3055, I desoldered it and with the help of AI, I got an instruction how to test it with my multimeter.

I own an old Voltcraft MM ( about 25y old ) and when I used it for some tests at the cab, I wasnt sure if I can rely on it. Sometimes the test showed me normal reading, the OL. Maybe the pins on the measuring tips are dirty? 5 out of the 6 tests were successfully, at the 6th test, I should get a reading about 0,5v. I got it for 2-3 seconds, then OL again, then the correct voltage again.
So I wasnt sure and in doubt, I just changed the 2N3055 ( I mean the expensive one is about 4,- ), I did another test with the 12v bulb and... successs - the light were shining like it should! Problem found and eliminated!

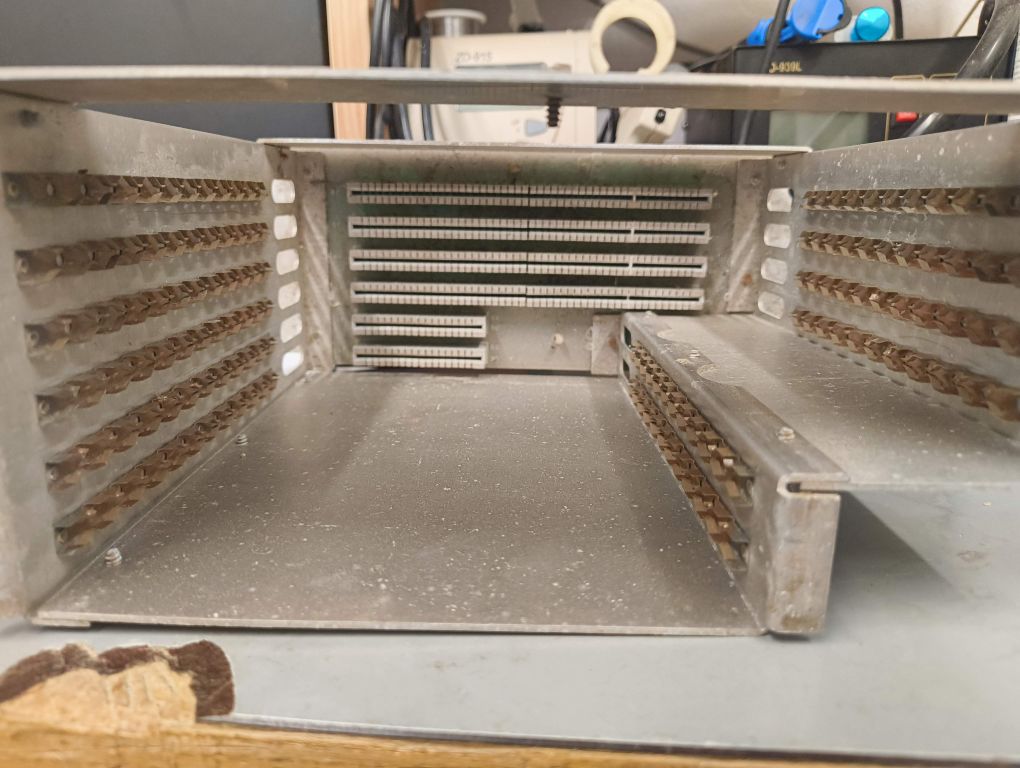
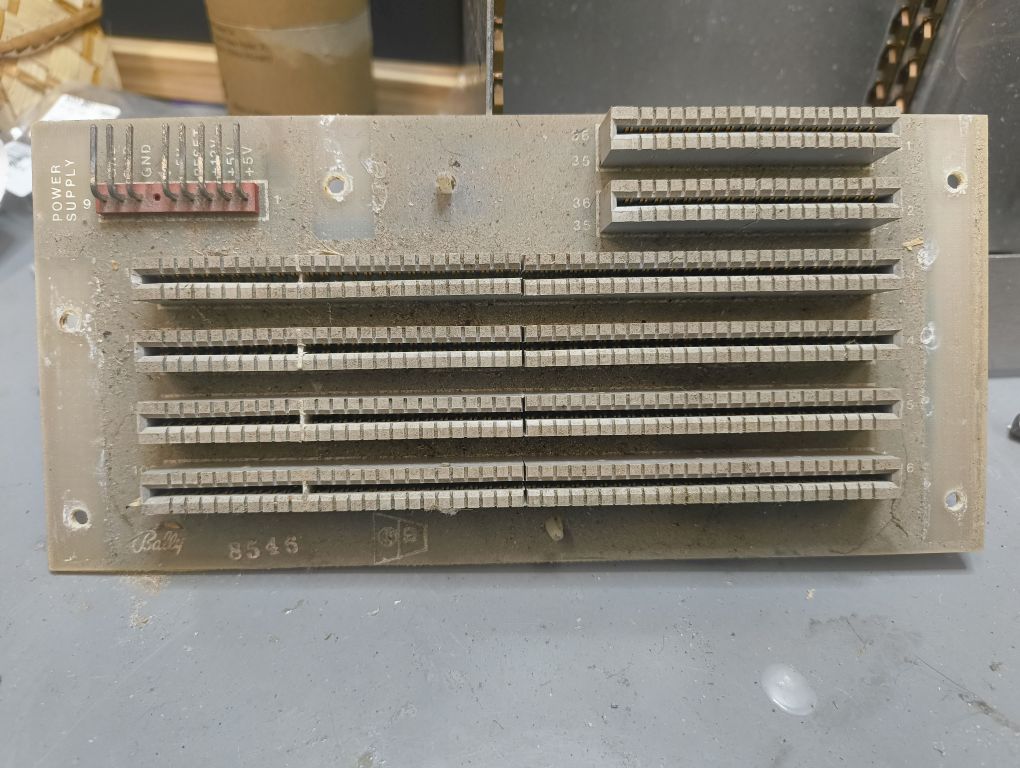
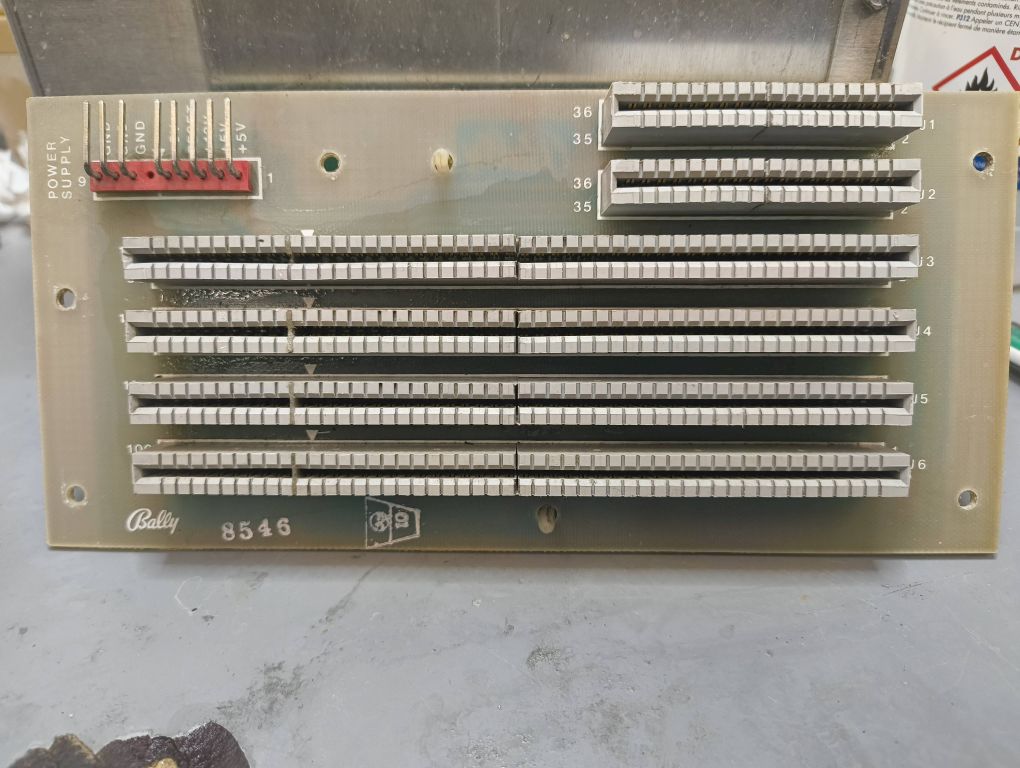
Between all these steps, I had time to clean the pcb cage ( before and after ):


Next step - the troublemaker caps!
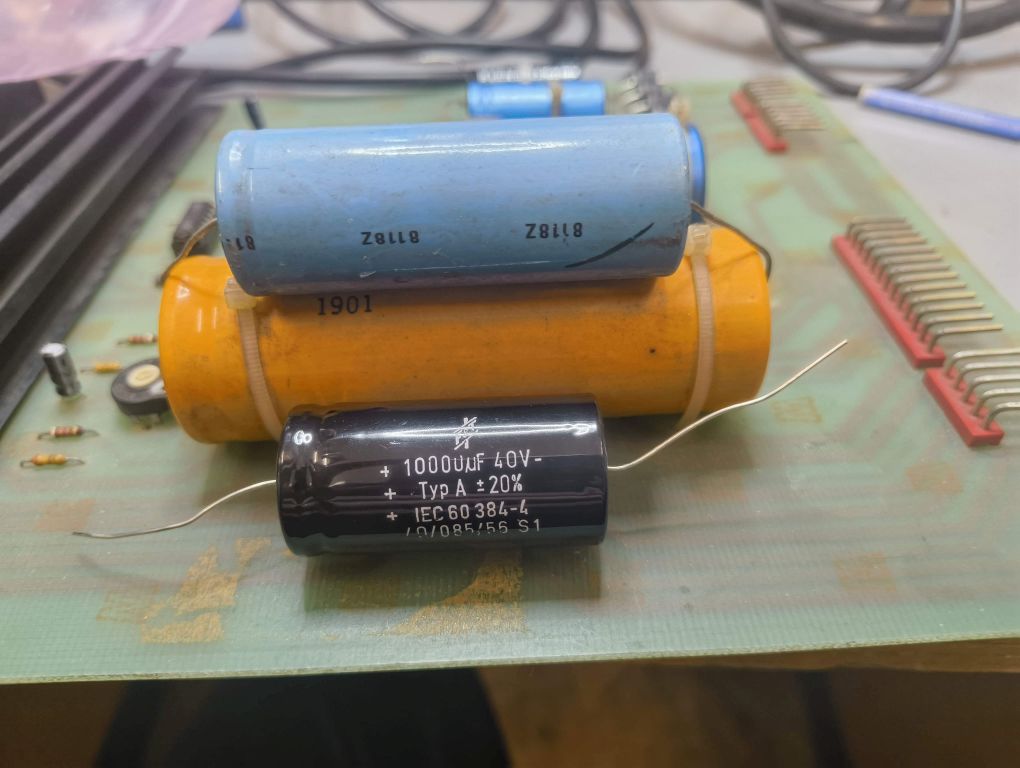
Thx to MrDo, I know these are the tantal elkos ( they tend to blow up ). Jochen already replaced most of them, but on the 3rd pcb there were 6 old caps installed, so lets get rid of them:


Thanks to samwhiskey, he told me I can use normal caps as an replacement. I did order new caps with the other replacement parts, but I ordered a 100v version. I didnt know or think about, that the 100v version cap is much bigger than lets say an 20v cap. So yeah, I could solder them in, but it would look horrible and space would have been a problem, so i took the normal caps with 22 uF and 25V ( luckily, in my storage were six of them, the exact number I needed  ).

And I had a chat with Alex and when we talked about Gorf, he told me I should check the soundamp too. There are tantal caps on that mini pcb and there are pictures on klov about exploded ones - who blew a hole into the pcb!
But Jochen already changed these too, and on the picture you can see why he did that :D


I cleaned the pcb and all the connections with an fiber optic pen. Then it was time for my first real test...
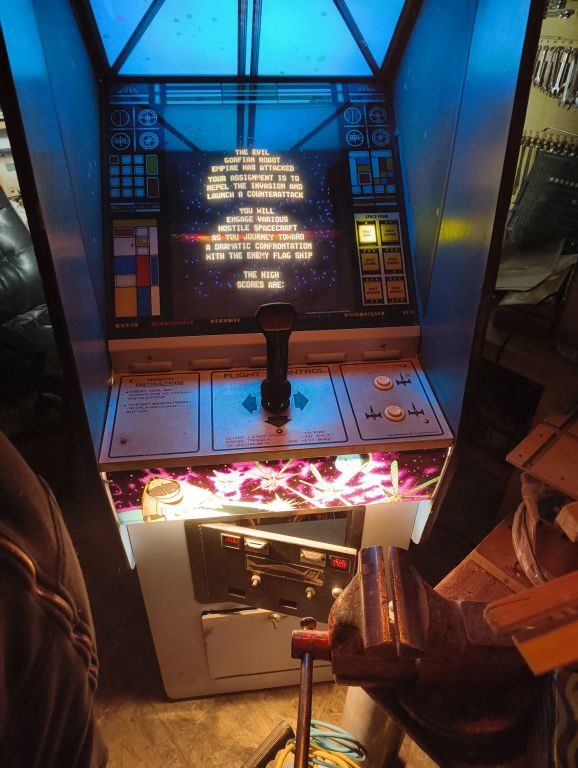


Its working!!!!

Ok, next step - cleaning and touch up for the cab.
My plan was to derust the coindoor because rust is a thing i dont want on my cabs.


The sideart has also some scratches, but I can live with that.

Andreas_AUT

  • Member
  • **
  • Posts: 388
  • hello world
    • View Profile
Re: Galactic Orbiting Robot Force
« Reply #1 on: March 02, 2026, 06:14:00 PM »
There were a few days between the first post and the 2nd one.

Ok, on the bottom side, the cab had some light wood damage. One of the previous owners already started fixing it, but there was still some work to do. My 2k bondo dried up, so I ordered a cheap 1k one. Downside - it needs much more time to harden out and the 2k is much more stronger/hard. So with the 1k, I spent some evenings with filling, sanding, and start by filling again. Btw I ordered 2k again, its much easier to work with that.


And this is the current status:


If you take a closer look to the corners, you can see that there are darker spots. Maybe its because of my 1k bondo or because I didnt put on an base coat. I just sanded the cab a bit and rolled the paint ( 2 coats ) in one go. To eliminate the spots, it would need another coat of paint, but ill skip that because you can rarely see it and my goal isnt to restore the cab like new, like it came out of the factory.


That wooden door needs some more work off course.


After some basic cleaning inside the cab with the vacuum cleaner, pensil, spraycleaner and a lot of towels, I continued with the coindoor. It was a bit rusty either, so lets eliminate that:


So i put them into my sand blaster cabin...


... and I finished the coindoor with the help of an wire brush. The sandblaster left some paintspots on the coindoor, so the wire brush was an easy finish instead of changing the blast media and more air pressure ).


( ah yeah, the coindoor had minor rust on the inside too )


So I painted the coin door outside of my garage ( we had heavy wind going on ), she swing and the distance of my spray paint was sometimes closer and then more far away from the coindoor.


And yeah, I created some paint nose. First, I wetsanded them with 3000 sand grid paper, but I quickly changed to 120 and the paint nose was history.

When I was inside to get the other parts for some paint, I thought to myself, I hope the coindoor wont fall down because of the wind. And guess what happened? Doing, she fell down  :-\
I repainted it and yeah, I had to bend it back.


These franc signs had seen better days, I wetsanded it with 3000 and gave it a finish with an magic eraser. I could do better, but im okay with the result:


At the end, my goal was to clean up the iso transformer, but the screw nut were seized because of rust, so I didnt dismount it ( otherwise, I would have cut the nut and replaced it ).
What was possible to dismount got some sand blasting, the iso trafo got some wire brush attention. The fuse holder had some corrosion, so I cleaned it up either.


(before cleaning )

I put everything together and tried a game, but nothing...
I put a good amount of electronic cleaner into every connector, then it worked again. Some times, my ship randomly exploded - long story short, I had to adjust the monitor, it was a bit out of sync.

In the next days, I will update this thread again because I got the correct color today and I have to touch up the wood parts.
Thanks to my electric stair climber, the cab is already up in the first floor ( its so easy to move cabs now :D ).

Stay tuned...

DarthNuno

  • Administrator
  • ArcadeLifeStyler'
  • *****
  • Posts: 11824
  • Singe's castle
    • View Profile
    • Dragon's Lair Fans / Arcade LifeStyle
Re: Galactic Orbiting Robot Force
« Reply #2 on: March 03, 2026, 09:54:53 PM »
Thanks to you for sharing this here. :spaceace:

Wait… Gorf? Jochen?  ::) Could it be the cabinet I faced him on at Eurocade 2014?  :shock:  :arrow:


I don’t remember spotting any damage - though to be honest, it was dark enough that I could’ve missed it…  ::)

Andreas_AUT

  • Member
  • **
  • Posts: 388
  • hello world
    • View Profile
Re: Galactic Orbiting Robot Force
« Reply #3 on: March 04, 2026, 05:45:38 PM »
You are welcome, im happy to share a bit of my progress with you all.

Well, maybe it is the cab or maybe its from the bulk buy they bought from a member here, im not sure - I guess I have to ask Jochen about it.

That´s a picture while it was down at my workroom:


Gorf is such a great game!!

Belike

  • ArcadeLifeStyler'
  • ***
  • Posts: 4789
  • Budapest, Hungary
    • View Profile
Re: Galactic Orbiting Robot Force
« Reply #4 on: March 06, 2026, 09:55:51 AM »
It’s great to see such a successful restoration again, with so many photos documenting it. Thanks for sharing. :spaceace: