Author Topic: Operation "Back to life" for my Dragon's Lair cab'  (Read 130817 times)

DarthNuno

  • Administrator
  • ArcadeLifeStyler'
  • *****
  • Posts: 11708
  • Singe's castle
    • View Profile
    • Dragon's Lair Fans / Arcade LifeStyle
Operation "Back to life" for my Dragon's Lair cab'
« on: July 10, 2005, 03:52:31 PM »
10th of July 2005

OK, so following the road trip :


...the next step is -of course - to see it working, and far  better, playable  :!:  :)

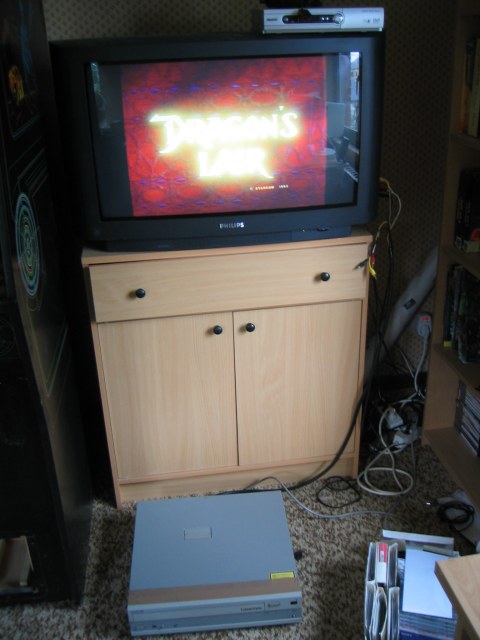
Here's what happens when I power up the game :


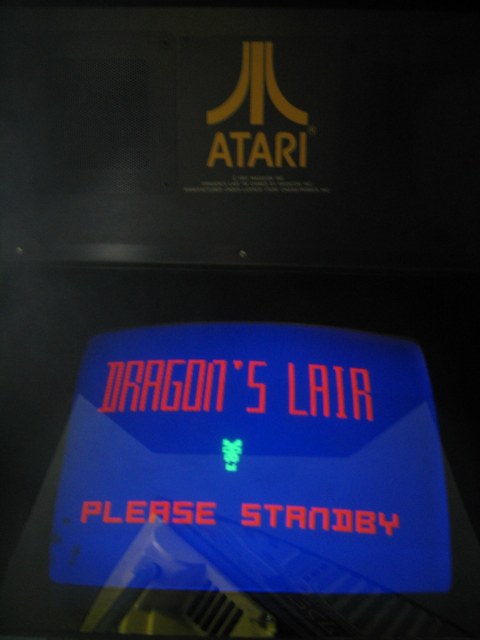
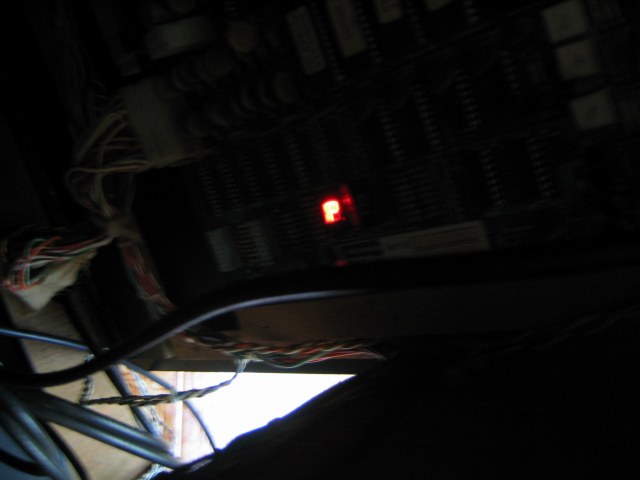
The Dragon's Lair PCB led displays P :


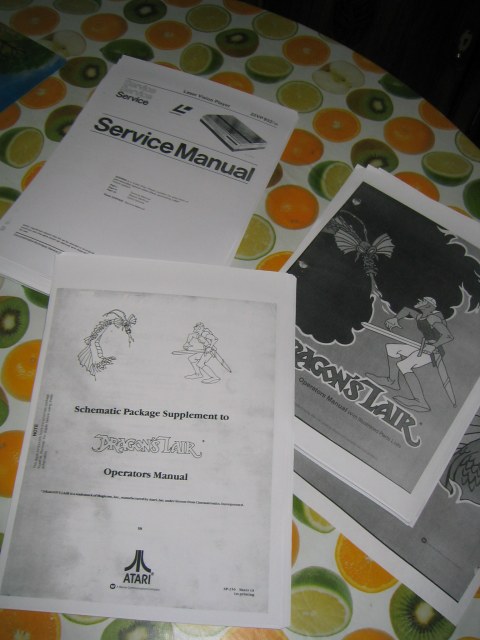
Ok, the first thing to do is to get as many documentation as possible  :idea: One place to go for in-deep laser disc stuff : http://www.d-l-p.com

I get the service manual for the game, and for the Laser Disc player :


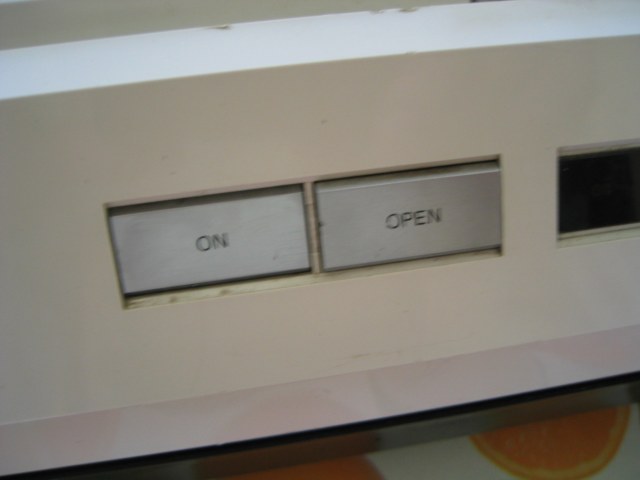
It's seems that the Philips 22VP932 LDP has a problem  :x


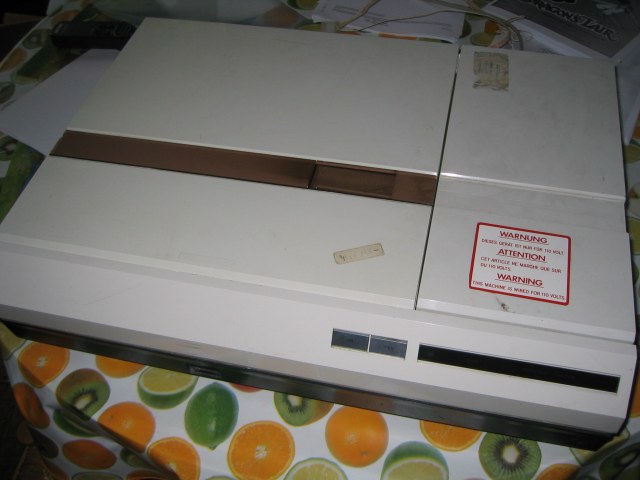
Check out the video of the LD  problem -> https://www.dragonslairfans.com/dlfix/laserdisc.AVI

The LD produce a repetitive noise... the "ON" button seems stuck... and I'm not able to eject the disc  :?


There's a procedure in the LD manual, but not really clear  :?  Thanks to Matteo ( Regular at D-L-P.com ) for the eject procedure confirmation   :P

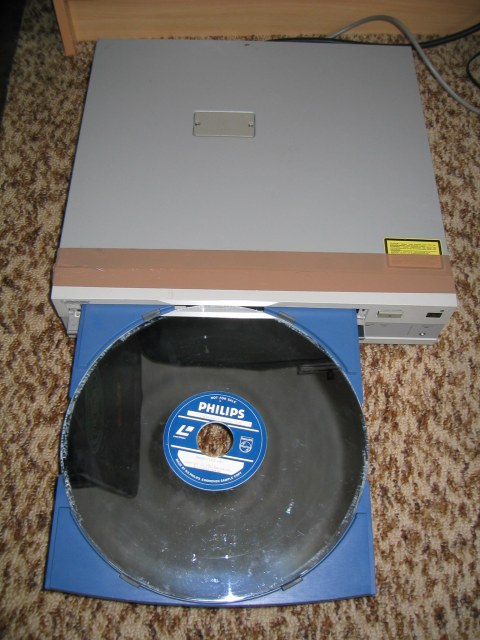
So now, I can have -a least- a look at the laser disc itself :
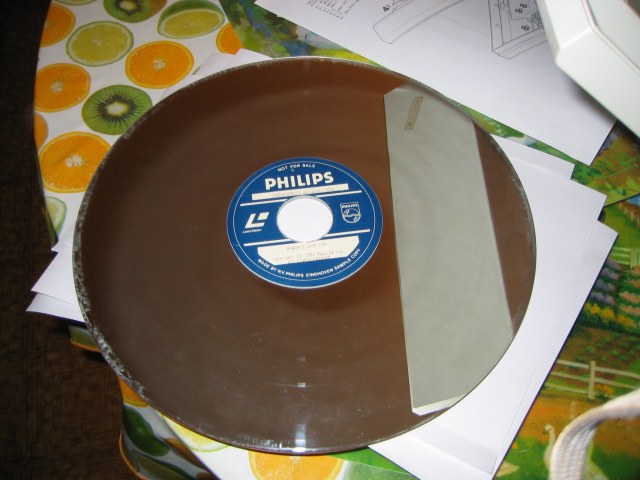


...closer...


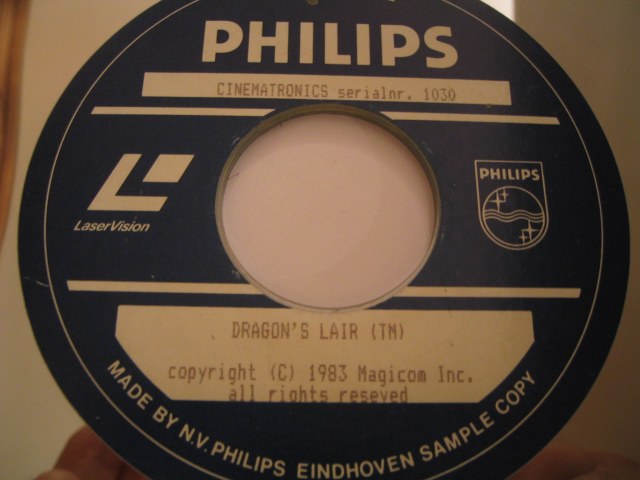
Thanks (again!!!) to Matteo, according the previous video of the problem, it can be an optic path problem.

Let's open the player to see if i can clean the mirrors and others optical parts :


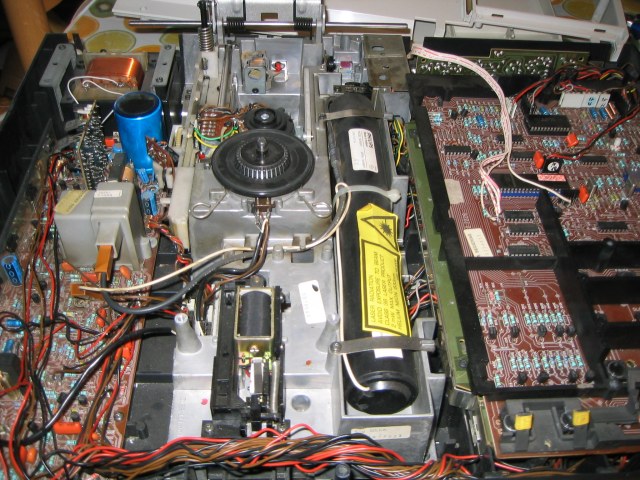
I've used bomb air spray to remove dust from the LD player, and clean up with alcohol lens & mirrors... but the problem remains  :?

Check out the video of the optical lens  problem -> https://www.dragonslairfans.com/dlfix/opticaljump1.AVI


Check out the video of the optical lens  only -> https://www.dragonslairfans.com/dlfix/opticaljump2.AVI

Mhhh, it doesn't looks good at all ... It'll probably an hard fix...   :cry:

Ok, I have another laser disc player, a SONY LDP 3300P.

Let's test the laser disc itself :


The laser disc seems to have no problem ( I didn't check it to the end ) : crisp image, a no laser rot... at least a good new :)

There are few solutions to play Dragon's Lair inside the cabinet :

Use Daphne emulator -> It'll use my Sony LDP ( it's working, see Dragon's Lair -> Daphne Project link ) but it won't use the PAL PCB with score overlay  :)


Use a laser disc card converter, such the LaserAce or the Hi-Tech card but I'm not sure if it can works with the PAL version of the game...

Use the Matteo's EURO Dragon's Lair PC Conversion card, which it sounds the best option.

Full details here : http://www.d-l-p.com/tech/docs/eurodl.asp

In short, it'll use my real DL pcb to play the original game with an another LD player... So I'll keep the game overlay text   :D  That's exactly what I want to...
To complete this interface, there's a custom board to build... Matteo explains it very well on the construction section... but I'm not fluent at all with electronic construction board... oops:  :oops:  :oops:

To continue...  :roll:
« Last Edit: January 30, 2009, 08:49:55 PM by DarthNuno »

DarthNuno

  • Administrator
  • ArcadeLifeStyler'
  • *****
  • Posts: 11708
  • Singe's castle
    • View Profile
    • Dragon's Lair Fans / Arcade LifeStyle
Operation "Back to life" started for my Dragon's L
« Reply #1 on: July 11, 2005, 07:07:40 PM »
11th of July :

I have all the parts needed to built the Matteo's "EURODL" cutom card interface :

- an IC MAX232 manufactured by Maxim
- five capacitors are 1 µF 16 V
- a red led with a 750 Ohm resistor
- a 5 wire cable (from PCB to EuroDL interface)
- a 5 wire cable (from EuroDL interface to PC serial port)
- a 6 pin male Molex connector (for connecting to EuroDL PCB)
- a 9 or 25 pin female connector (for connecting to PC serial port)
- a cable with a wire nipper at the end to get + 5 V from the EuroDL PCB
- a socket for the IC MAX232
- a small multihole PCB

Here's the parts to start :


Here the shematic of the inferface I have to built :


 :oops:  I'm stuck  :oops:  I'm not famliar with these shematics  :oops:  I'm sure it won't be difficult, but I would like to have a non-electronic shematic, like ->  joint wire 1 with wire 2, etc ...  :oops:

Here's my starting point :


Help needing now  :?  A more simple schematic pleeeaaassse  ( maybe a simple picture done with paint and all the parts wired together... )  :oops:  ...

SPACE HARRIER

  • Jr. Member
  • *
  • Posts: 51
    • View Profile
    • http://gunners-club.1up.com/
Operation "Back to life" started for my Dragon's L
« Reply #2 on: July 13, 2005, 12:29:03 AM »
I also can't help you with elektrostuff
But i have found a site that hosts stuff about arcadecabins..like sideart or decals.maybey you can use some of it :?:
http://www.localarcade.com/arcade_art/search.php
Here you can find art about DRAGON'S LAIR,TRON..ect. :lol:
Good luck with your restoration :D

Till next time. :wink:
IED 777 times,but i'm still alive!

DarthNuno

  • Administrator
  • ArcadeLifeStyler'
  • *****
  • Posts: 11708
  • Singe's castle
    • View Profile
    • Dragon's Lair Fans / Arcade LifeStyle
Operation "Back to life" started for my Dragon's L
« Reply #3 on: July 17, 2005, 05:54:43 PM »
Yo Space Harrier,

I've already take order for missing parts  :roll:  

A great website for repro under license : http://www.arcaderenovations.com/store/home.php

 8)  8)  8)

DarthNuno

  • Administrator
  • ArcadeLifeStyler'
  • *****
  • Posts: 11708
  • Singe's castle
    • View Profile
    • Dragon's Lair Fans / Arcade LifeStyle
Operation "Back to life" started for my Dragon's L
« Reply #4 on: July 17, 2005, 06:41:39 PM »
17th of july

My Dragon's Lair is now WORKING !!!

 :D  :D  :D  :D  :D  :D  :D  :D  :D  :D  :D  :D  :D  :D  :D  :D  :D  :D  :D  :D

I've finished to build the Matteo's EuroDL interface who allow the DL pcb  the using of a LDP Sony instead the old shit Philips 22VP932 LDP  :roll:

Here's what I've done :

First step, prepare all the components...


... and start the job...


... this is the first time I'm doing this... I had to learn electronic basis  :-/

 :oops:  Thanks to all people who help me to understand the EuroDL schema  :D  ... and especially Liodel from France who draw for me the "SCHEMA for begineer" conversion  :roll:


Ok, so let's continue the job...


... I do it very slow... please don't laugh  :oops:  But I'm motivate  :twisted:  :twisted:  :twisted:  :twisted:


...further...


OK, it's done... 4 hours later ...let's plug everything !!!
On that picture, you can see the old LD Player... I'll remove it of course.


Oh yes, a view from the back too :roll:


The EuroDL card is now plug on COM2


So, I power up the Sony LDP 3300, the EuroDL card is also pluged to the original Atari DL PCB, and the computer runs the prg to remap laser disc command to the Sony LDP.... and ... and...

IT'S RUNNING... ALIVE... !!! Thanks my god !!! ;-)


*** NOW WATCH THESE VIDEOS TO SEE ALL THE STUFF RUNNING ***

1- EURODLcard ... all the installation ... behind the scene :  https://www.dragonslairfans.com/dlcab/eurodl-demo.avi

2- Playing the game : https://www.dragonslairfans.com/dlcab/DLrunning1.avi

3- Playing the game... again  :roll:  : https://www.dragonslairfans.com/dlcab/DLrunning2.avi


And for my pleasure, other pictures of the game... running  :twisted:  :twisted:  :twisted:  :wink:


Next step... use a smaller computer, and arrange all the wires to be 'as clean as possible'... I admit it's a real mess with all the wires, but was only for the test... I see now that everything is working, so, I'll arrange all better... :-P

... stay tuned...  :P

DarthNuno

  • Administrator
  • ArcadeLifeStyler'
  • *****
  • Posts: 11708
  • Singe's castle
    • View Profile
    • Dragon's Lair Fans / Arcade LifeStyle
Operation "Back to life" started for my Dragon's L
« Reply #5 on: July 21, 2005, 10:52:24 PM »
21th of July

Got from www.arcaderenovations.com new Dragon's Lair control panel overlay & 2 new sideart  :P Also received a new Wico joystick  :)

The stuf, well packed :


The new CPO is wonderfull  :P  Same texture than the original one. But this is  the US CPO repro, and the joystick/buttons holes in the ATARI CPO version aren't exaclty in the same location, so... I'll see what I'll do, I mean get a new control panel undrilled, or build a new one ? ... Don't know know, but it won't be a problem  :roll:


Have a look at the side arts :  very beautifull...


... of course, because it's under Bluth license :-)


All the stuff :


The WICO joytick :


Stay tuned...  :roll:  :P  :P  :P

DarthNuno

  • Administrator
  • ArcadeLifeStyler'
  • *****
  • Posts: 11708
  • Singe's castle
    • View Profile
    • Dragon's Lair Fans / Arcade LifeStyle
Operation "Back to life" started for my Dragon's L
« Reply #6 on: July 24, 2005, 06:53:30 PM »
24th of july

As you seen previously, my EURODL custum board is working fine, but I build it in order to test it ASAP  :roll:

:idea:  :idea:  :idea:  So now I got time to arrange all the stuff, and here's the result :


Better isn't it  :roll:  :wink:

Stay tuned...

DarthNuno

  • Administrator
  • ArcadeLifeStyler'
  • *****
  • Posts: 11708
  • Singe's castle
    • View Profile
    • Dragon's Lair Fans / Arcade LifeStyle
Operation "Back to life" started for my Dragon's L
« Reply #7 on: July 25, 2005, 09:57:41 PM »
25th of july

Now let's arrange the computer itself  :?  I don't want to put an entire computer just to control the eurodl interface, so I'll keep the strict minimum  :idea:

Here's the starting point :


Removing the motherboard...


... and keep only the necessary parts :


The parts :

- Cyrix 233mhz processor ( Pentium 1 generation )
- 32 mb ram
- 1 floppy 3 1/2
- Power supply
- ATrend motherboard
- 2 serial ports

I'm happy because this motherboard can boot without a VGA & Keyboard plugged  :D  That's exactly what I need ... no useless stuff  inside the cab' :roll:

fixing the floppy...


... all the parts are fixed and ready to go ;-)


Next step : cut a piece of wood to fix this ensemble, and found a good place for the computer power supply inside the cab  :roll:

... so stay tuned...

DarthNuno

  • Administrator
  • ArcadeLifeStyler'
  • *****
  • Posts: 11708
  • Singe's castle
    • View Profile
    • Dragon's Lair Fans / Arcade LifeStyle
Operation "Back to life" started for my Dragon's L
« Reply #8 on: July 29, 2005, 07:33:03 PM »
28th of July :

Got the new air filter  :lol:


Oh my god, do I really need to order that in US  :?:  :roll: (shipping cost  :evil:  :evil:  :evil: )

It's brand new :


Here's a picture of the old one, inside the cab' ... :oops:


Old vs New...


... In location  :D


 :arrow:  stay tuned  8)

DarthNuno

  • Administrator
  • ArcadeLifeStyler'
  • *****
  • Posts: 11708
  • Singe's castle
    • View Profile
    • Dragon's Lair Fans / Arcade LifeStyle
Operation "Back to life" started for my Dragon's L
« Reply #9 on: July 31, 2005, 09:34:40 AM »
29th of july

Let's continue the integration of the computer, who'll control the EuroDl interface.

Cut a piece of wood...


... to fix under the computer mobo, to avoid any bad electronic contact


Ok, so all the computer elements are now fixed on a same piece, I've to found a place for the power supply  :roll:  
Eureka  :idea: Just under the backdoor, close to the cab' fan :


... I never tought I'll use that small IBM 233mhz cyrix processor one day  :D


... and once again, a new "evolution" of my EuroDL interface... the cables between the Dragon's Lair PCB and the EuroDL was to short :? ... now fixed  : 8)


Intergation of the computer / EuroDL interface done  :D

:arrow: One switch power up everything

The only switch ( the original switch on the back of the cab' ) power up the pc mobo, the Dragon's Lair pcb and the Sony laserdisc player  :P  Yeah BabY Yeah  :P


The EuroDL interface has a nice location now  :)


Stay tuned  8)

DarthNuno

  • Administrator
  • ArcadeLifeStyler'
  • *****
  • Posts: 11708
  • Singe's castle
    • View Profile
    • Dragon's Lair Fans / Arcade LifeStyle
Operation "Back to life" started for my Dragon's L
« Reply #10 on: July 31, 2005, 11:13:30 AM »
29th of july (bis)

Got two more packages from US...  :roll:


Hey nice, a 'new' book to add in my collection  :D
 :oops: with all these arcade game restoration in progress, I've no enough time to update the website  :oops:


And the big box includes a new metal repro bezel, and a new repro plexi for the monitor.

Have a look at the bezel ... wich one is the new  :roll:  :P


Have a look at the plexi monitor...


That pictures doesn't show you the problem about the old plexi, so let's have a look closer, with more light  :idea:


... scratch, cigarets burn...  :evil:  ... so you understand why I need a new plexi monitor now  :o

... place new bezel and plexi...


...  :shock:  Opsss... the metal bezel seems to create a magnetic field  :shock: I'll investigate  :?


so I remove the metal bezel, and the picture is back to normal.


It starts to look very nice anyway :P


... I'll check why I got the magnetic field with the bezel monitor  :?  Maybe a ground problem  :?:

Stay tuned...

DarthNuno

  • Administrator
  • ArcadeLifeStyler'
  • *****
  • Posts: 11708
  • Singe's castle
    • View Profile
    • Dragon's Lair Fans / Arcade LifeStyle
Operation "Back to life" started for my Dragon's L
« Reply #11 on: July 31, 2005, 06:09:12 PM »
30th of july

It's time to fix the new repro control panel overlay  :arrow:

First, disassemble the control panel :


Another view of the originial Wico joystick :


The control panel is now out of the cab :


For infomation the Atari euro control panel is not exaclty the same than the US Cinematronic version. The two player buttons size are different, and the fixation for the control panel is different too.

Fixing the overlay is not so easy  :?  One mistake and the CPO is ruined  :evil:  So before to start the operation, I've followed this great tutorial from the Sam's Dragon's Lair Projectwebsite here :  http://members.aol.com/severlander/dragons_lair_control_panel.html
Congrats for the tutorial  :wink:

Ok, so I'm starting to fix the 4 buttons, in order to have the overlay perfectly aligned, and with the help of my wife, I slowly fix the CPO down part  :arrow:


Then I've removed the buttons, and apply the up part   :arrow:  Et voilà :)


The CPO repro is made for US panel, so I've to cut a little bit the down part of it :


As you can see, I didn't remove the old original overlay, because the new repro overlay has holes drilled... and I prefere to see old CPO picture under the players buttons than a big black hole  8)

Ok, I can now put a brand new Wico joystick  :)
Arghh, I haven't new screws for it yet :roll: So I'll use the original one for the moment... a little bit dirty :?


The control panel is now in place  :)


Oppss  :shock:  Without any particular reason the tiny transparent film that protect the overlay picture start go off on a corner   :shock:


Ok, hopefully it didn't affect the graphic itselft and I've found a trick to mask it but I'll check with the CPO maker what happens on the CPO  :?

Anyway here's the control panel now :


Stay Tuned  8)

DarthNuno

  • Administrator
  • ArcadeLifeStyler'
  • *****
  • Posts: 11708
  • Singe's castle
    • View Profile
    • Dragon's Lair Fans / Arcade LifeStyle
Operation "Back to life" started for my Dragon's L
« Reply #12 on: July 31, 2005, 11:31:32 PM »
31th of July

And here's side arts step  :)

Here's the 2 screws who are fixing the right part of the monitor.


Once again, thanks to my wife for her patience and her precious help  :roll:

After cleaning both cab' side, my wife keep the sticker horizontal, while i'm pulling down the white paper ( the paper on the back of the sticker  :oops: sorry for my poor english ) with my right hand, and apply the sticker with my left hand...


10 minutes later, it's done... we take time to do the best job possible  :roll:  It's was the first time I'm applying a so big sticker  :oops:


... and the greatest moment : removing the tiny upside sticker protection sheet...  :roll:

Yeah baby Yeah... perfect... no air bubbles  :P
In my opinion, it's impossible to fix such side art alone... too risky ... don't try that alone !!!


Let's repeat the same operations for the other side... and voila :


Mores pictures...  8)  8)  8)


Stay tuned...  8)

DarthNuno

  • Administrator
  • ArcadeLifeStyler'
  • *****
  • Posts: 11708
  • Singe's castle
    • View Profile
    • Dragon's Lair Fans / Arcade LifeStyle
Operation "Back to life" started for my Dragon's L
« Reply #13 on: September 09, 2005, 07:36:53 PM »
9th of september

Got a spare Video Disc Player from Germany...
I'm happy because this model is a PAL / NTSC model  :P

It's a Sony LDP3600-D

 :arrow: Very well packed by the way  :)


I've test it with a PAL DL disc...


... working fine  :wink:  :D

DarthNuno

  • Administrator
  • ArcadeLifeStyler'
  • *****
  • Posts: 11708
  • Singe's castle
    • View Profile
    • Dragon's Lair Fans / Arcade LifeStyle
Re: Operation "Back to life" started for my Dragon's L
« Reply #14 on: January 30, 2009, 08:37:32 PM »
Oh my god... how can this topic be finished like that   :oops: (shame on me)

See now where this cabinet is located   ::) ... in the Nuno's Lair of course  :arrow:


 :spaceace: :spaceace: :spaceace: