Show Posts

This section allows you to view all posts made by this member. Note that you can only see posts made in areas you currently have access to.


Messages - ThatArtGuy

Pages: [1] 2 3
1
Arcade Lifestyle / Re: Mini-Track (4 foot tall Track & Field)
« on: February 08, 2010, 07:09:09 AM »
Now for the fun part(s)


TAG

2
Arcade Lifestyle / Re: Mini-Track (4 foot tall Track & Field)
« on: February 07, 2010, 03:51:21 AM »
Well, she seems happy.


Still needs artwork. (I'm working on it.) Oh, and monitor glass and holding bracket.

TAG

3
Arcade Lifestyle / Re: Mini-Track (4 foot tall Track & Field)
« on: February 01, 2010, 06:47:38 AM »
Yeah, I was thinking that too.  I got the case since the power supply inside it was the same with or without the case.

4
Arcade Lifestyle / Re: Mini-Track (4 foot tall Track & Field)
« on: February 01, 2010, 03:19:40 AM »
Special surprises this episode...

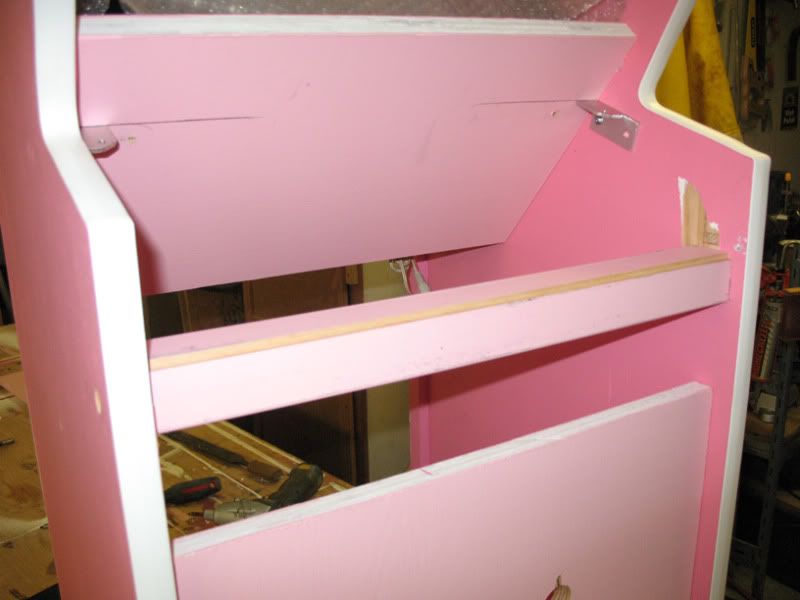
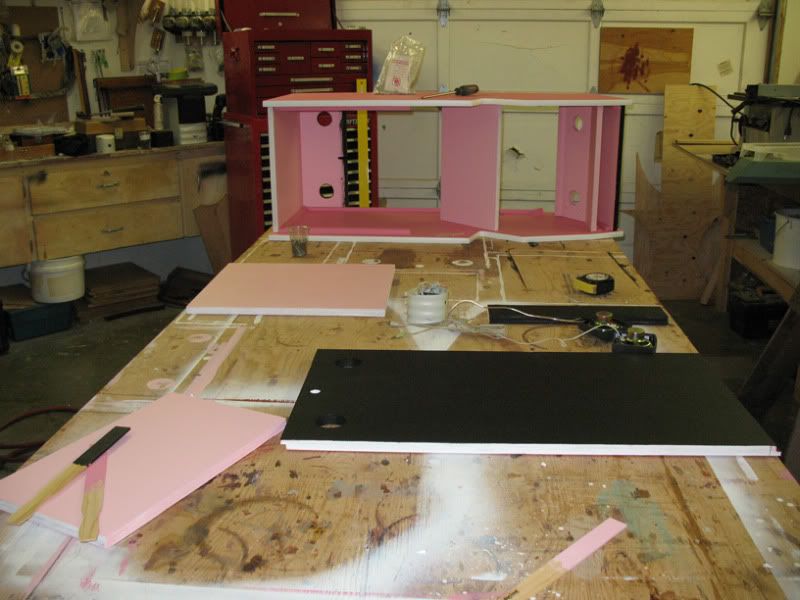
We taped and painted of the countersunken screws for the crossbar. (We wanted added strength for the control panel.)  But the wood filler still shows through.  We had to prime it all over again.


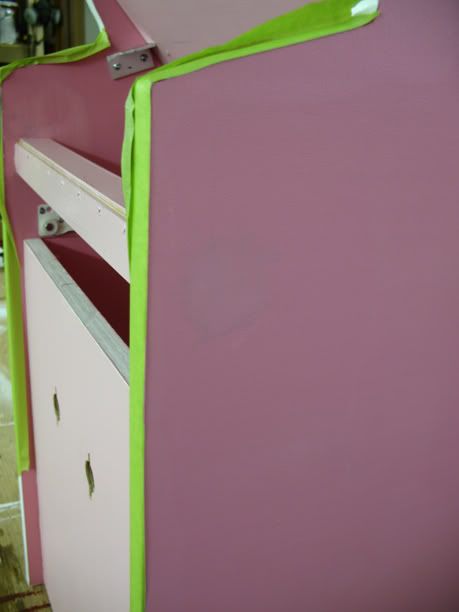
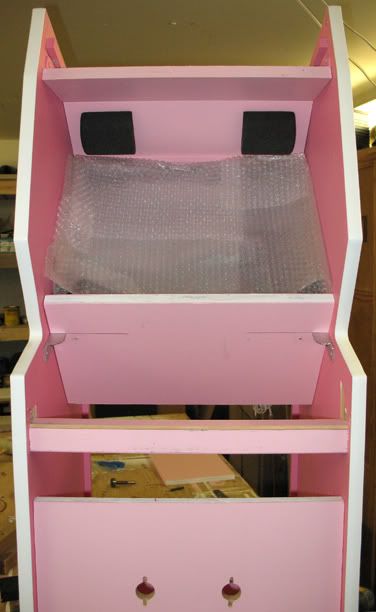
Everything else only needed one coat to spruce it up.


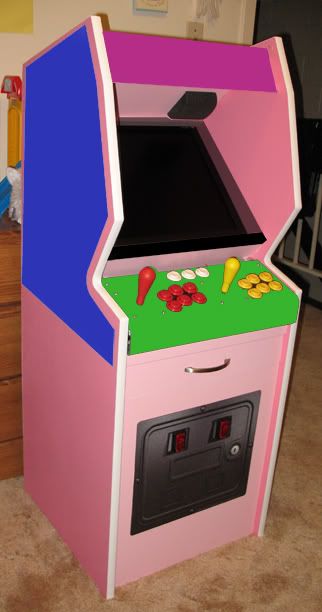
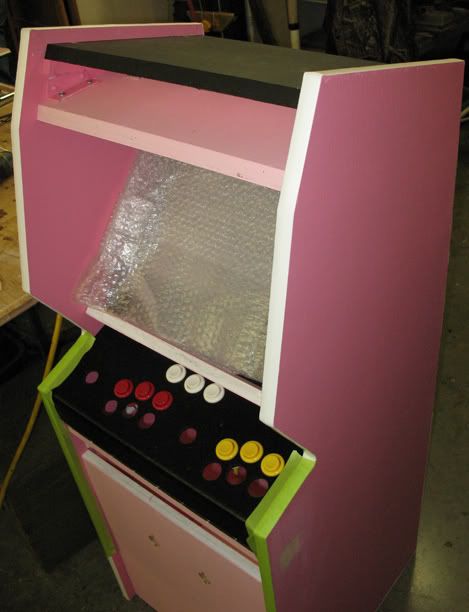
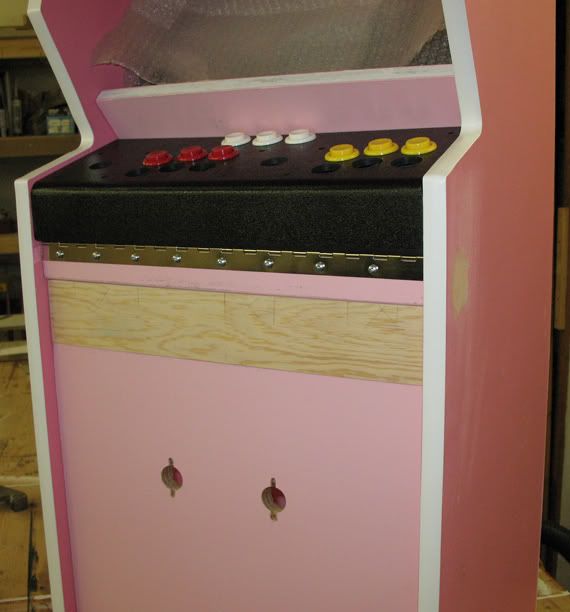
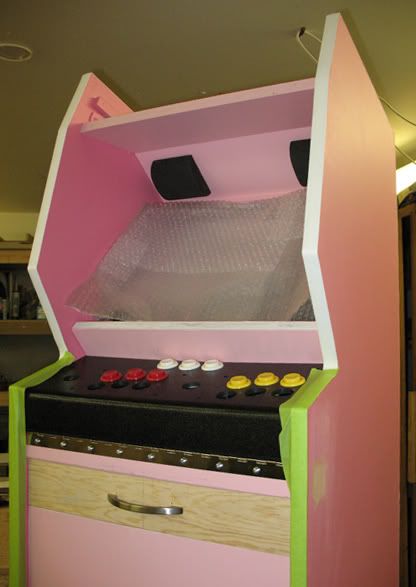
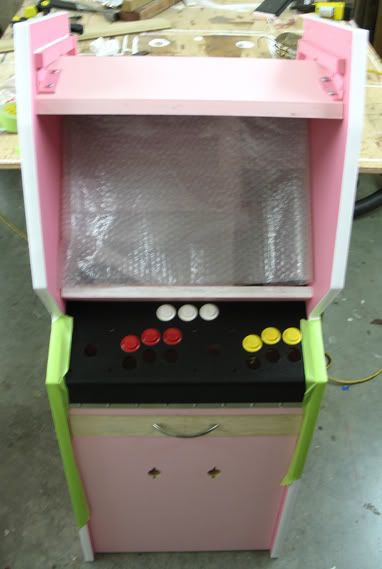
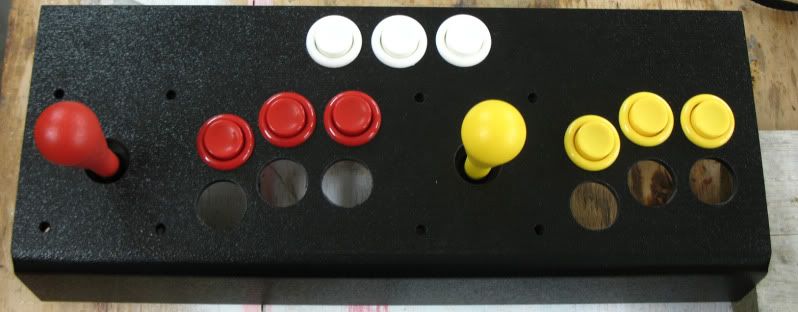
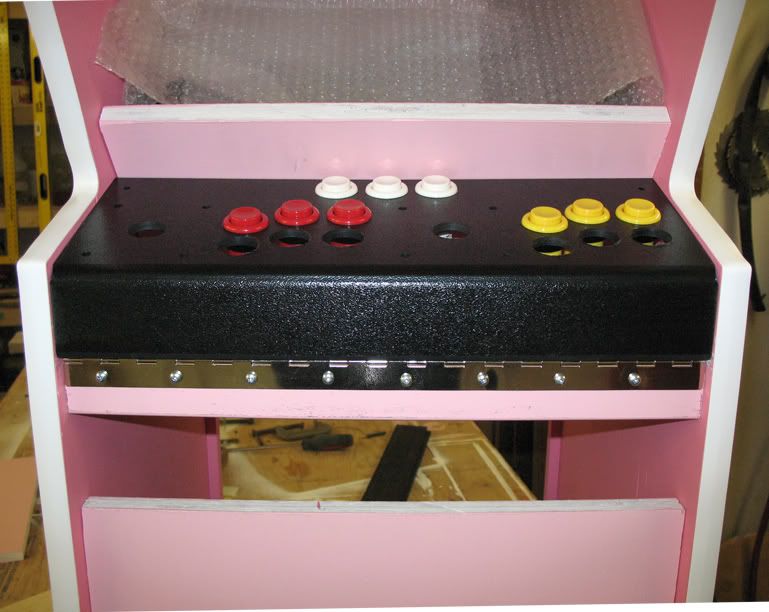
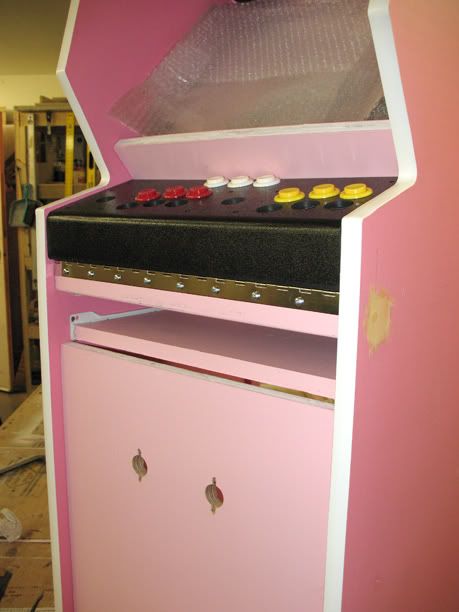
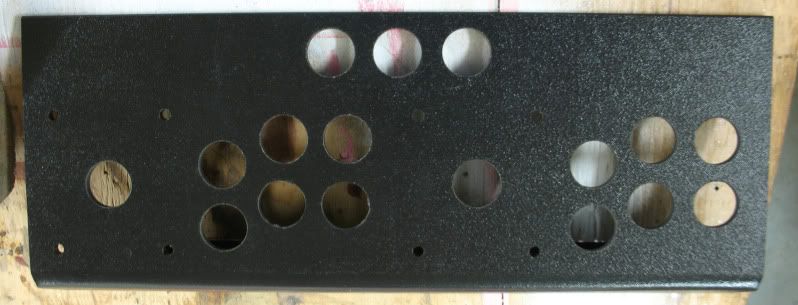
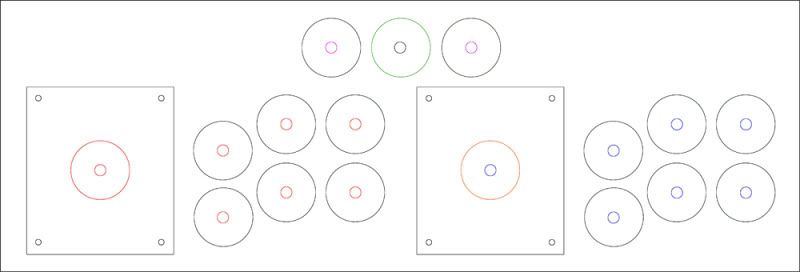
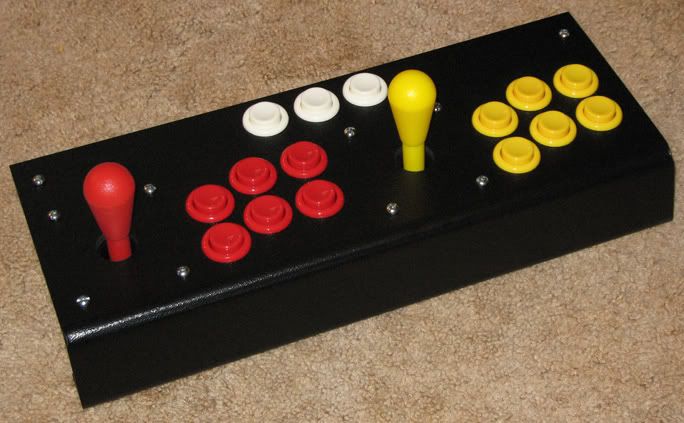
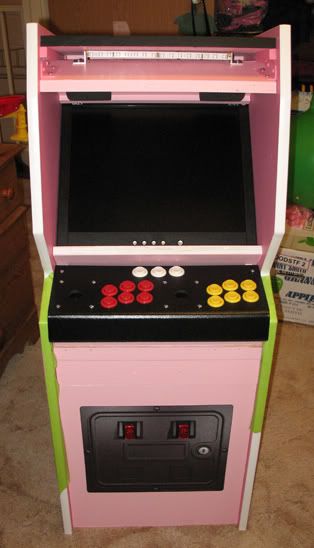
Populated the control panel to make sure everything fit. I have to say it did, barely.  On top, it doesn't look so bad.  The bottom is going to be a nightmare to wire.


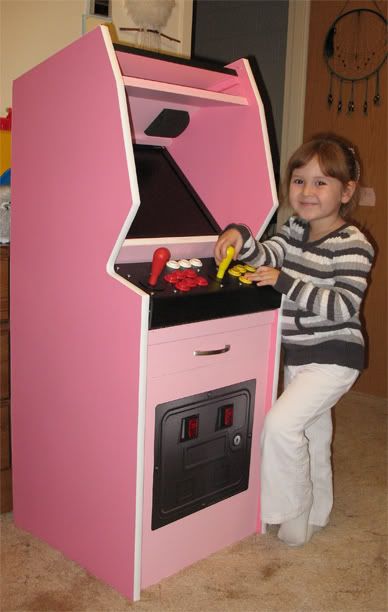
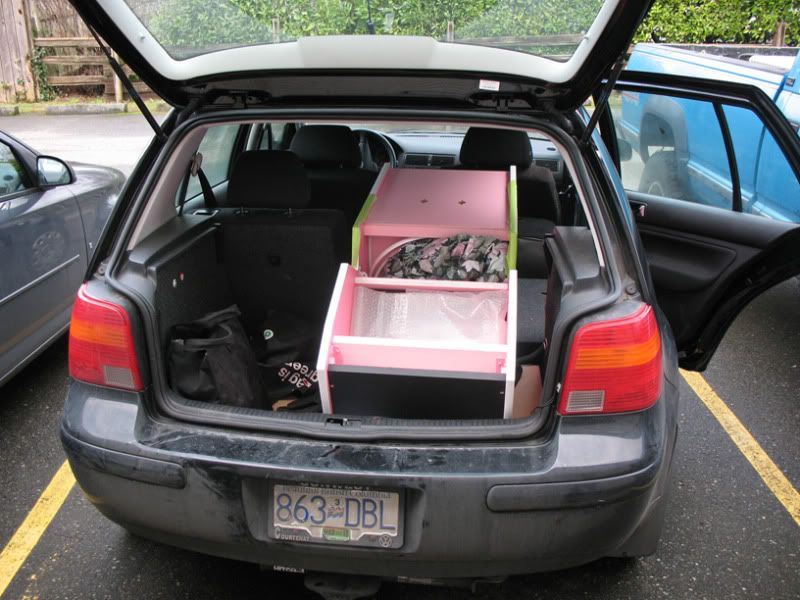
SURPRISE!!!  WE BROUGHT IT HOME!  I couldn't handle the drive out there anymore and decided I would finish everything else at home, so here we are.  The cab fit in the back of a Volkswagen Jetta.


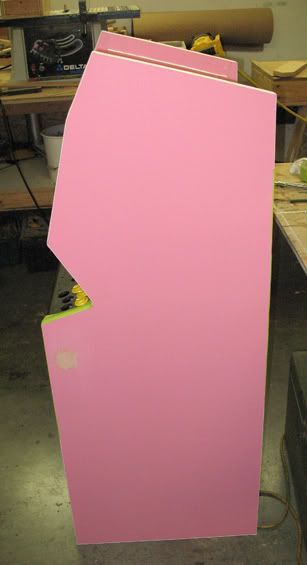
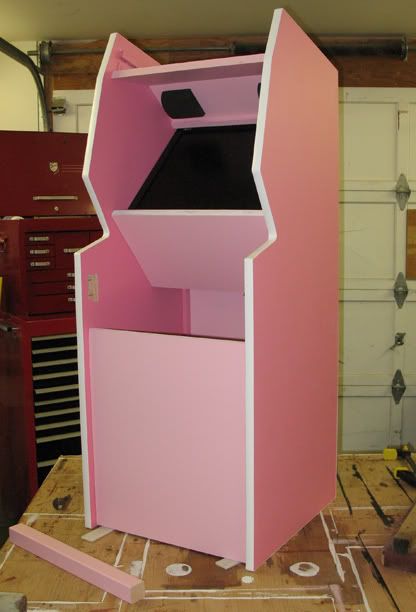
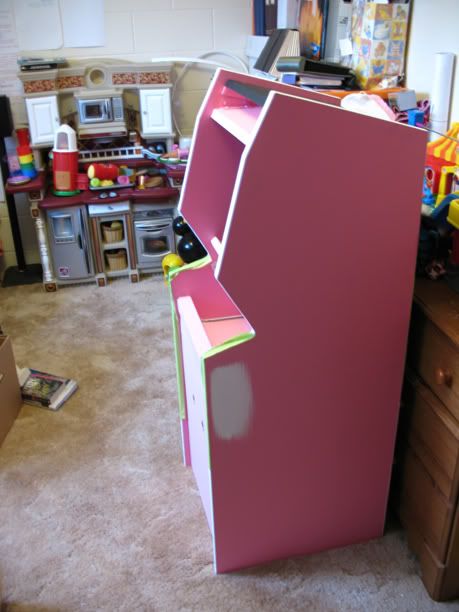
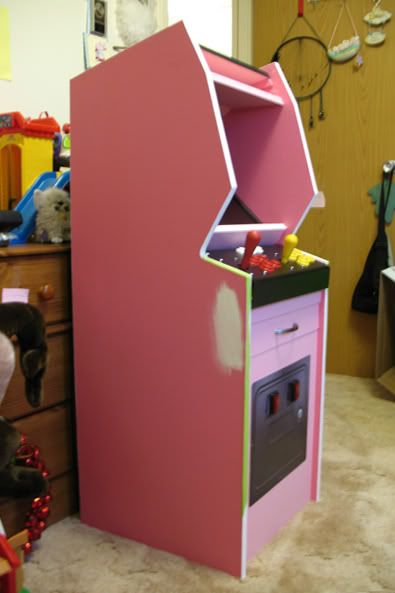
Up in the spare room. (You can start seeing it's size here. This is also a storage/study room mainly.)


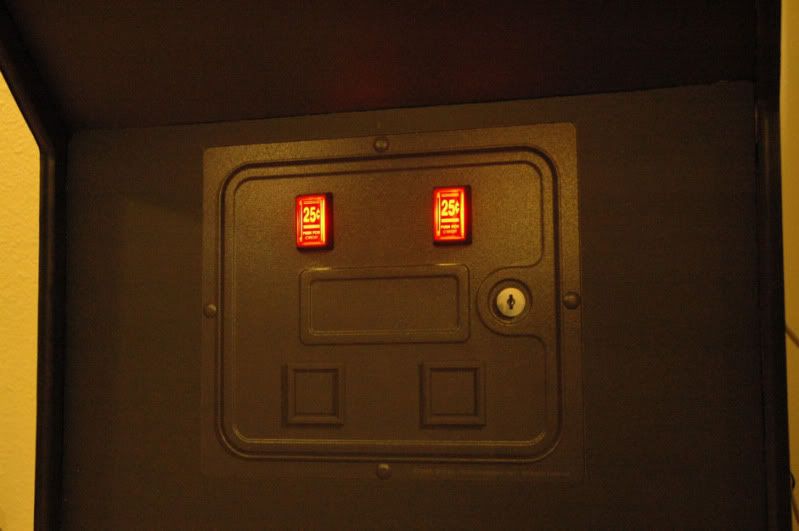
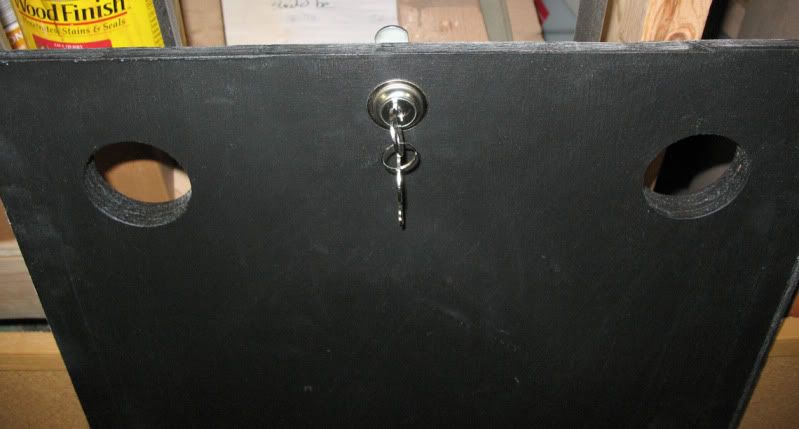
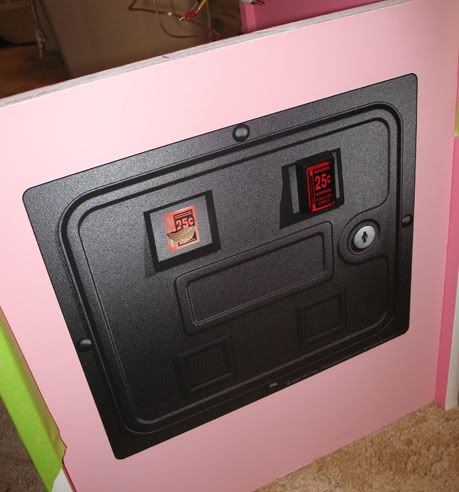
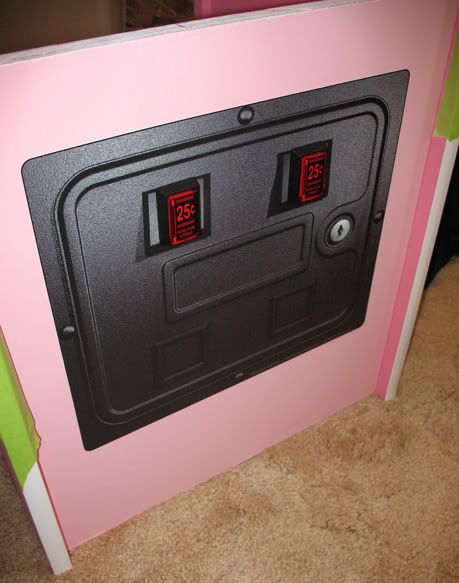
Applied the Unreal Coin Door sticker. Basically, to line it up we took the pinholes I made to measure the drill holes and used a compass to mark 1 and 1/8ths inch circles on the back.  We lined the circles up to the holes, and taped it down to the machine.  I peeled the top third of the backing and cut it off, pushing the sticker back down. After that, I took off all the tape and the rest of the backing and stuck the rest of the sticker on.  Pretty easy to do that way.


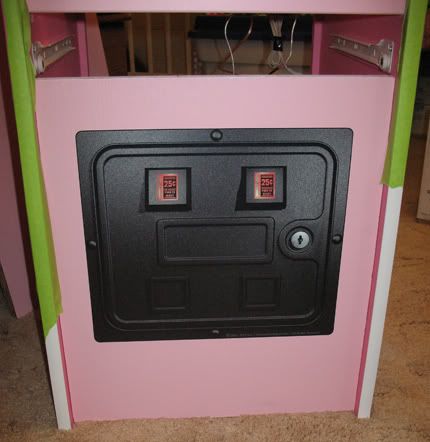
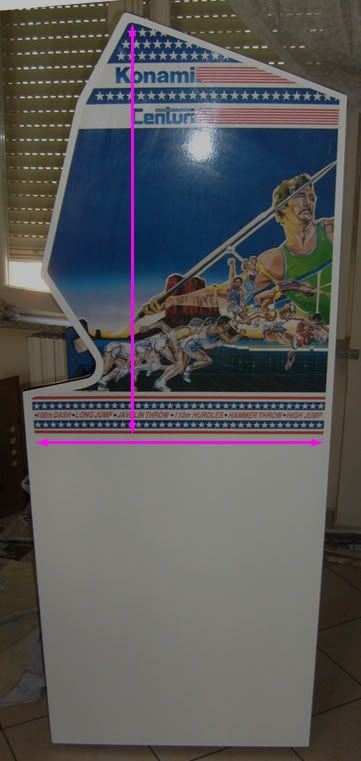
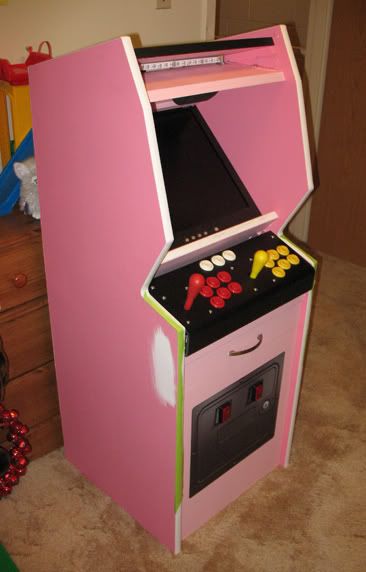
Hey! My measurements were correct! The fit just right!


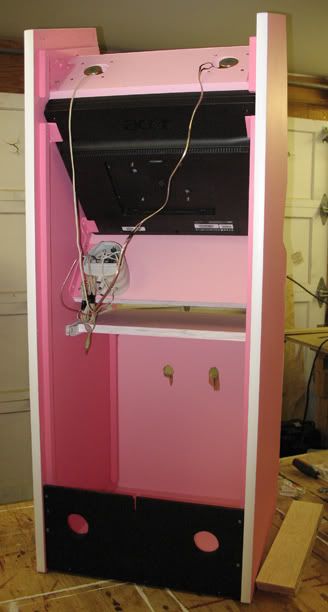
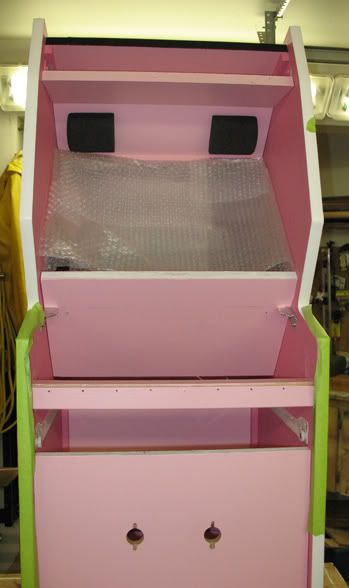
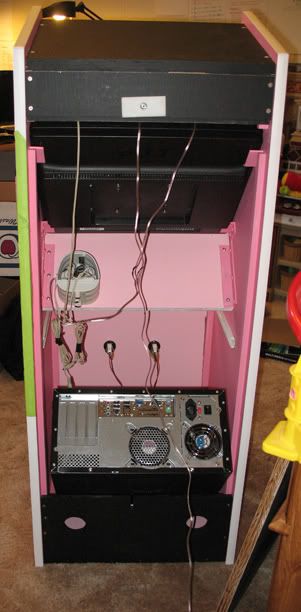
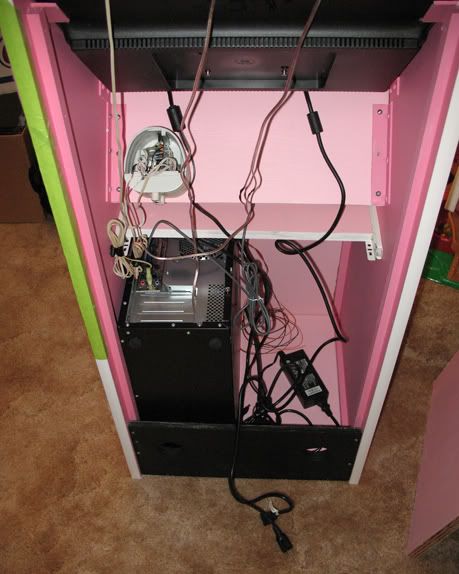
The mess from behind. (I'm still trying to figure out how everything is going to fit.)


Testing the control panel.


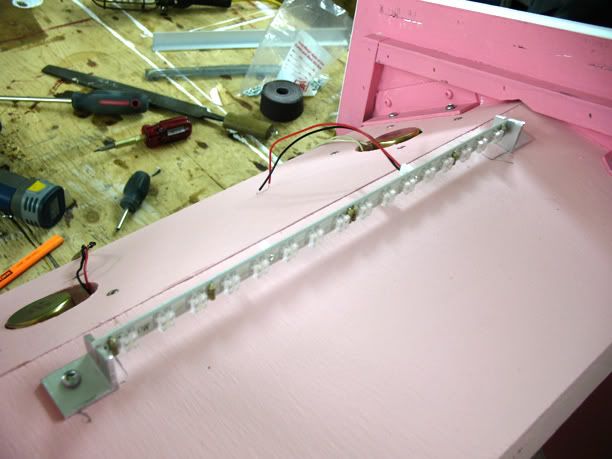
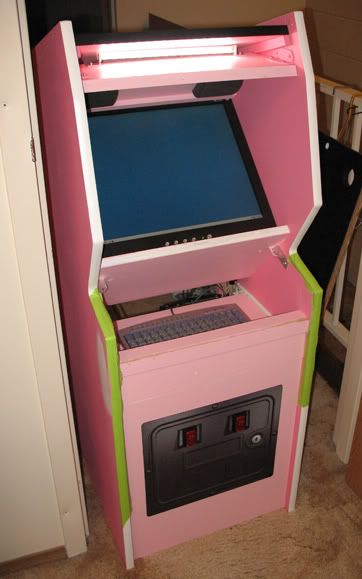
Plugging it in for the first time.


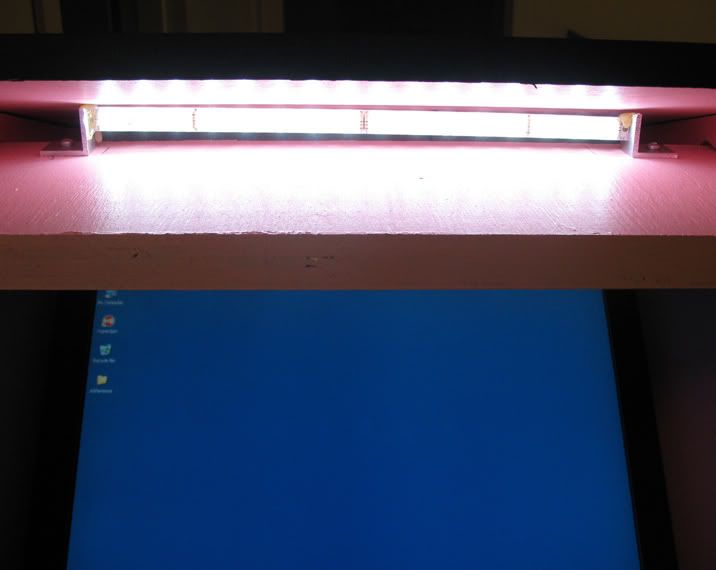
Look how bright this thing is, and it's midday.


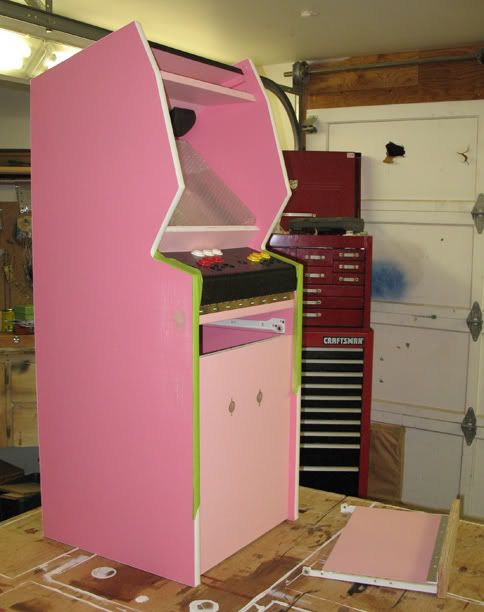
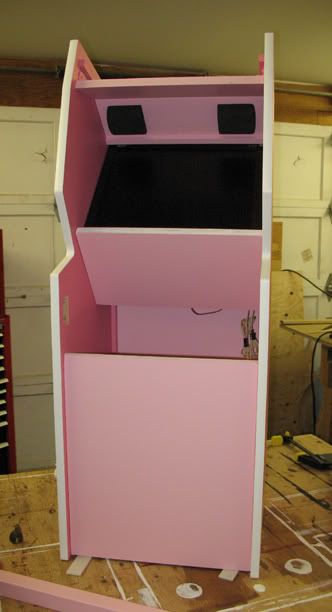
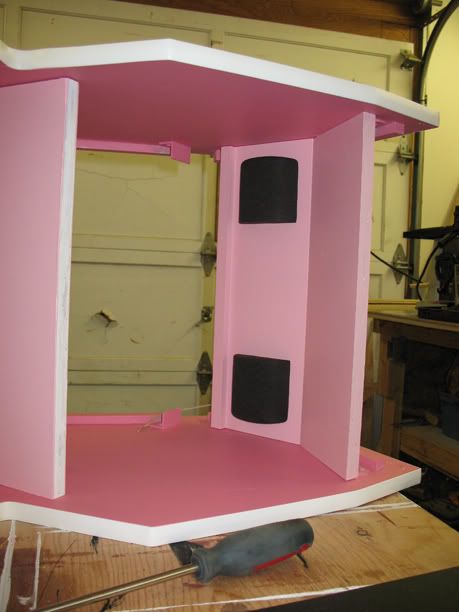
Test of what I call the "naked" cabinet (no artwork whatsoever).


Props go to groovygamegear.com for making products that seemed to be custom made for this machine.

TAG

5
Arcade Lifestyle / Re: Mini-Track (4 foot tall Track & Field)
« on: January 31, 2010, 08:25:56 AM »
Yeah, that's a nice job!  Unfortunately, the T&F artwork is more complex.  The stripes, grid, stars, and fonts would be easy.  The athletes and blue gradient... not so much.

6
Arcade Lifestyle / Re: Mini-Track (4 foot tall Track & Field)
« on: January 31, 2010, 04:29:17 AM »
Cool. Thanks! Oh, and metric is okay with me. Easier to do math with.

TAG

7
Arcade Lifestyle / Re: Mini-Track (4 foot tall Track & Field)
« on: January 31, 2010, 12:22:16 AM »
Thanks for the kind words!

As for artwork, I do not have vector files for any of the artwork, unfortunately (marquee, side art, or control panel).  I also don't have access to any NOS or repro artwork to do it.  Additionally, T&F would be hard to vector since the artwork was made from watercolored line art.  I can't blame Darin for not wanting to share. His repro's are awesome and that's how he puts food on his table.  Darin did help me with some of the measurements for when I was blocking out the cabinet, though.  So I had to thank him profusely for that.

What I am doing however is making sideart based on the original artwork.  It will be in a totally different color scheme since it has to match pink, red, and yellow. (Yeah, I'm banging my head on that one.)  It will also be non-T&F specific since it will be a multi-cab.  I could share that file since it will be my creation.  Here's the start of it:


Oh, and since my daughter has dual citizenship I will be using stars and maple leafs in the original star pattern. :D

TAG

PS - Major thanks go to scr33n since I couldn't find a decent shot of the side art anywhere but his located here.

8
Arcade Lifestyle / Re: Mini-Track (4 foot tall Track & Field)
« on: January 30, 2010, 11:00:33 PM »
Before I fire up Illustrator for side art design, I need two measurements.  I need the height of the sideart, and would like the width of the bottom edge.  Here is a picture.


Your help would be appreciated.

TAG

9
Arcade Lifestyle / Re: Mini-Track (4 foot tall Track & Field)
« on: January 28, 2010, 09:36:19 PM »
It's pink... I'm sure she'll be happy. LOL

Wired the LED light and repaired the speaker wire (AGAIN!!!). (You can see it broken in the pic in the previous post.)  We stapled the wires down this time so they won't break off again.  Put on the top and back pieces.  Everything is assembled. We just need to touch up the painting and off to home it will go.


The unpainted boards on the side of the cab are the only pieces we have left from single sheet of wood we purchased.  I guess you can say we were fairly economical.  Just to reiterate how much room we have inside this machine, we couldn't close the cab door due to the barrel lock hitting the LCD monitor inside.  I was disappointed by this, since I wanted an authentic lock, but I can't do anything but adapt to the problem.  You can see our plastic door lock on the back.


TAG

10
Arcade Lifestyle / Re: Mini-Track (4 foot tall Track & Field)
« on: January 28, 2010, 01:44:51 AM »
It's a super special Wednesday edition!


Checking the size of the keyboard drawer's front plate.


Drawer is complete. Now it needs paint.


Set the cabinet on the floor.  It looks infinitely smaller now. LOL


The cabinet from my perspective.


Before we place the top on the cabinet, we have to install the marquee light.  I got the Nova Matrix LED light from groovygamegear.com since it's small and super bright.  You can find it here: http://groovygamegear.com/webstore/index.php?main_page=product_info&cPath=83&products_id=307

Do I get something for the advertising I'm doing?


Hot glueing it in place so it doesn't touch any conductive parts.


The light is installed.  Now we just need to wire it up.


The only things we have left to do at the shop is wiring the marquee light, putting on the final pieces, and repainting areas that need them.  After that, I can bring it home and do the electronics there.  (That is much easier for me than this woodworking part.)

TAG

11
Arcade Lifestyle / Re: Mini-Track (4 foot tall Track & Field)
« on: January 27, 2010, 06:56:01 AM »
We bit the bullet and got the next size up. (Puns are fun.)  Redrilled all the holes so the buttons fit.  Now I find the holes for the joystick base are slightly off. Great. We'll find another workaround.  Oh, the rest of the buttons are in the mail.


Measured with the coin box sticker and did a test install of the coin buttons.  Right one needs to move counter-clockwise I think, but that's an easy fix. Hopefully my measures aren't off like the joystick bases (which I did by tracing the actual base).


Close up of the buttons.  They should look great lit up.


Installed the 2x2 for holding the control panel.


Control Panel installed with the piano hinge.  I wanted to tuck it under, but the hinge didn't want to work that way.  It's nice and shiny, so I can live with it.


Installing a keyboard drawer due to wife's wishes.


Backside.  You can tell how this wood likes to get chewed up on the newly drilled holes.


A little bit closer anyway.  I'm sure I'll have to repaint the entire cabinet again after all our mangling. *sigh*

TAG

12
Arcade Lifestyle / Re: Mini-Track (4 foot tall Track & Field)
« on: January 23, 2010, 08:59:34 PM »
I'd love to have a real coin door, but I literally have no room for one. The inside of the cab is only 17 inches deep (roughly).  I'm going to have to turn the computer (the front panel facing the floor) just to get it to fit.  I ordered an Unreal Coin Door from groovygamegear.com to put on the front, along with glowing coin buttons.  I got the sticker last week, and it's large.  Great for a full size, so it's going to look huge on this thing.  Here's someone else's example of the sticker and buttons:


It's one of the few times where I think a sticker is the better option.  I think I'll have a half inch on each side of the sticker on my mini-cab. We'll see if it's a good idea to cut the sides down or not.  I'm thinking it would be better not to do it.  I just want to get this thing assembled so I can do the electronics and artwork at home instead of driving 15 minutes every Tuesday and Thursday for 2 hours to work on it. (Yes, it will have full artwork.)

TAG

13
Arcade Lifestyle / Re: Mini-Track (4 foot tall Track & Field)
« on: January 23, 2010, 02:03:29 AM »
Thanks guys, we're getting there.  I think the closer to the end we get the slower it goes.


Installed the kickplate and monitor.


Finally figured out what kind of bit we needed to drill the plastic without melting it.  It's a Forstner bit.  It's used for drilling soft wood. Works great for the control panel.  The only unfortunate part is that we got one size smaller than we should have, so the buttons don't fit (barely).  The solution is to thread the holes and screw in the buttons (fun, fun, fun).


The control panel.


The back cab door. Cab lock installed.


TAG

14
Arcade Lifestyle / Re: Mini-Track (4 foot tall Track & Field)
« on: January 19, 2010, 08:12:27 AM »
Assembling the mess.


Putting in the speakers.


Tapping in the markers for the control panel layout. (Image is mirrored due to cutting from the bottom side.)


TAG

15
Arcade Lifestyle / Re: Mini-Track (4 foot tall Track & Field)
« on: January 15, 2010, 12:27:11 AM »
This isn't too cluttered is it?


Pages: [1] 2 3